Everywhere we looked, people advised against adding a stair runner to a new build house. Even a few floor fitters told us not to bother, as apparently the stair runner would end up a droopy, saggy mess. They also said the stairs wouldn’t paint well because they aren’t entirely made with solid wood. It was all very disheartening to say the least.
Yet, that desire for stylish stairs was burning strong. Rather boldly we decided to turn a blind eye, cross our fingers, and hope for the best, as we had zero interest to fully carpeting the stairs.
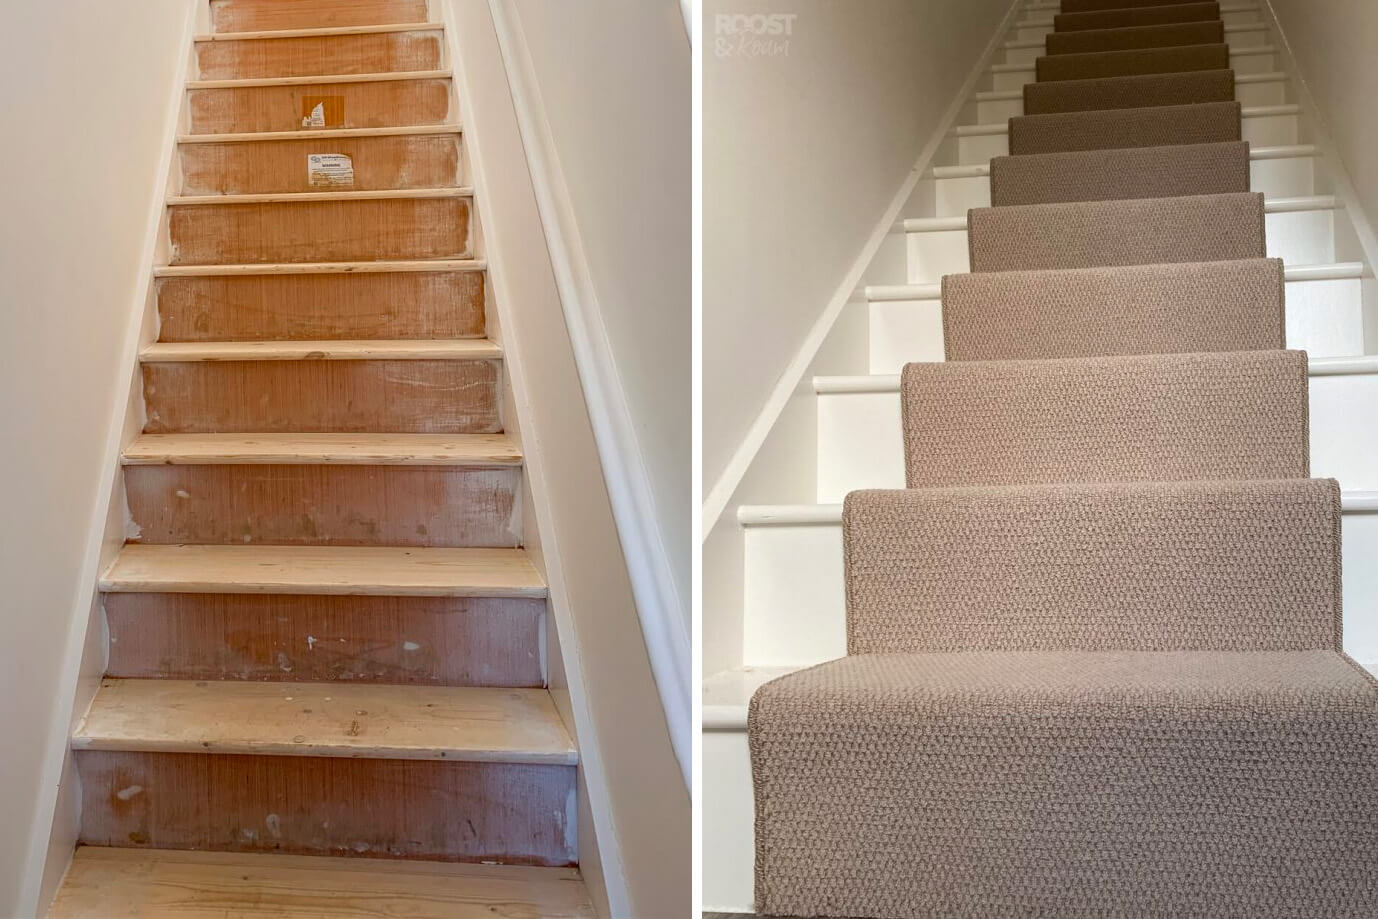
Stair runners add so much character to a home – something our new-build house was severely lacking in.
So, if you’re in the same predicament, wondering if you can or can’t. Well, I’m here to tell you, don’t let your pretty runner dreams dwindle. It is absolutely possible!
In this article...
The day we got the keys to our new home

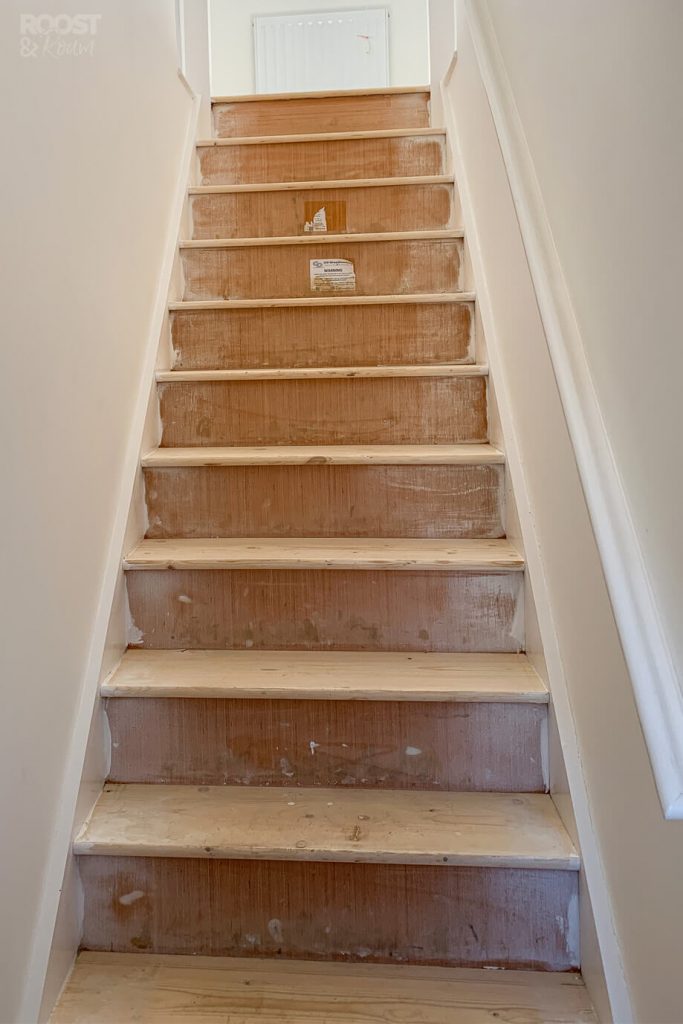
The day we got our keys, this is what we were greeted with. No, your glasses aren’t covered in smudges, nor are your eyes deceiving you. We spent over quarter of a million pounds on a house, to get stairs covered in paint splatters and mud.
This was after the developments so called deep ‘sparkle clean’ too. Clearly the cleaning fairies had gone on strike that day!
Anyway. Here’s a step-by-step of how we achieved our gorgeous stair runner in our new-build house.
Cleaning & filling the holes
Our stairs were covered in diamond shape chunks of mud, beautifully created from the tread of the builders wellies.
First-things-first, we hoovered up all the loose mud which uncovered a whopping big nail protruding from one of the steps. The builders had clearly overshot when installing the staircase, but instead of removing and doing it again correctly, they decided to just let it be. Quality tradesmen at their finest.
James grabbed some pliers, snipped it off and concealed what was left with a squeeze of wood filler. He also filled in any other gaps/holes as there were quite a few. Then we left it to dry overnight, ready to sand back in the morning.
Sanding the wooden stairs
We thoroughly sanded the stairs using by black & decker sanding mouse. Removing all the splats of paint, dry-walling mud, and patches of wood filler. Stopping when the stairs became all silky-smooth.
This is such a messy job! Make sure you’re wearing goggles to protect your eyes, and a dust mask to prevent you from inhaling all that harmful dust into your lungs.
We shut all the internal doors to try and prevent the dust getting everywhere (turns out, it still managed to get everywhere) and opened the landing window and front door to help draw out the big dust cloud.
Once all the sanding was complete, we gave it a quick hoover and called it a night. Leaving all the remaining dust that was dancing about in the air time to settle. Because this job was so dusty (and I didn’t want to kill off my incredible Shark hoover) we actually bought this heavy duty work one.
Cleaning, round two
In the morning, we gave it another good hoover. Then picked up any remaining dust by wiping over it with a damp cloth.
Time to prime the stairs
For primer we went with Leyland trade acrylic primer undercoat from B&Q. Using a 1 inch angled brush to get into all the nooks and crannies and a small foam roller wherever possible to create as little streaks as possible.
One coat covered most parts surprising well. But as this is a high traffic area, we waited 2 hours (as per the instructions on the tin) before adding a second coat.
The paint had dried beautifully on the top of the steps (made of real wood) but it looked more wishy-washy on the back part of the stairs. Those parts are made from chipboard so I guess it absorbed the paint differently.
After a couple coats it looked much more uniform, and was ready for the top coat.
Painting the wooden stairs ready for the carpet stair runner
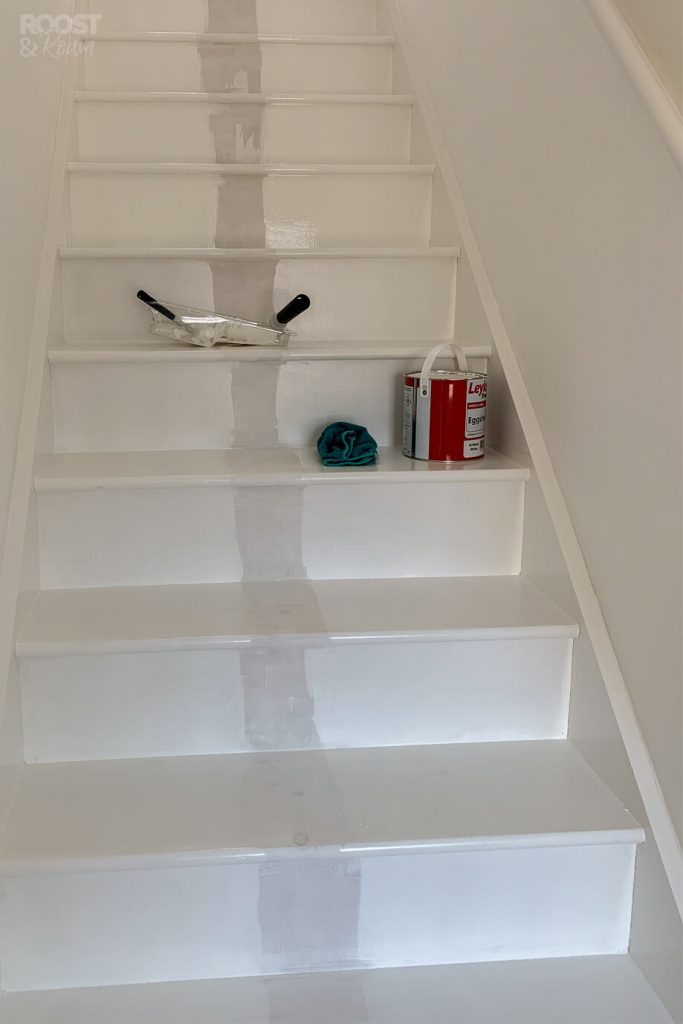
As our stairs are enclosed, we needed to steer clear from making the space feel dark and narrow. To ensure this area remained bright and airy, we decided to go with a simple bright white. This also meant I didn’t need to paint the pig’s ear hand rail, or the banister at the top.
High gloss paint isn’t our thing, so we opted for an eggshell top coat instead which gives a slight sheen. Sadly It’s still an ordeal to clean your brushes out after using it!
Once again, I used a foam roller wherever possible to avoid annoying brush strokes. This paint does seem to magically self level to a certain degree though, resulting in a perfect smooth professional finish.
The paint takes 16+ hours to fully dry, so I kept a narrow path through the centre. Then we could carefully get up and down the stairs still if we needed to.
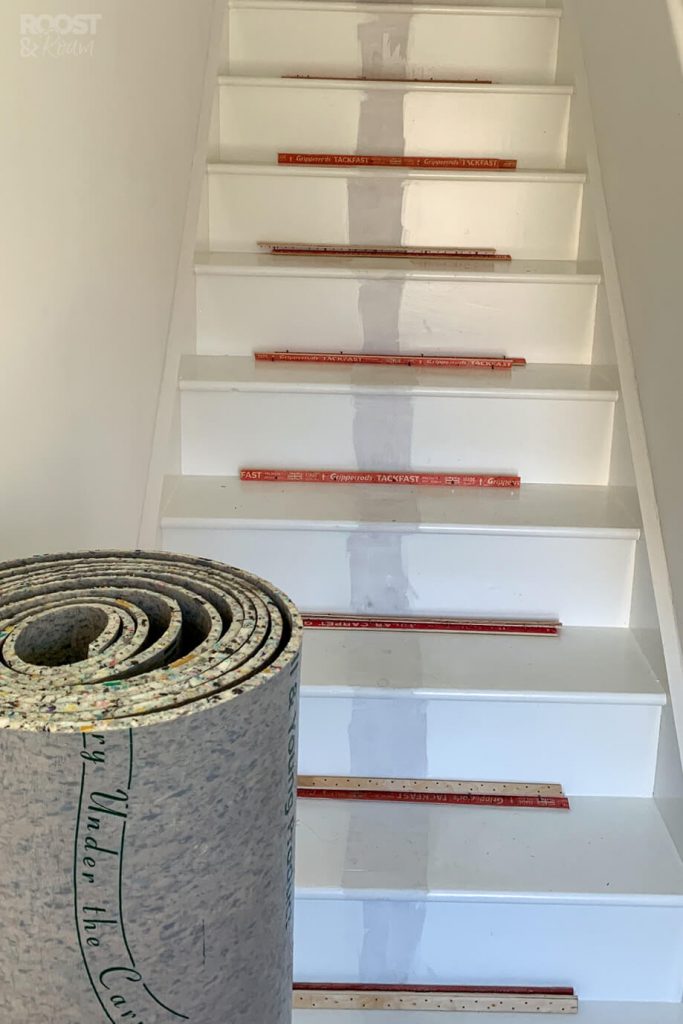
Choosing the right carpet for the stair runner
We knew that we wanted a looped wool type of carpet, not the high pile, soft and fluffy sort.
It also had to be quite light to compliment our downstairs LVT and to keep the space bright and open. We ended up going with this pretty creamy-beige colour, and got the edges whipped in a similar shade to avoid a stripe down the edges.
Fitting the carpet runner
Unfortunately this didn’t happen for quite some time as tradesmen kept messing us about. Which meant we had to learn to love our painted stairs for a good couple of months.
Eventually after a long wait, the floor fitter turned up and it was time to say an overdue goodbye to our painted stairs and messy chipboard landing.

Stair runner measurements
Our stairs are quite wide (900mm) So we opted for a 600mm wide runner as I thought 500mm (which is the norm) would look too narrow on our staircase. I’m glad we did as 600mm looks the perfect width.
We might add some stair rods ourselves at a later date, but for now we love them just as they are.
We’re so glad we ignored the negative Nancie’s and went for it. The stair runner looks so lovely and has helped add a little bit of character to our new-build house.

If you enjoyed this post or found it helpful, and you’d like to show some love & support. You can now treat me to a cuppa on the link below, thanks so much if you do!
2 comments
This was exactly the article I needed to read as we prepare to move into our new build home. Thanks for the walk through, can’t wait to get started on ours but really hope that the builders don’t leave ours in such a mess…
Congrats on your new home, I’m glad it was helpful! Good luck with your stairs, and fingers crossed yours aren’t covered in mud.