We love a sliding barn door, but didn’t want to pay through the nose to have one.
So in typical us fashion, we ordered in some MDF and plywood to build our very own chevron sliding door.
How hard could it be. Right?!
In this article...
No previous door building skills behind you?
Join the club.
We had zero expertise in the door building department too. But if you’re willing to pick up some tools and learn new skills along the way, like we did. Then why not give it a try!
It wasn’t overly complicated, but it was hefty. So make sure you have your Weetabix for breakfast.
What will I need?
Door making or carpentry is not our profession.
We’re creative people who sadly spend our days sat behind computer screens in office jobs, so please take this guide with a pinch of salt.
We’re a pair of DIY’ers (is that a word? Spell check is showing me a big red line.) Regardless, we just like to give things a go for ourselves, all in the hopes of saving some money and learning something new.
You might have better tools for the job too, like a track saw.
We really need a track saw.
Here’s the big tools we used from our arsenal, i’ve linked them for you.
A few of theses aren’t essential either.
You could just whack little nails in with a hammer instead of using a nail gun. Although you’d miss out on heaps of fun, it’s by far the best power tool!
The spray gun wasn’t the best to be honest. Maybe we were using it wrong and need a bit more practice. But we gave up using it for the colour coat. Instead we switched to a trusty paint brush and small foam roller.
The orbital sander just saved our arms on the tedious sanding job, and the router created an impressive curved edge silhouette. Not essential, but it did elevate the end result, taking it from an 8 to a 10.
Other things you’ll need:
- Wood body filler
- Clamps
- Saw Horses/Workbench (or something to work on)
- Paint roller
- Paint brush
- Wood primer
- Wood paint of your chosen colour
- Wood glue
- 18mm Plywood
- 15mm MDF
- Sliding door bracket
- Door handle & pull
Ordering our wood for this DIY door project
We ordered our MDF strips from MDF direct, who are fab by the way.
It’s a little more pricey as they cut the MDF to size for you with perfect accuracy.
Unlike the instore B&Q wood cutting service, which has been hit and miss. Sometimes it’s spot on, but it has stung us a few times with wonky cuts and no refund. We recently used B&Q’s wood cutting service for some lounge alcove cupboards we’re building (blog coming soon on that one) and the doors were cut 1cm narrower one end than the other. Making them completely unusable and a waste of money.
Anyway, I digress. Back to MDF direct.
We ordered 15mm thick MDF (cut into 90mm wide strips) which we would later trim in length ourselves to create the chevron design.
For the back/main body of the door, we used a sheet of 18mm thick plywood from B&Q which we cut to size ourselves. We measured our door frame width (opening & frame) so that the sliding door would be wide enough to cover it all. Then we measured the height from the bracket to the ground so that the door would just kiss the floor.
If you’re wondering why we picked these depths of wood, It was so the door would be the same depth as our standard internal doors.
Lets start building the chevron door
Step one: Making the design
We popped our thick Plywood up on our saw horses in the garden ready to get to work.
I say popped, but there was definitely more heaving than popping.
This thing is weighty!
First we cut the sheet of ply to the correct size using our circular saw (Ideally you need a track saw for this) but as we don’t have one, James had to create his own.
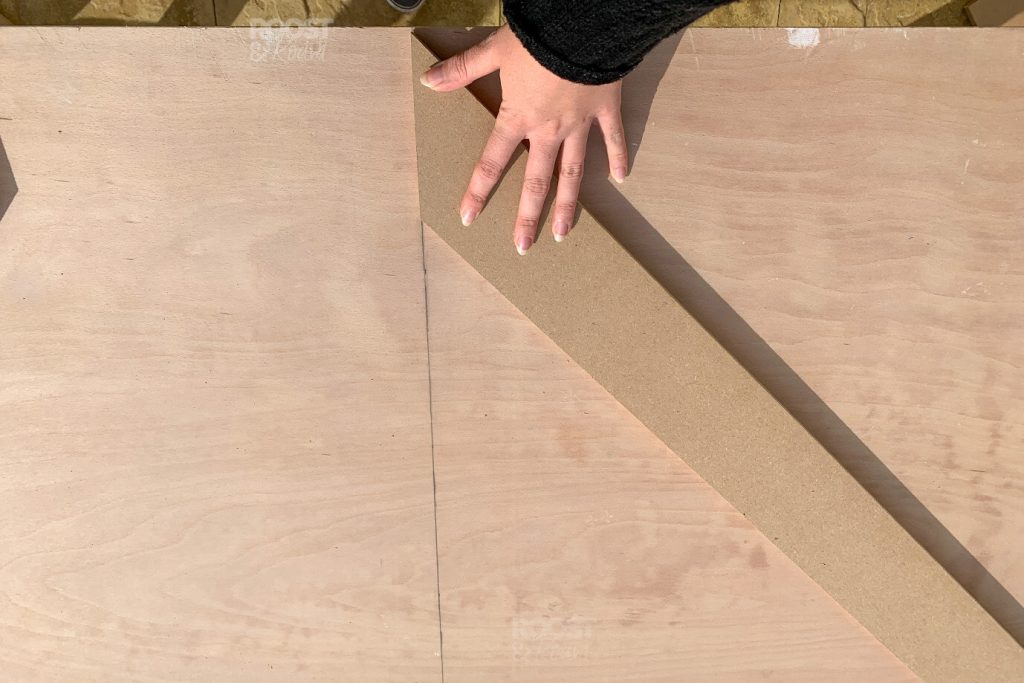
Using a spare piece of wood, James clamped it securely onto the plywood to use it like a track. Then he could run the circular saw along the clamped bit of wood, using it like a ruler to keep his cuts nice and straight.
Now the door was the correct size, we played around with different pattern designs and spacing until we were happy with how it looked.
Once settled, James drew a line through the centre of the door so we could place our 45 degree cuts along it. Then we began gluing and nailing them down, fixing them into place.
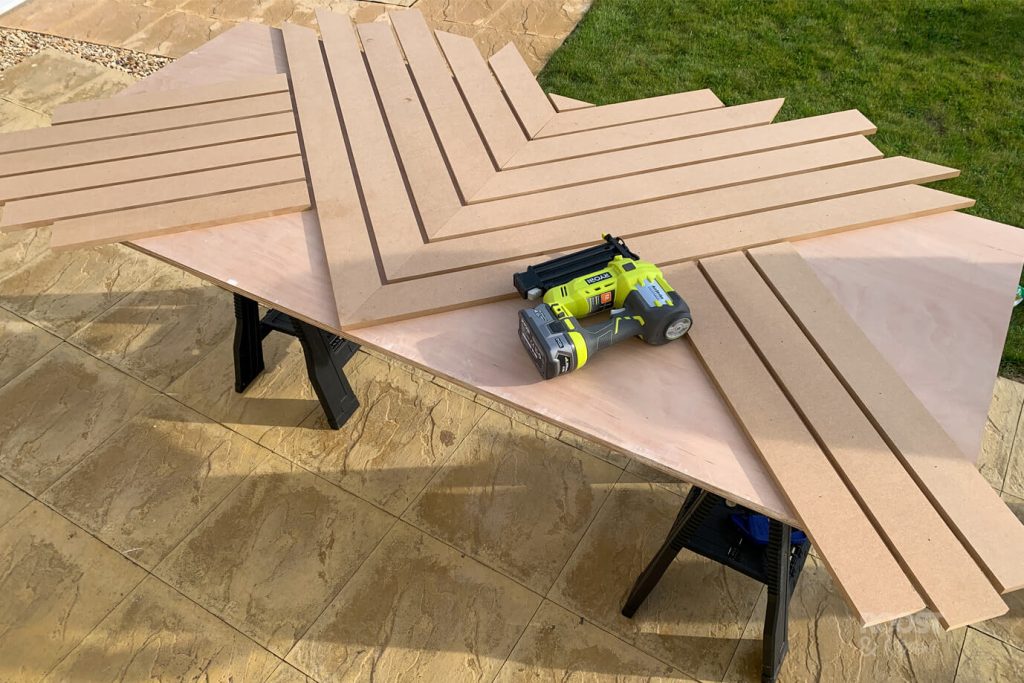
Woahhh. Let’s rewind.
45 degree cuts.
These are a doddle if you have a mitre saw. You can set the saw at that angle and cut away easy peasy.
Sadly we don’t have a mitre saw, so we used a speed square (which ironically is triangular in shape) hey presto – 45 degree angle. We drew the line and cut each one with our circular saw.
For spacing (after trying a few options) we settled on a random 0.5 inch baton of wood we had laying around, as that gave us the gaps we were looking for. We worked our way around the door, making sure to wipe off any excess wood glue that oozed out before it dried.
Step two: Trimming the excess wood
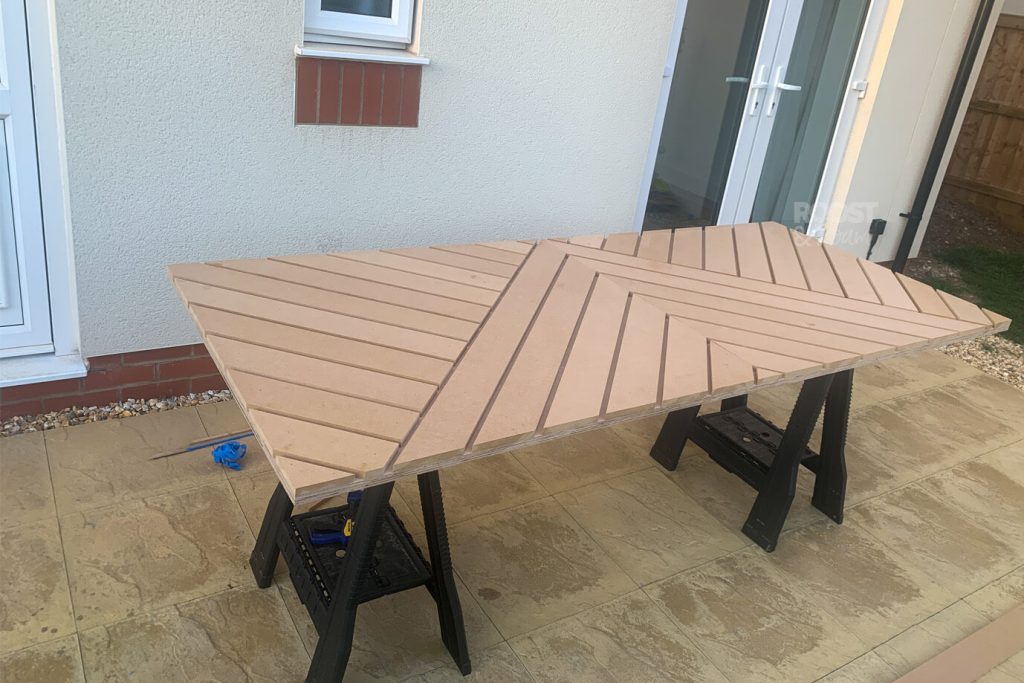
Eventually we had a rather spiky looking door, with lots of wooden strips over hanging the main door shape beneath.
This is where a track saw would have come in really handy to trim off all the excess MDF. We did the same as earlier, clamping a piece of wood onto it to create our own track, and cut off all the excess with the circular saw.
Step three: Using wood body filler
This step isn’t essential, but it makes a noticeable difference come the end.
We love this particular body filler as it works so well. I will warn you though, it stinks to high heaven. So if you can do this outside, 100% do.
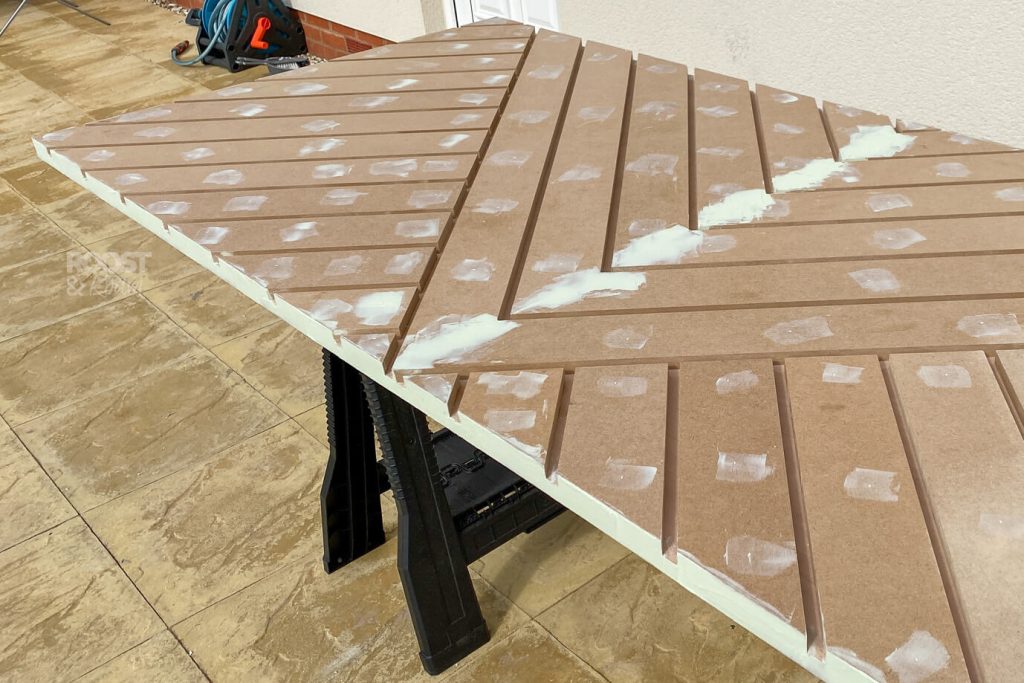
Mix some of the body filler up, then go and fill in any dents from where the nails went in, along with all the 45 degree joins on the chevron pattern too.
Then what you want to do is go around the entire outer-edge of the door. Basically the aim here is to hide the join between the plywood and MDF. We want it to flow and look like its been carved out rather than glued together.
Let this all dry, then lightly sand with a fine grit sandpaper until it’s flush and silky smooth.
Make sure you wear a mask too. MDF is not great for your lungs!
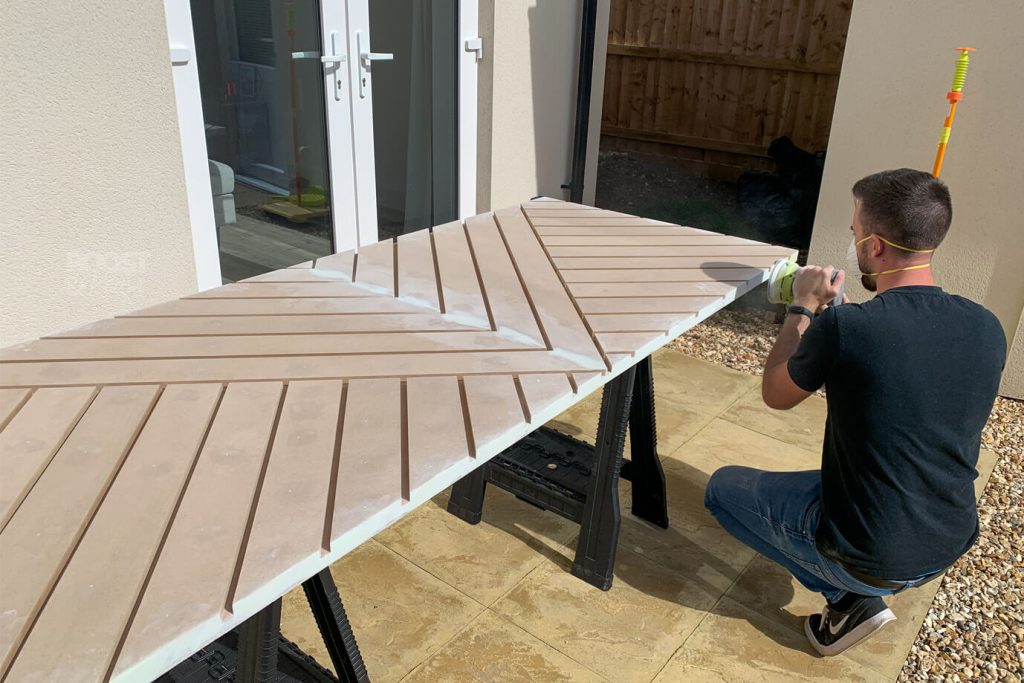
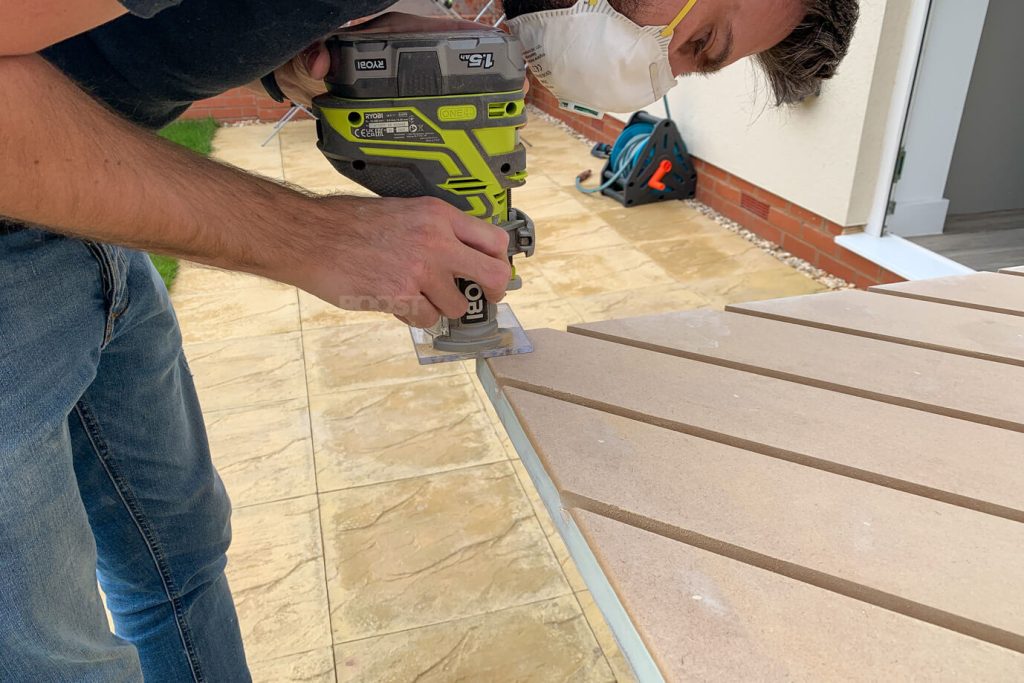
Step four: Router the edges… If you want!
Skip this step if you want the door to keep a square edge. We just wanted to pull out all the stops and smooth off the blunt edge.
James did a practice run on a scrap bit of wood to check we liked the result, then he moved on to the real deal.
This turned out to be a little tricky.
Because its lots of separate bits of wood, it made it hard to keep the same pressure along the run. He did a cracking job though, and we love how much this elevated the door design.
Step five: Prime it up, ready for painting
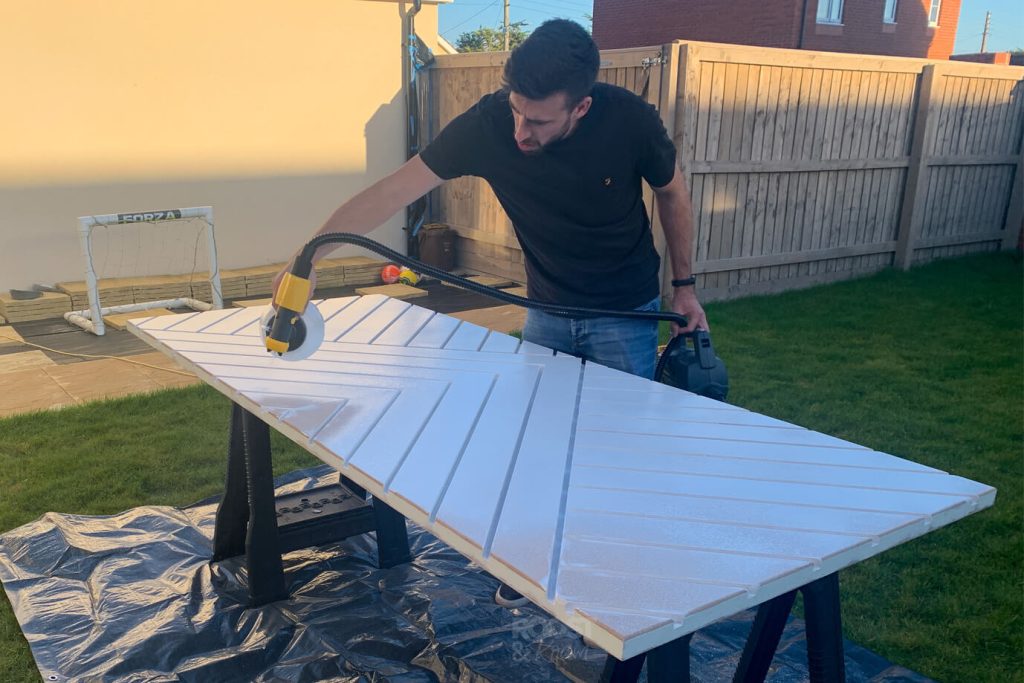
MDF is thirsty stuff, so you’ll want to do one, if not two coats of primer before you use your colour of choice.
But before anything, make sure you use a damp cloth and remove any dust. Leaving it to dry for a couple minutes before you put any paint on it.
We used the spray gun as we hoped that would give the most professional result, but to be honest it spluttered a bit and didn’t keep the paint layer all that even. Probably user error, as some people really rave about them!
Once the front had dried, we flipped it over and sprayed the back of the door.
Step six: Add some colour
I could go into business and start a shop with all my paint testers. It’s a little ridiculous.
But we settled on this beautiful mid toned green-grey. It’s called ‘Simply Grey’ by Valspar, and we got it mixed up in their premium wood paint which is a lovely smooth paint to use.
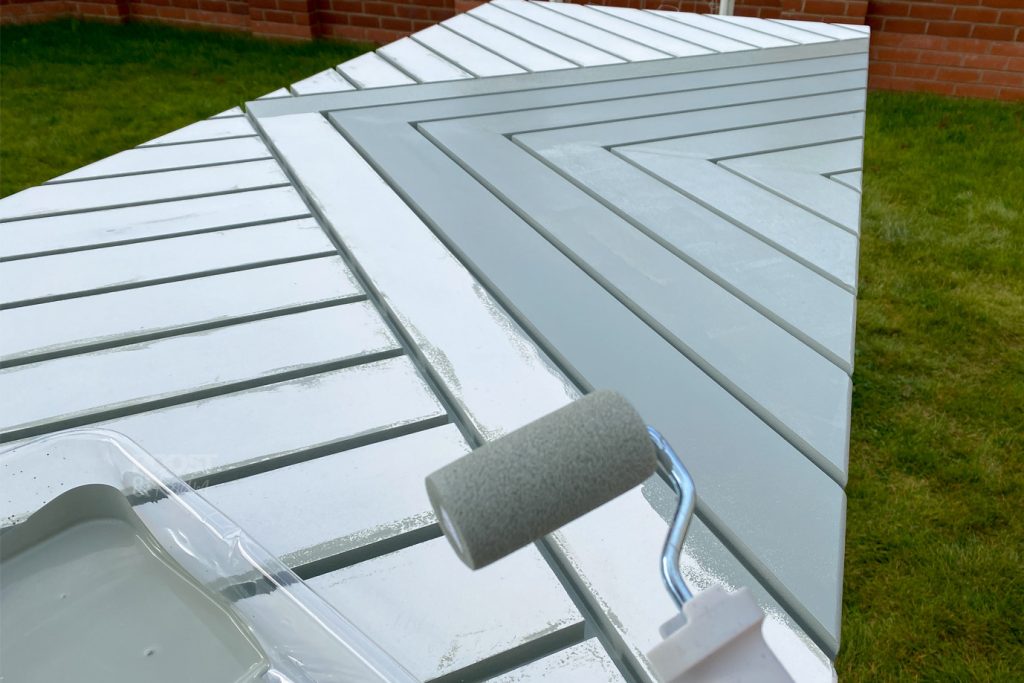
As we had given up with spray gun, we used foam brushes to paint inside all the gaps first. They soon got chewed up though, after getting through 3 of them I switched over to a normal 1 inch paint brush which was much better.
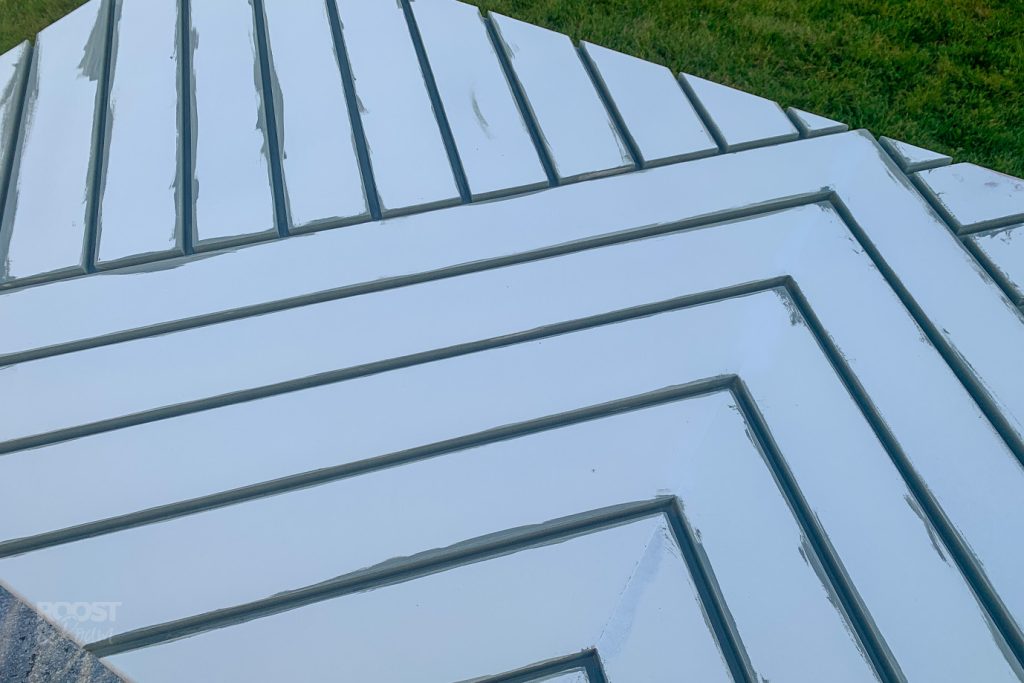
I then painted the top of each plank with the foam roller which created a nice smooth finish. (Work on one plank at a time)
Once dry, we flipped it over and painted the back.
We did a total of 2 coats, leaving the correct drying time between each layer.
Step seven: Adding the handle and wall bracket
We got the sliding door track and chunky handle from Amazon, I’ve linked for you if you like them.
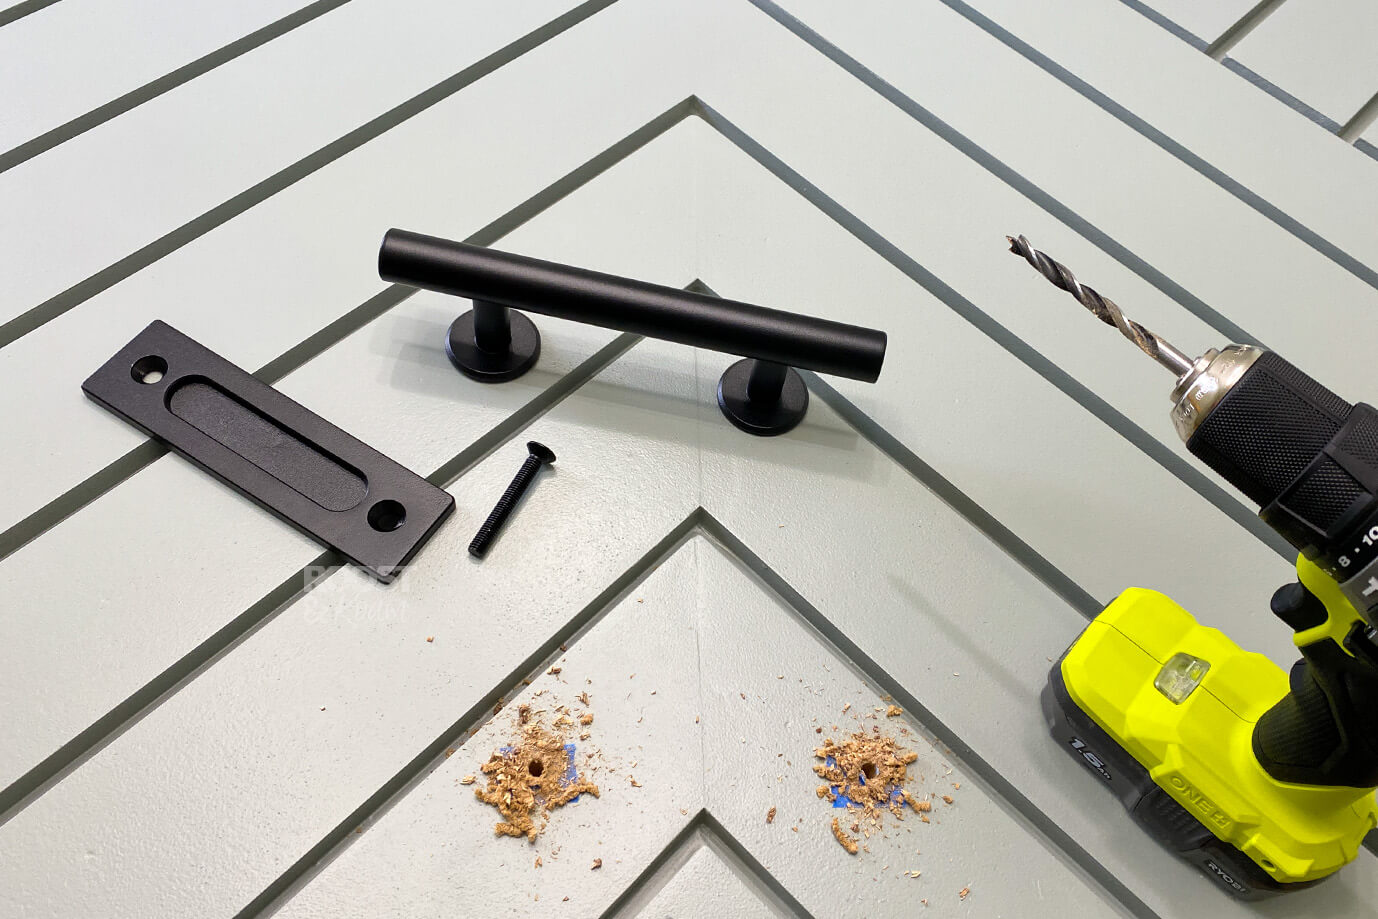
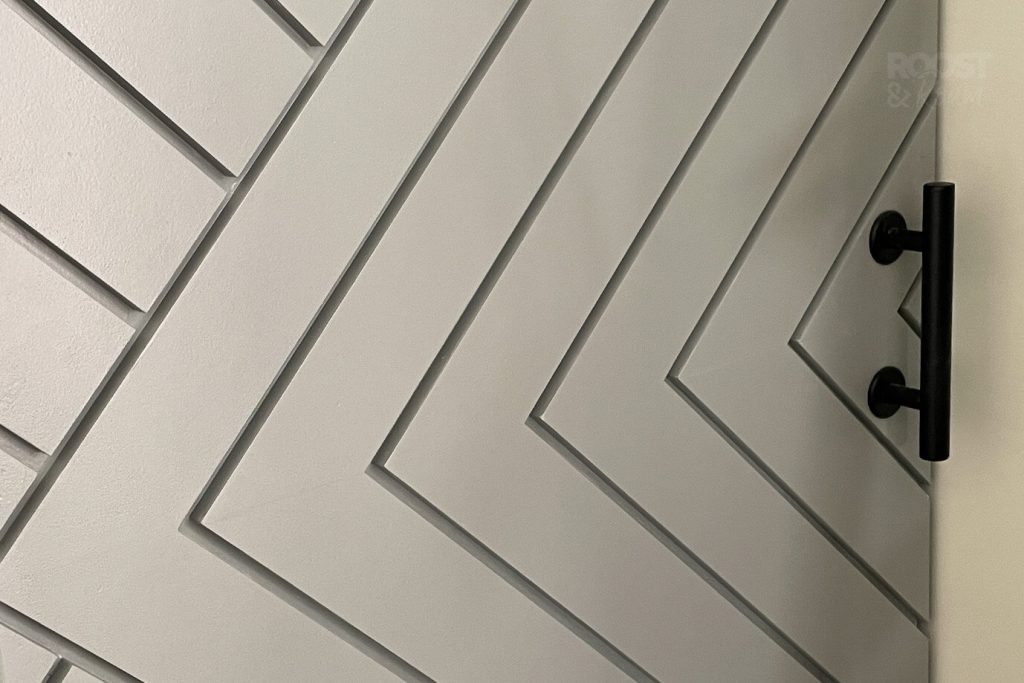
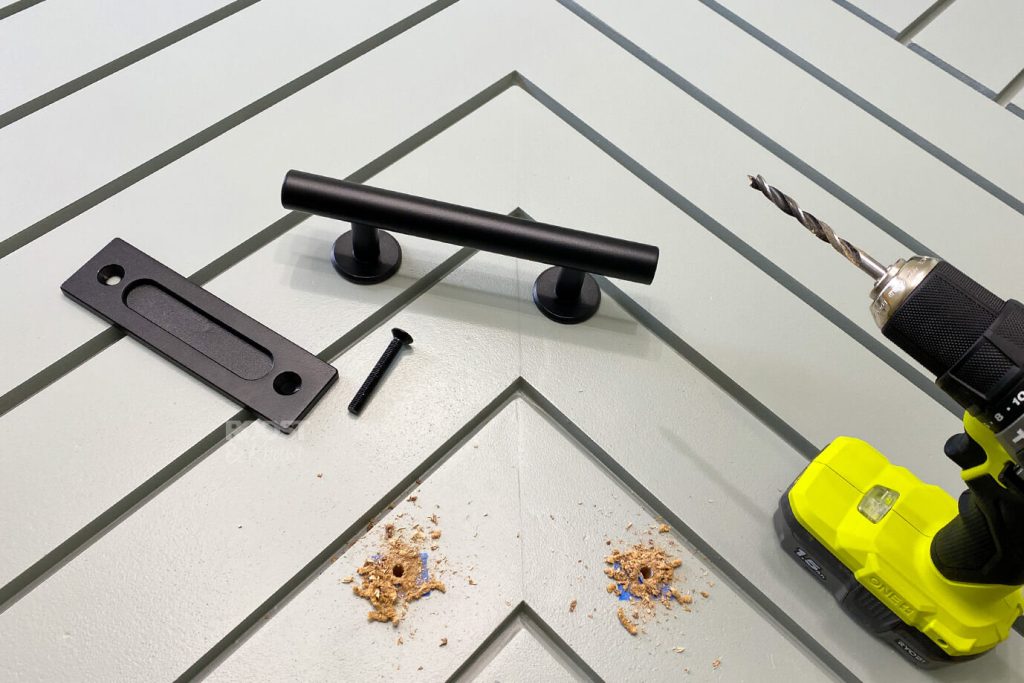
Because of the chevron pattern, we were limited on where we could put the bracket. It needed to be screwed through the thickest part of the door (avoiding any of the gaps between the MDF slats). Same for the handle, it had to be a spot big enough for both screws.
James drilled some holes and attached the door brackets, then he did the same for the handle. The handle fixes directly into the grab plate (on the back) for opening the door from the other side. So you need to make sure where you position the handle on the front works on the reverse too.
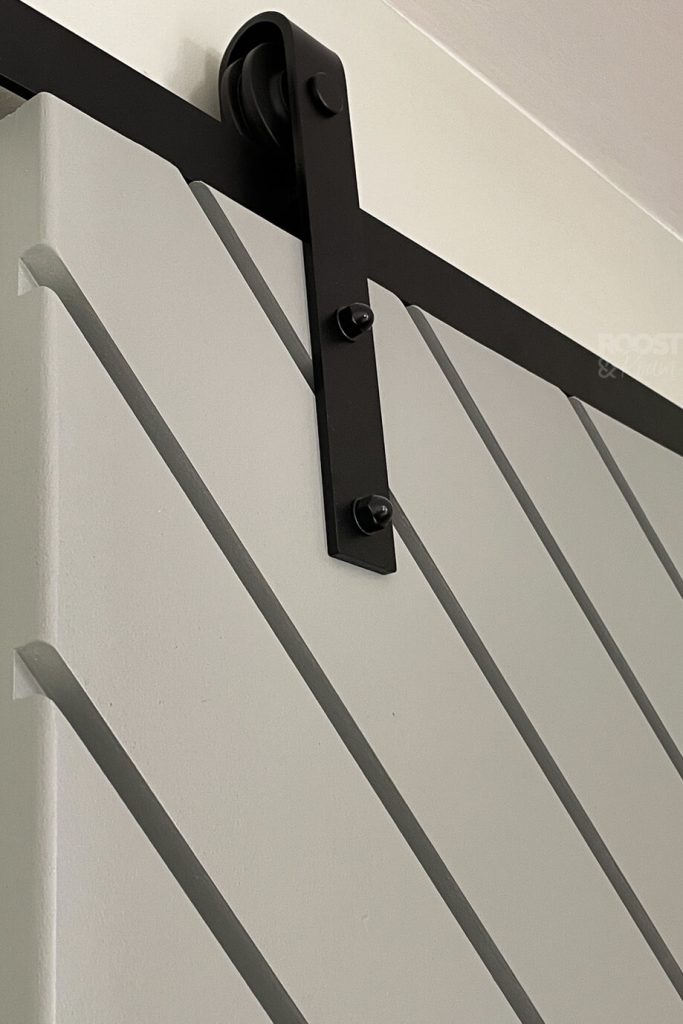
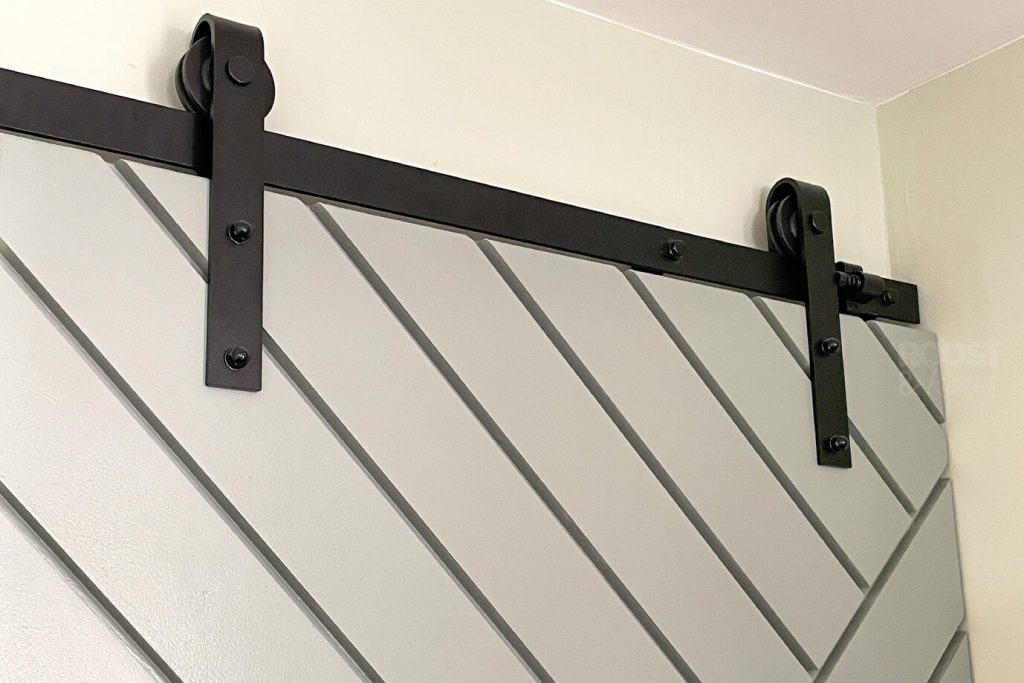
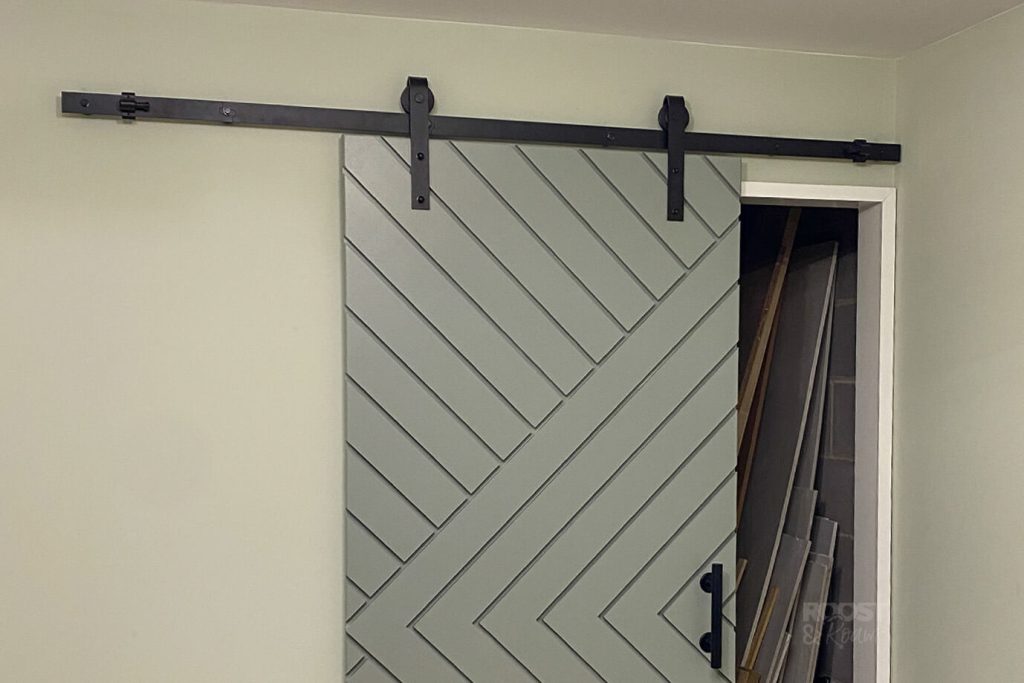
We knew we were going to be hanging a heavy door on the wall when we converted our garage into an office. To make the wall extra sturdy, we put additional stud work in this area. James found the stud, checked the height of the door and fixed the track to the wall through the studs.
Then we lifted the door up onto the track and it worked like a dream.
Step eight: Don’t forget the floor guide!
This was the only bit we didn’t account for.
Our gap beneath the door is about 6mm, but the roller floor guide is 9mm meaning we cant get it under. Really you need to leave at least a 1cm gap.
So there is currently nothing to keep the door a set distance away from the wall, it’s just hanging from the top rail. I think we will have to cut a few millimetres off the bottom of the door to allow for the floor guide.
Just a little food for thought there. Don’t do what we did.
Account for the floor guide!
Enjoy your super fabulous sliding barn door
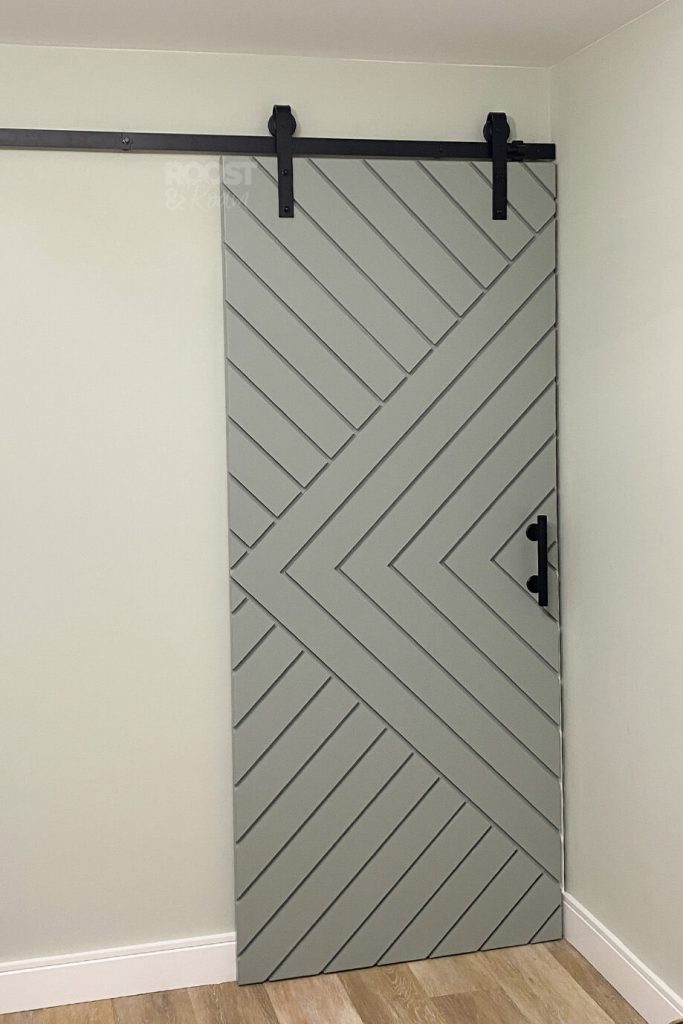
We’re thrilled with our DIY sliding door.
It’s ace and has made such a cool feature in our office/garage conversion. Overall, it was pretty straight forward to make, and cost half the price of buying one.
We take that as a DIY win, plus we now have a few more skills under our belts too.
Good luck if you have a go at making your own, I’d love to hear how you got on!
If you enjoyed this post or found it helpful, and you’d like to show some love & support. You can now treat me to a cuppa on the link below, thanks so much if you do!
