Ever wondered how you could build alcove cupboards yourself? I’m here to share all in this handy DIY guide!
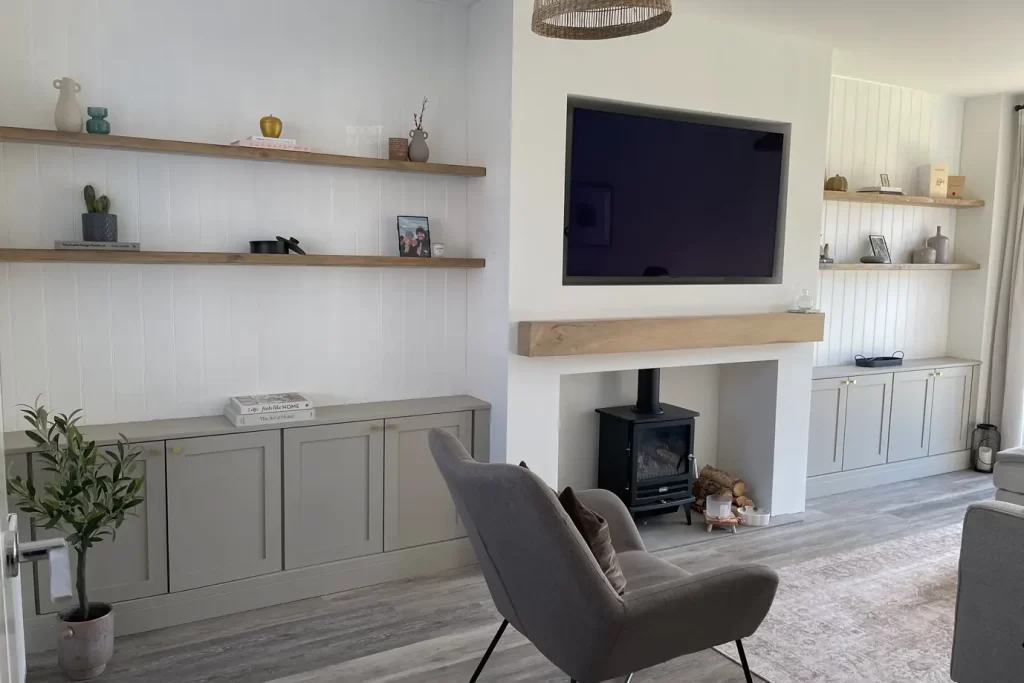
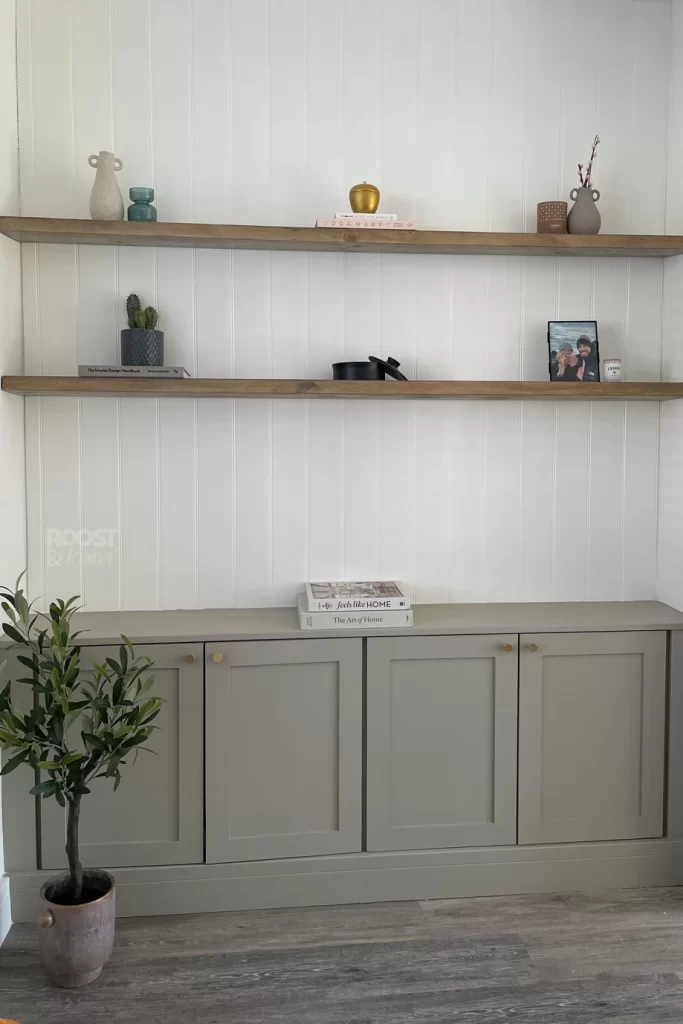
After building our false chimney breast last year, the next DIY project on our list was to build alcove cupboards either side of the fireplace. The chimney breast added much needed character to our lounge and provided a wow factor. But these alcove cupboards have really finished off the room and tied the space together. Plus it’s given us heaps of extra storage and some pretty wooden shelves to style throughout the seasons, so I am thrilled! (Although I do need a trip to some home-stores and charity shops now to pick up some more decor pieces!)
The depth we were working with was too slim to undergo any sort of IKEA furniture hack. Resulting in us building the cupboards from scratch, using good old MDF and some even better maths calculations. It’s surprising how much handy storage these fairly narrow alcove cupboards have provided. I’m also very fond of how it hides away the ugly games consoles and messy tangled cables!
I know some of you have been waiting patiently for this blog post, but I didn’t want to share this until the whole area was 100% finished. So, without further ado; here’s how you can build you very own alcove cupboards all by yourself.
In this article...
Materials you will need to build your own alcove cupboards
- MDF
- 2×1 Timber
- Wood Glue
- Combi drill
- Impact driver / electric screwdriver
- Screws
- Circular Saw
- Primer paint (for wood)
- Wood Paint (Your chosen colour)
- Paint Brush & Foam Roller
- Tape Measure
- Safety Glasses
- Mask
- Crowbar
- Multi-tool
- Brackets
- Handles
- Decorators caulk
- Orbital sander / sand paper
Optional
How to build alcove cupboards yourself
Let’s just start by saying we aren’t professional carpenters! This is a DIY guide on how we built our own alcove cupboards from scratch – as a couple of DIY’ers!
Hopefully this proves that if you’re willing to put the time and effort in, then nothing is too far out of reach. Building the alcove cupboards ourselves saved us hundreds of pounds, which meant it was feasible for us to make this addition a reality.
I’ll break this guide down into steps, in the hopes it makes it as easy as possible for you to follow along.
Right. Roll your sleeves up, here we go!
Step 1: Pull off your skirting boards
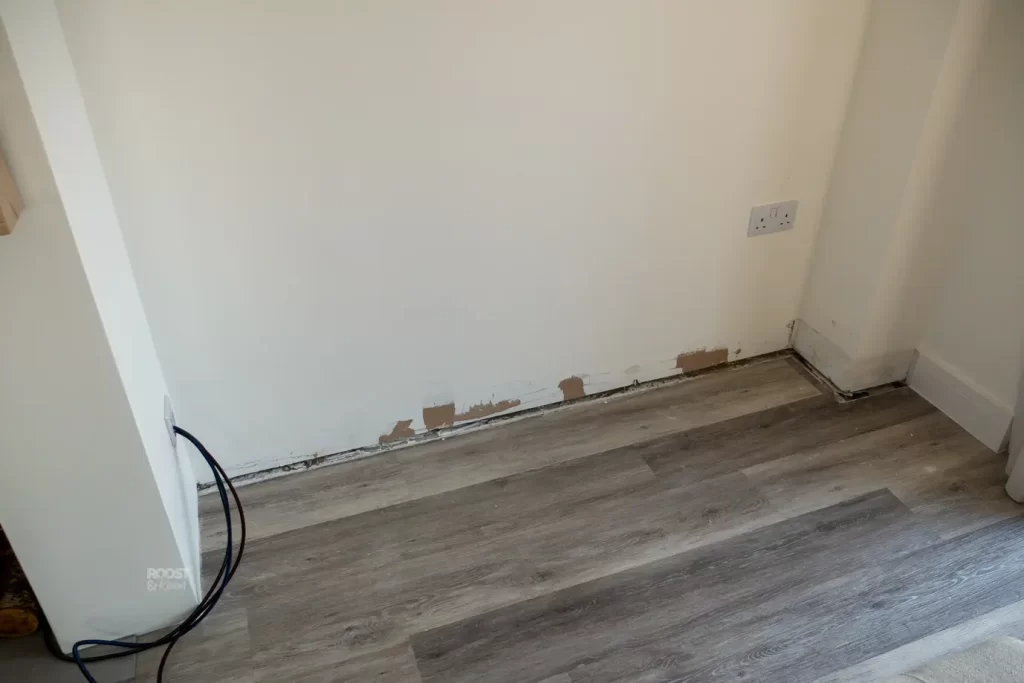
Before we started anything we prised the skirting boards off from the wall, and kept them safe in the garage for the time being. This was so we could reuse them at the end to give the alcove cupboards a built in look.
Give them a light key/sand if you plan on painting them a different colour later.
To remove the skirting boards, we used a mixture of a multitool, crowbar and a sprinkle of brute force.
Top tip: Be careful and take your time so that they don’t snap. This process will most likely cause a bit of damage the plasterboard behind. Our’s ripped a bit of the paper off the plaster board (but it was going to be covered over again anyway to it didn’t matter).
Step 2: Measure & cut your timber for the cupboard frame
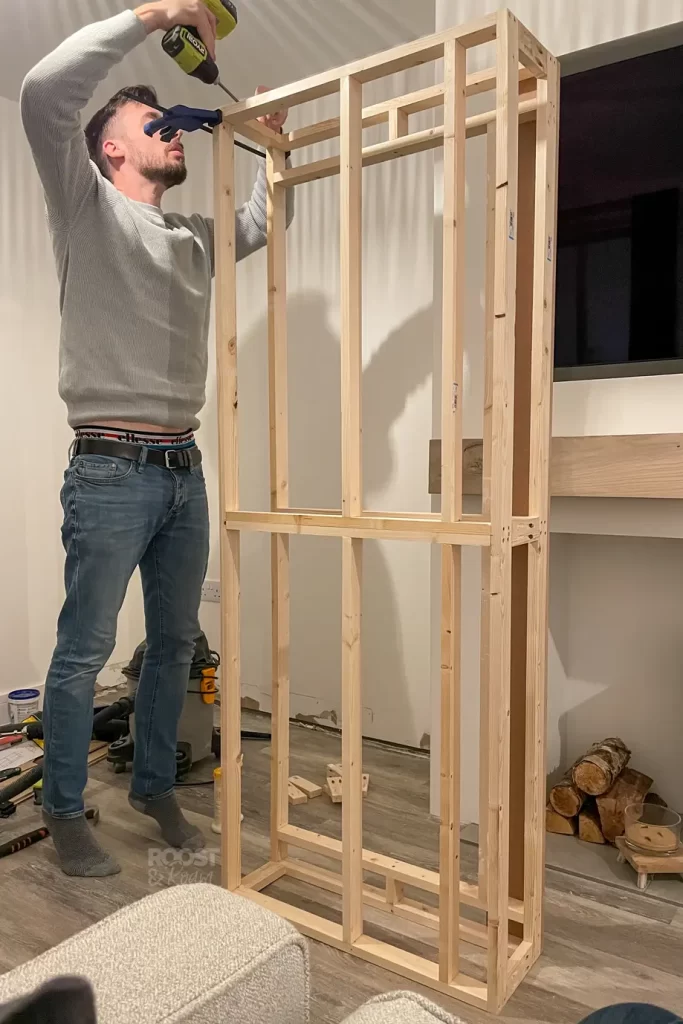
The first part of building work was to construct a wooden frame using 2×1 timber. We did this a little differently to some other alcove constructions that I’ve seen online.
It’s common for people to build a base on the floor, and then cover it over with some MDF to create a false floor. Then, in essence, what they do is build boxes out of MDF that sit on top of the MDF base. Sort of like a kitchen carcass. Well, we didn’t do that…
We built the entire hollow frame with 2×1’s, screwed it all together, then slid it into the recess. This way we didn’t need extra MDF on the back wall, or sides of our cabinet which helped us keep them a little bigger inside. It also saved us some money as we required less MDF! Win-win!
To explain the gist of the frame measurements, this is how we worked it out:
- First we measured the length of the wall, and decided how tall we wanted the alcoves to be. This gave us our frame length and height dimensions.
- Then we decided how many doors we wanted on each alcove. Originally we wanted 3 doors, but they would have been really large doors! Or we would have needed bits of wood to create spaces between the doors in order to keep the doors smaller. To keep it simple, we went with 4 smaller doors.
- We then figured out how large we would like each of the 4 doors to be. From that, we knew how much gap there would be at either end of the frame which would eventually be blocked off with fixed MDF. This also helped us work out the middle support, which needed to be wide enough to avoid a gap in the middle when the doors were closed. Otherwise you would see into the cupboard!
- For the depth of the frame, this was a combination of factors. One – we wanted it shallower than the chimney breast. Two – we wanted the skirting board to run flush with the wall that jutted out on the right hand side of the room. (In hind sight, we should have done this slightly recessed, because I painted the alcove a different colour) You’ll see what I mean at the end.
- You’ll add an additional strip of 2×1 timber to create a ledge for the bottom shelf to sit on. We positioned this so that the shelf was just above the height of the skirting board. This was so when the door was shut, it closed up against this ledge.
Hopefully this picture explains it!
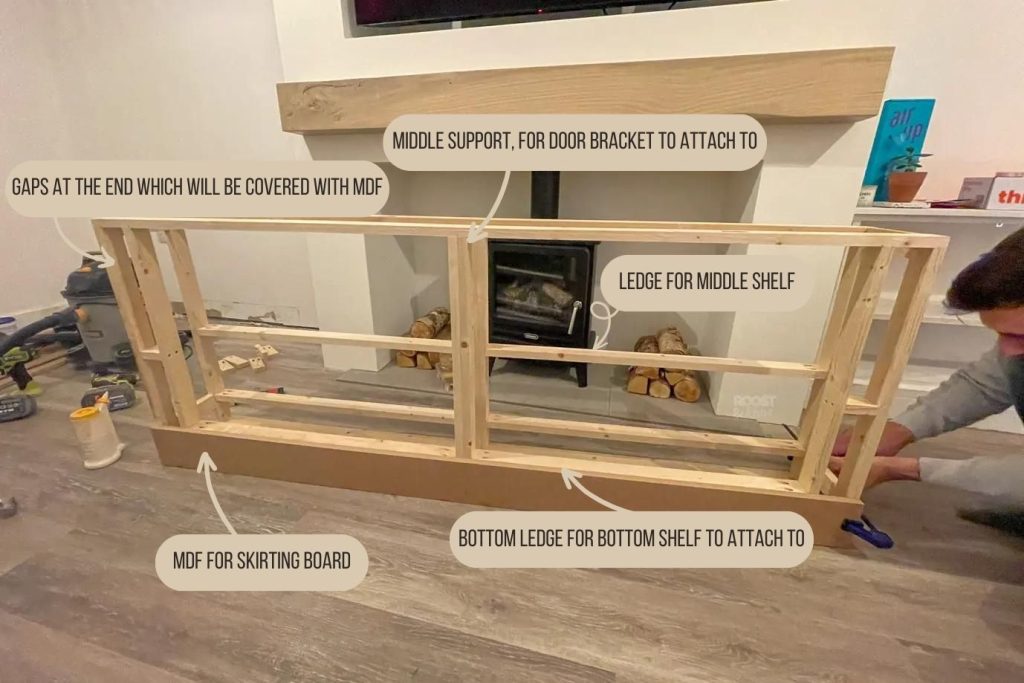
James then attached a strip of MDF along the bottom, using a mixture of wood glue and the nail gun to fix it into place. This is what the skirting board attaches to later.
Top tip: Use a pocket hole jig to drill all the holes in your timber cuts. This makes screwing it all together really easy and neat. You might also want to use some clamps to keep the frame square whilst you’re screwing it all together.
Step 3: fixing your frame in place
Now that you’ve slid your frame into the alcove recess, its time to securely fix it into place. James screwed it into the back wall, and into the floor. We used a mixture of wood screws going into raw plugs for the walls, and concrete screws for the floor.
Top tip: Make sure you use a stud finder and scan the walls for any pipes of electric cables before you do this!
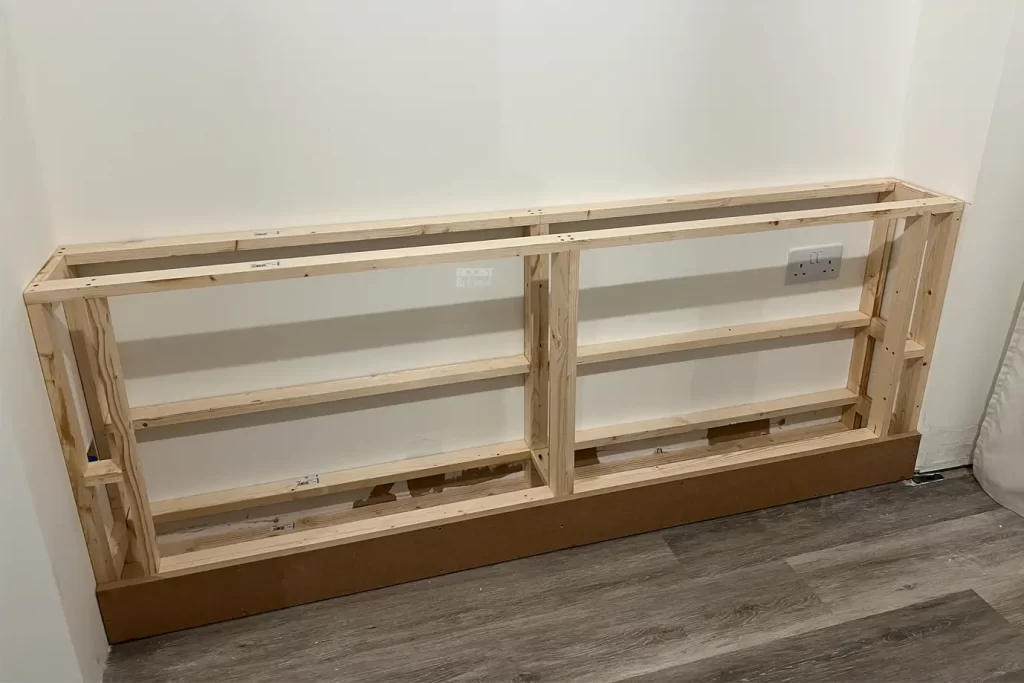
Step 4: Making the top and shelves for your alcove cupboards
Next it was time to cut some MDF to make the top and the internal shelves. One would become a middle shelf, and the other would become a base. At one point we debated not having a bottom shelf, as without one we would have additional depth all the way down to the floor. However, we decided that it would look a little odd and unfinished like that.
Let’s start with the top. To work out the measurements for the top, you need to consider whether you want it flush with the doors or if you want a slight overhang.
We knew that we wanted our top to sit flush with the doors, so in order to work this out you need to know how deep your doors are. Our doors were going to be made with 12mm thick MDF, but we were also adding thin 6mm strips of MDF onto it to create a shaker style door. Therefor, we knew we needed to add a total of 18mm onto our depth measurement in order for it to sit flush with the doors.
Now for the shelves. You’re going to have a couple tricky cuts to navigate when making the shelves, as you’ll need to cut out a couple notches for the middle pillar and again in the corners.
To work this out you’ll need to measure all the pillars and then transfer these measurements onto the MDF.
Top tip: To cut out the shelf notches use a multi-tool or jigsaw. Don’t worry too much if it’s not completely perfect. Small imperfections can be corrected afterwards with body filler.
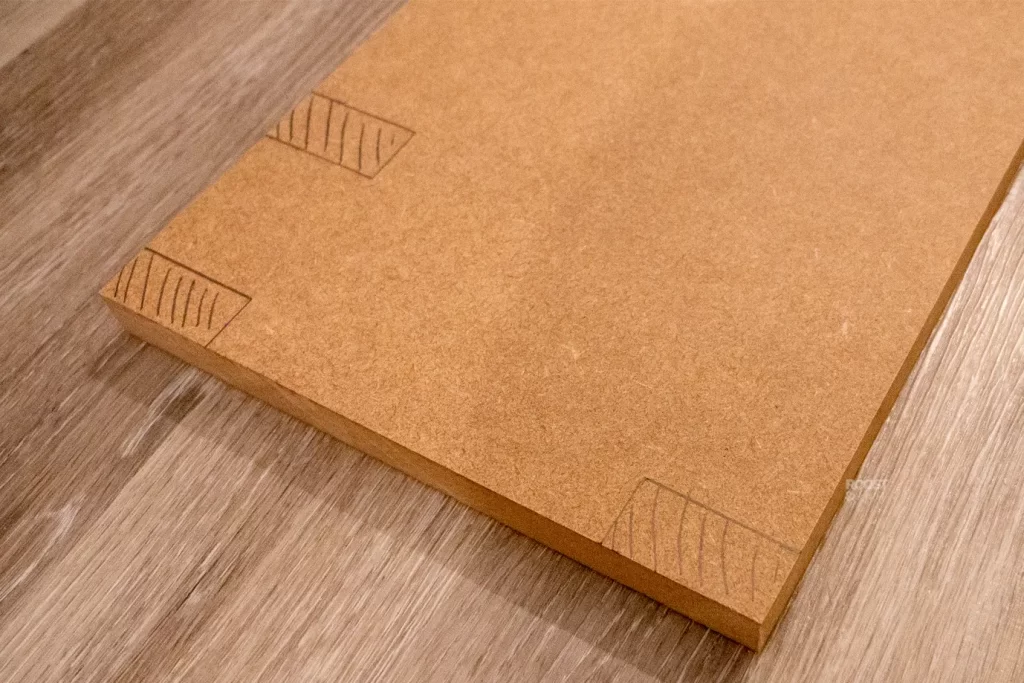
Once everything is cut out, pop the base in first and fix it into place using wood glue and a couple nails/ screws. Repeat the process for the middle shelf and top.
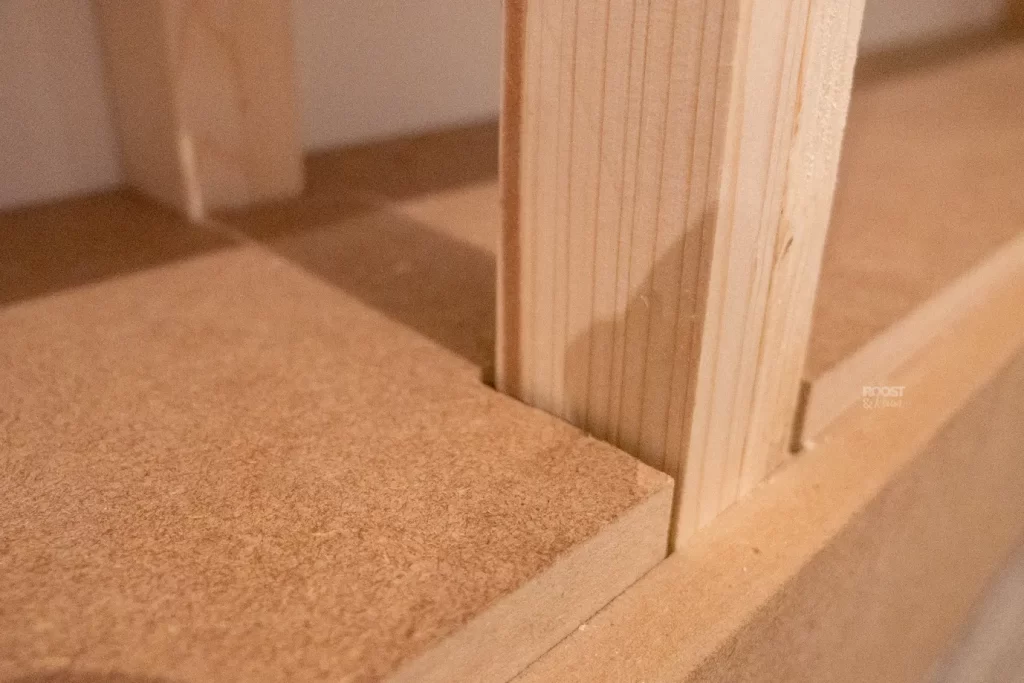
Step 5: Fix the skirting board back on
In order to make your alcoves look built in and super professional! You’ll now need to fix the skirting boards back on. To do this, simply use some wood glue and push them back into place.
Top tip: Wedge something up against the skirting boards to keep it pushed up against the frame whilst the glue sets, or use a nail gun and shoot in a couple nails to stop it from slipping.
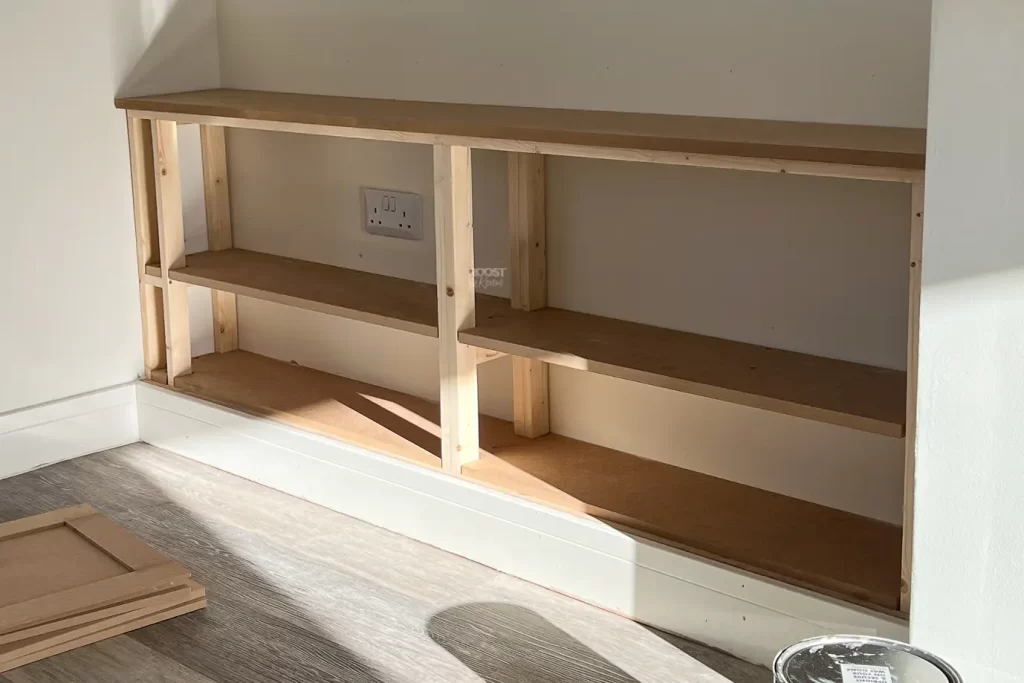
Step 6: Make the alcove cupboard doors
These cupboard doors must be cut to absolute millimetre precision! If they are on the slightest wonk they will look terrible when you assemble it all together. Make sure you take your time to cut the MDF down perfectly straight. A track saw would be ideal for this task, but we don’t have one of those. So, James clamped on a piece of wood and used it as a guide for his circular saw.
Once we had cut out 8 matching rectangles for the doors, we then added the thin strips of MDF to make them shaker style.
We got the MDF strips cut down at B&Q on their cutting service – but I will say they aren’t perfect! We had to sort through them and put them into piles of most similar sized before we put them on the doors. Luckily we had a few spare ones, so we just used the best of the bunch.
James then had to cut the horizontal pieces down, so that they were the correct length.
The strips were attached to the doors with wood glue and a couple nails. Then we filled the joins and covered the edges with body filler. Once this was dry, we sanded it back using the same fine grit sandpaper. We also did this on our DIY sliding barn door, as it really elevates the end product!
Top tip: If you’re doing shaker doors, be sure to apply body filler all around the edges. This makes it seem like its one piece of wood, so you cant see that a strip of wood has been attached to it. This really levels up your work, and is well worth the extra time and effort!
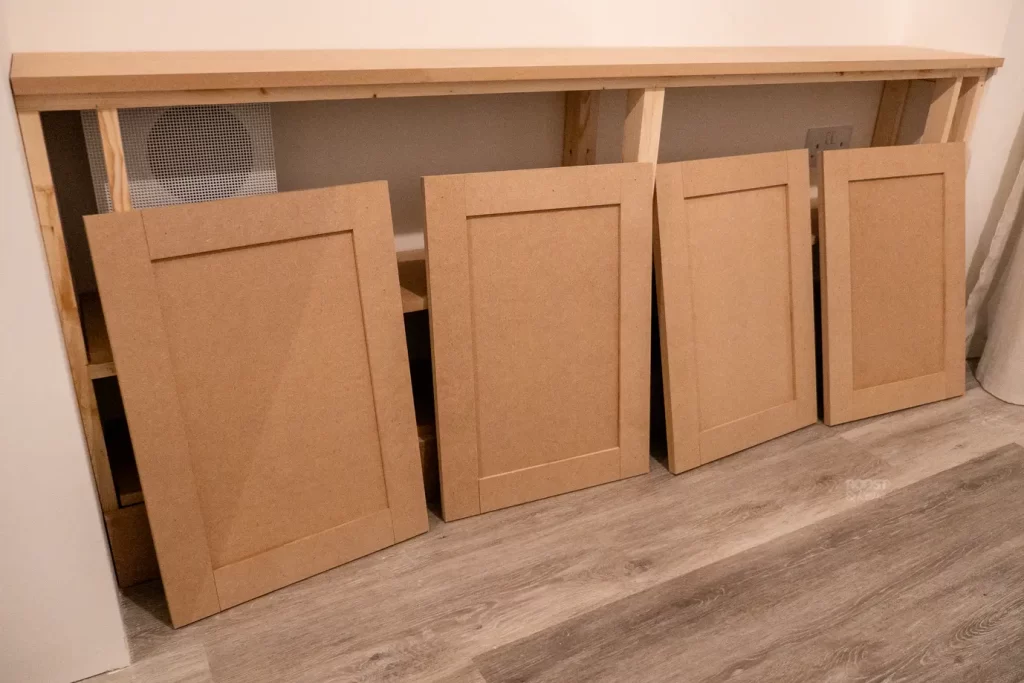
Step 7: Fill in any gaps and imperfections
For this we used a combination of body filler and decorators caulk. All the little indentation marks from the nail gun, along with gaps around the pillars were filled in with body filler. And the join between the top/lid and the wall was filled with decorators caulk.
Once the body filler has dried, give it a little sand using a fine grit sandpaper until it’s smooth and flush.
Top tip: To get a neat bead of decorators caulk, once you’ve applied it, run your finger along the caulk and remove any excess with a rag. This will smooth it out into a nice neat line.
Make sure to use decorators caulk as its flexible and can be painted over, unlike silicone.
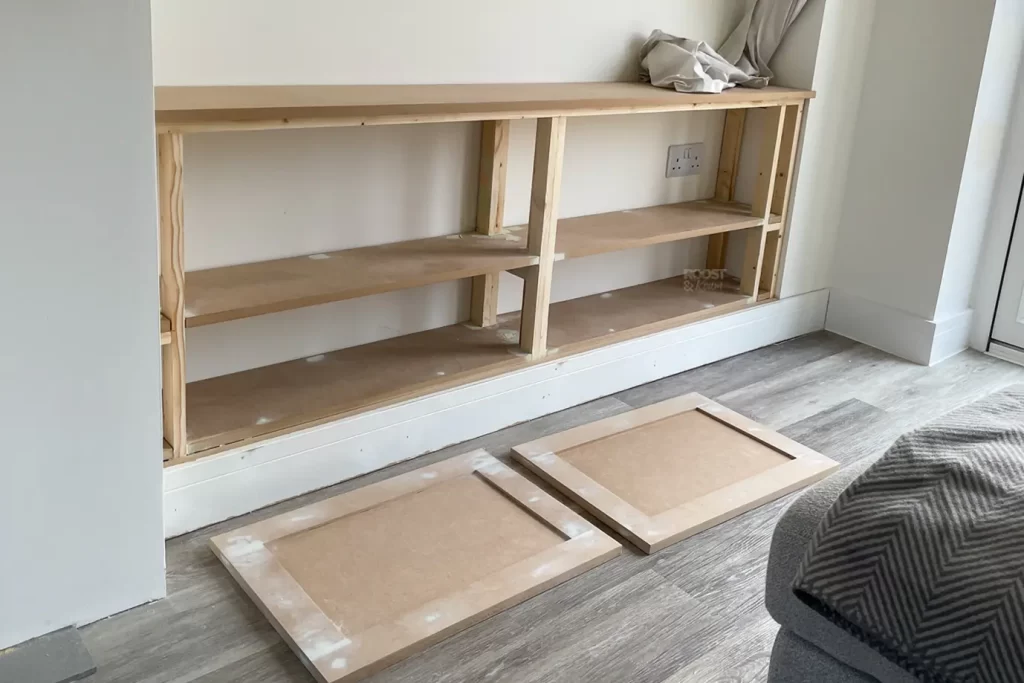
Step 8: Prime everything
Next you need to prime everything – doors, frame, top and the shelves.
We used a white primer specifically designed for wood, and applied it using a mix of paint brush and small foam roller. The brush is handy for the pillars and getting in the corners. But to avoid horrible brush strokes, we used the foam roller over the doors, shelves and top.
We only needed one coat of primer, but follow the instructions and drying times that are displayed on your tin of paint. We used this one.
Top tip: Don’t forget to prime the bottom of the shelves, I even painted the underside of the top too.
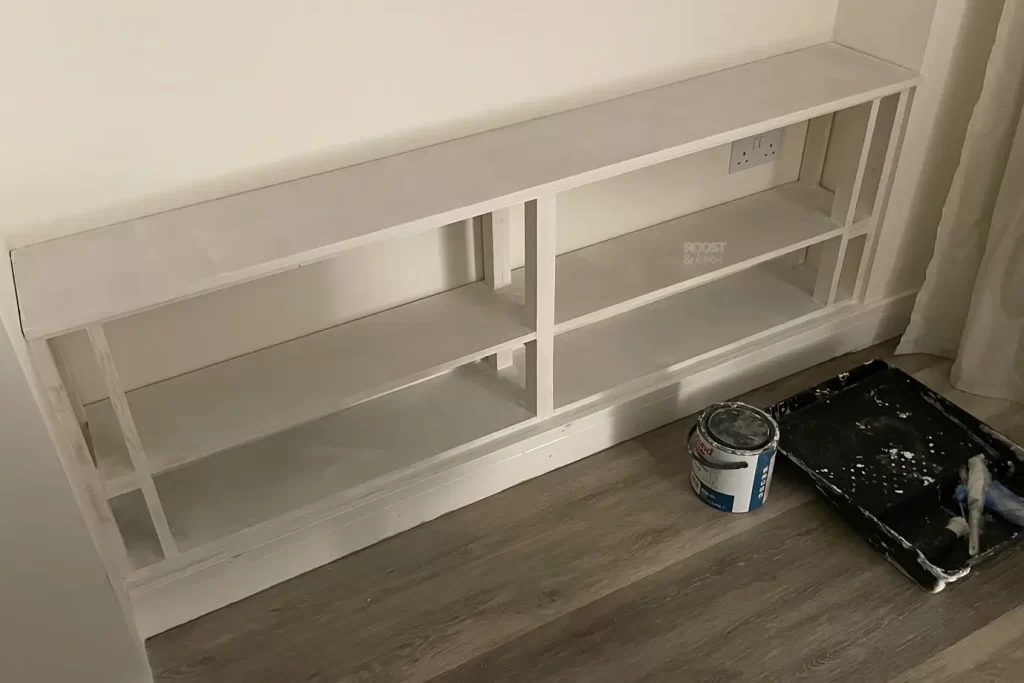
Step 9: Add a splash of colour onto your alcove cupboards
Once your wood has been primed, and it’s had the correct drying time. You can next add some paint in the colour of your choosing.
To avoid getting it all over the walls, we first prepped the edges with some frog tape.
I did this in exactly the same way, a mixture of using the brush to get into the nooks and crannies, then the foam roller to remove any pesky brush strokes.
I did a total of 2 coats, waiting the correct drying time between coats.
To paint the doors, I propped them up on a couple rolls of brown tape, or a tin of paint. This was enough to lift it away from the floor, and enabled me to paint around the sides. Once the front had dried, I flipped them over and did the exact same on the back.
I also painted the skirting boards the same colour which was fine on the left side as the alcove went the full width of the wall. However, as I mentioned earlier – the right had side has a bit of wall that juts out. So this side I had to just paint the skirting board up to this point.
Top tip: To save having to wash your brush and roller out between coats, wrap them up tightly with cling film. Then you only need to wash them up once at the end.
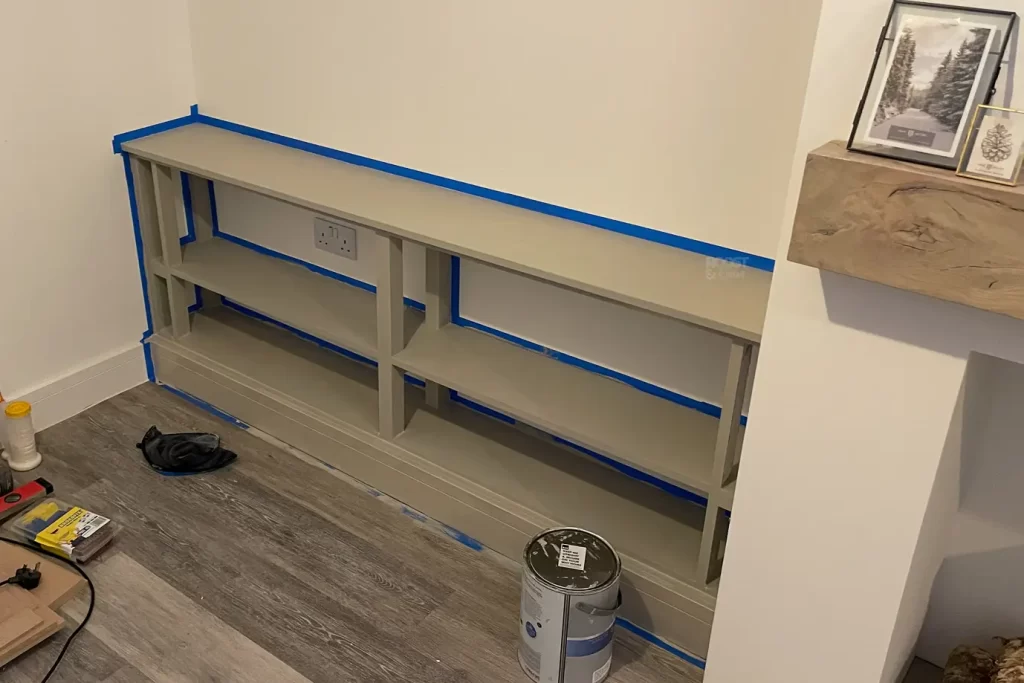
Step 10: Attach the door brackets
There are so many different brackets to chose from. Initially we wanted the soft close ones, but we soon discovered they weren’t going to work on our doors because the wood wasn’t deep enough. You needed to router out a hinge recess, and it was going to be a little too deep for our doors. The hinges were also too long for our frames, which meant they would have protruded past the frame into the cupboard.
That left us with the option of regular door hinges, or spring hinges. We opted for the latter.
James screwed the brackets onto the frame first, then he attached the doors to them.
Be patient with this part. It can be a little tricky to get it all lined up perfectly straight. James used some shims to help him keep them all level.
Our brackets are super strong and really snap back. We have to make sure to hold on to the handle when we close the door, so we may look at adding some after market soft close adaptors.
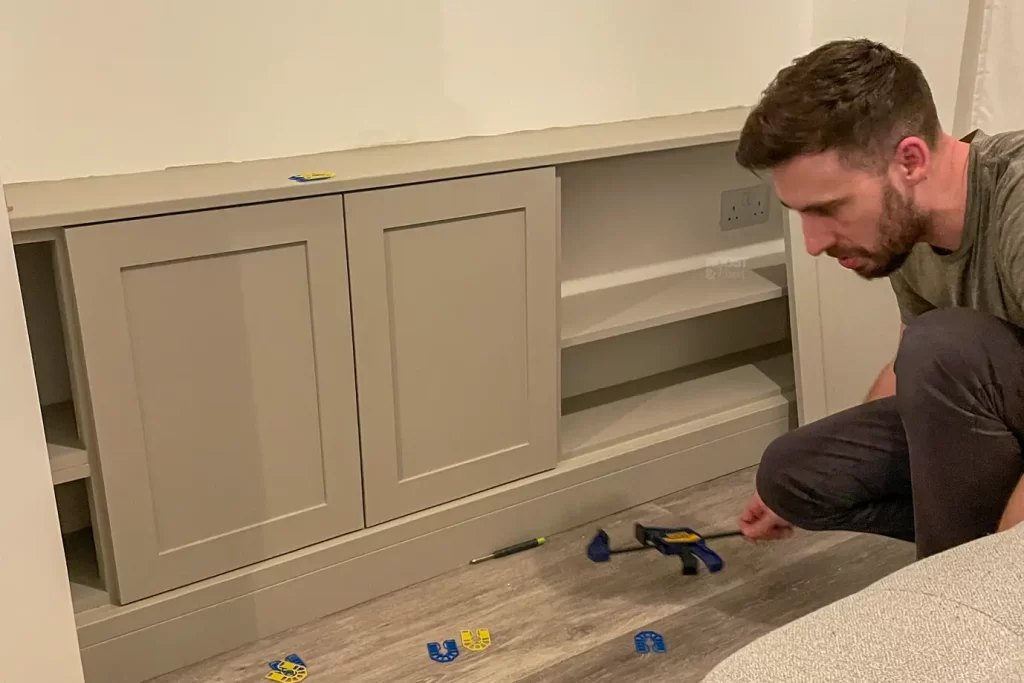
Step 11: Fix the handles
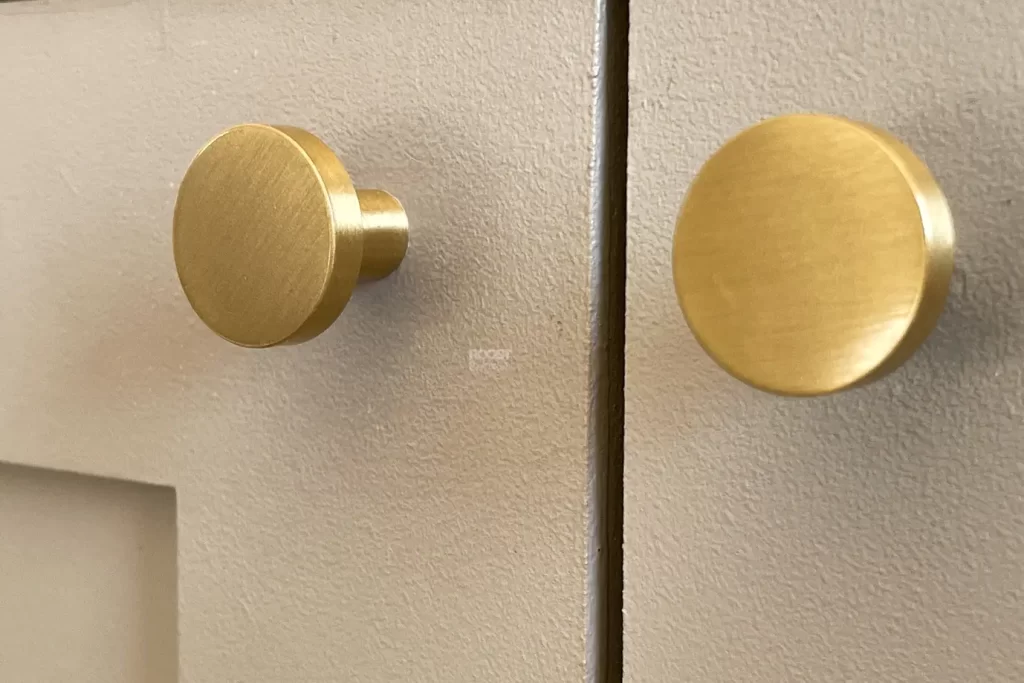
I bought these cute golden door knobs from amazon. They are perfect for what we wanted and were an absolute bargain! After deciding on the placement, James drilled some holes and attached the door handles.
My plan was to put a bit of antique gold Rub & Buff onto them, but for now i’m enjoying them as they are!
Top tip: Take your time with this and make sure you measure where to drill perfectly. It only takes a couple millimetres for them to be noticeably wonky!
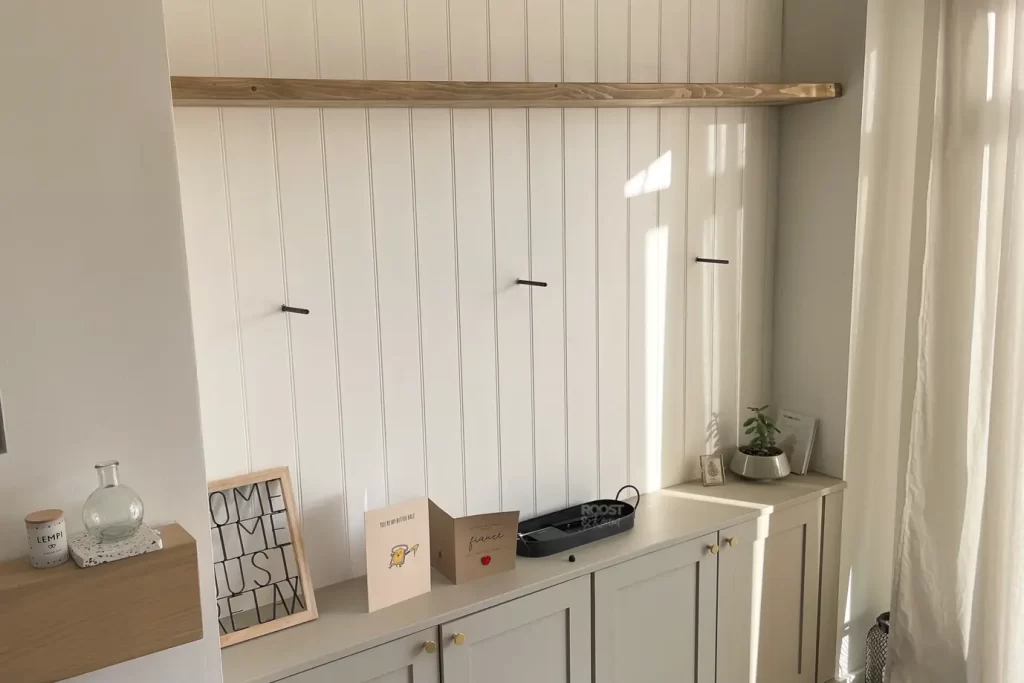
Step 12: Add cladding to the wall behind your alcoves
I love how much depth, warmth and character wooden cladding can add to a room. For that reason, we attached some MDF cladding panels to back of the alcoves. Obviously this step is completely optional, you might want to keep the wall plain, wallpaper it or paint it a bold colour.
Getting the cladding in sheets, rather than individual planks made this job so quick! We picked them up from Wicks and they came pre-primed.
James measured the wall and cut the cladding boards to size, we then stuck them to the wall using grip fill and a couple nails out the nail gun.
To finish it off we added a strip of wooden trim along the top, which was fixed it into place with wood glue and the nail gun.
Step 13: Install brackets for the floating shelves
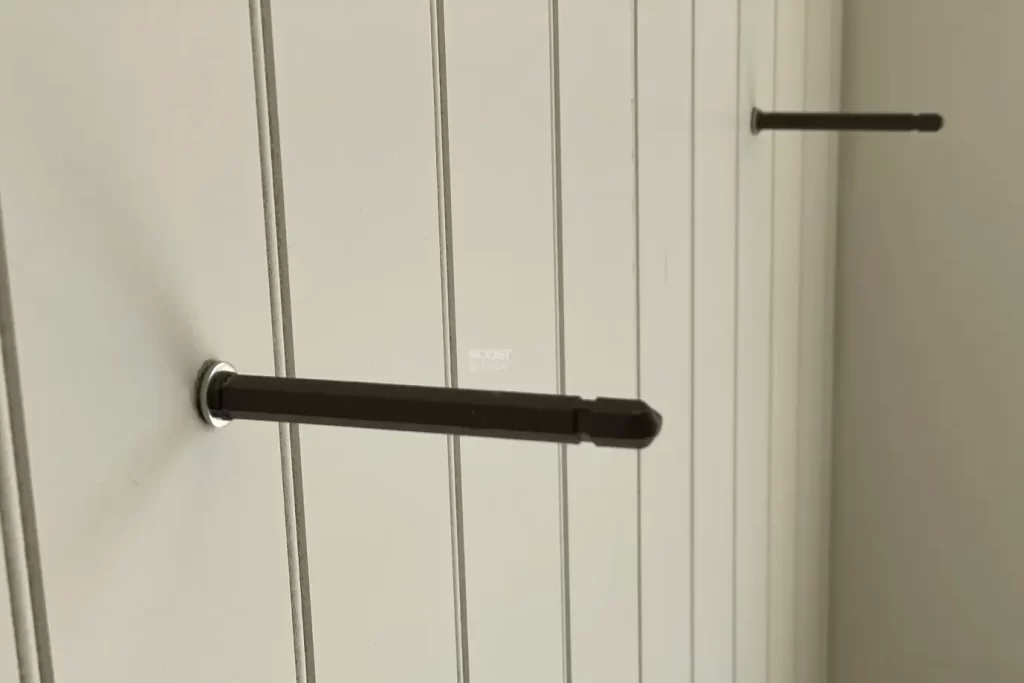
To hold up our long shelves we next needed to install some floating shelf brackets. We used similar brackets to the ones which we used to secure our heavy oak mantel to the chimney breast – I’ll link them here.
After working out the ideal shelf placement, James got out the laser level to mark the height. Then he marked on the wall where to drill each hole, spacing them out to hold the weight of the shelf.
We used 3 brackets per shelf.
Top tip: Try and keep these as straight as possible when drilling your holes. If they are all angled in slightly different directions, it’s going to make fixing the shelves hard work.
Step 14: Paint the cladding
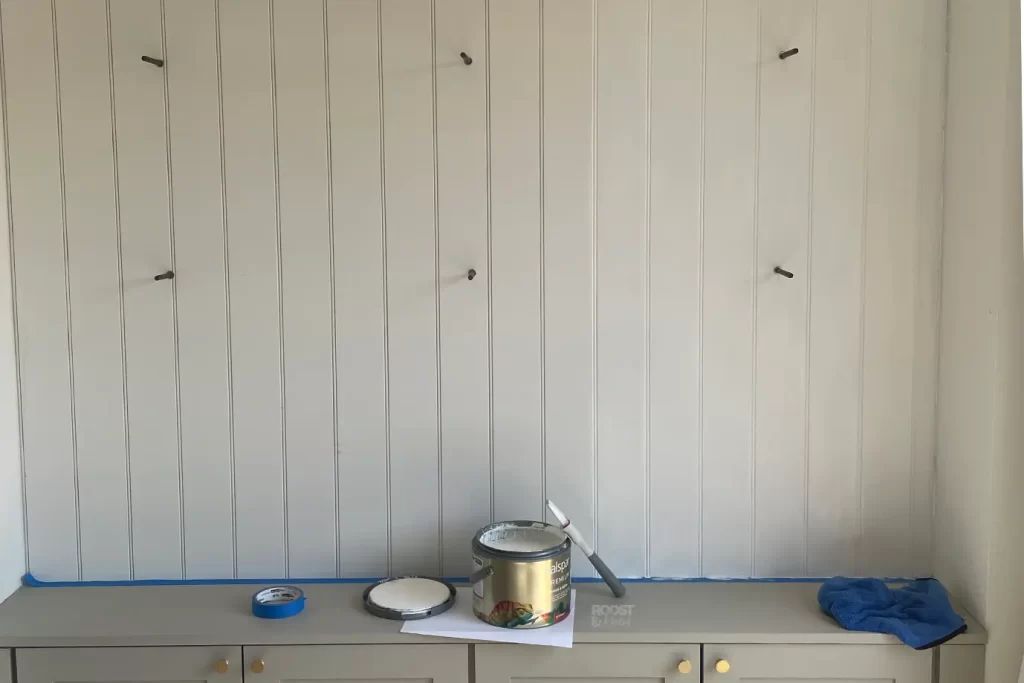
We decided to keep this area nice and light, so I painted the cladding in the same colour as the chimney breast. This colour is called ‘Hot White’ by Valspa, although this time I got another pot mixed up in the satin wood formula, as apposed to the matt wall paint.
I did a total of two coats, and was amazed at what a difference it made!
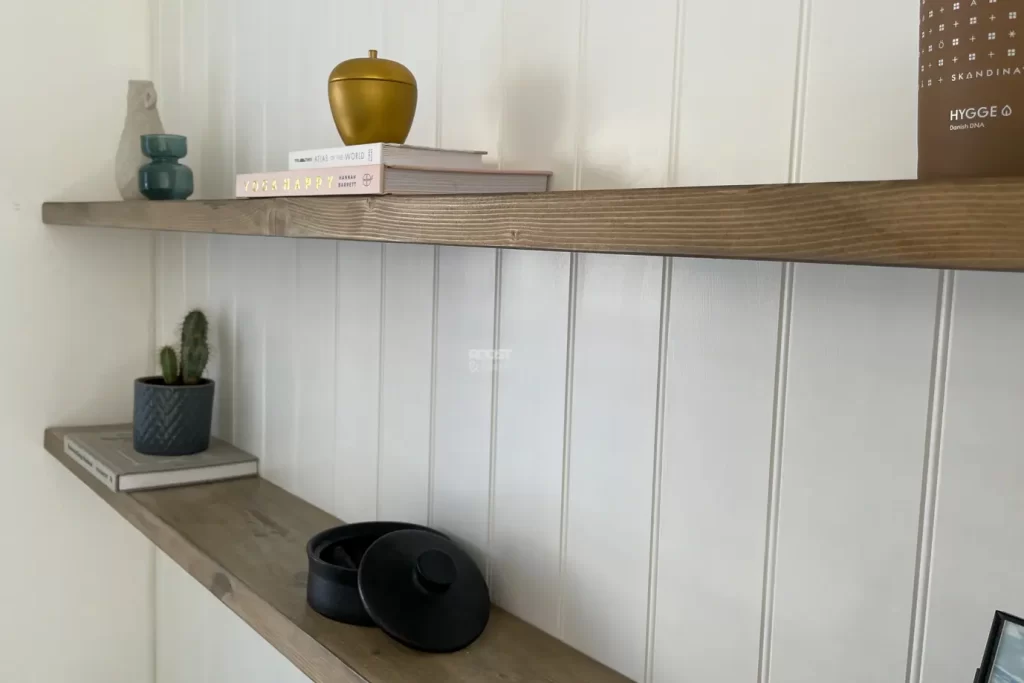
Step 15: Make your long shelves
Ideally, we wanted oak shelves up here to match the oak mantel on the fireplace. Sadly the quote for oak shelves was way out of budget, so we had to come up with a plan B – scaffold boards!
We used scaffold boards for my DIY floating dressing table, and they worked out great. So we decided to do the same again.
The scaffold boards we ordered in from scaffolding-direct.co.uk were really affordable. They just needed a little bit of a glow up!
First James removed the silver metal from the ends. Word of warning – be super careful as these are like razor blades. James left a nice little trail of claret from the patio to the kitchen sink after slicing his thumb on them! The scaffold boards were also a bit too chunky for what we wanted in this room, so we sliced them down to make them a little narrower at 18cm wide.
Next I sanded them back using 80 grit paper first, before switching over to a 140 grit paper to finish them off.
This is where it all went wrong!!
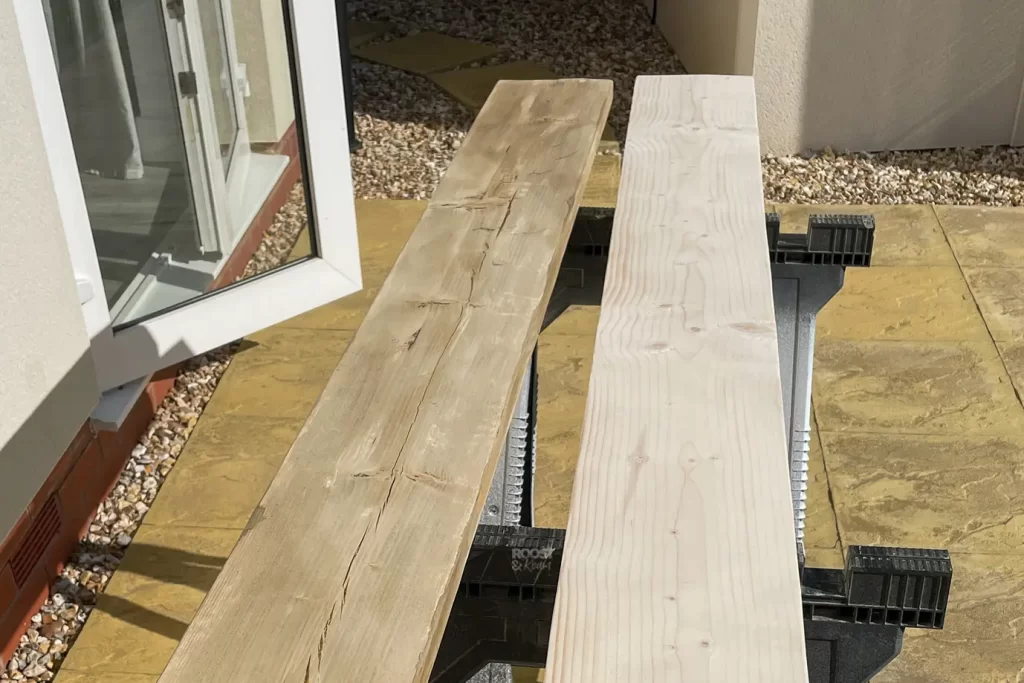
We painted them with the same paint ‘light oak’ that we used on the mantle, and my DIY floating dressing table. But this didn’t go too well this time! I think it was because the pine scaffold boards were brand new which made them a super light pine. The light oak paint ended up turning the scaffold boards grey, and they didn’t have the same warmth in them as the mantle did.
To try and rectify this, we grabbed a tin of ‘medium oak’ wood stain by Ronseal, and applied 3 coats in total. This was a fail too, as that ‘medium oak’ just turned them an alarming shade of Simpson yellow!
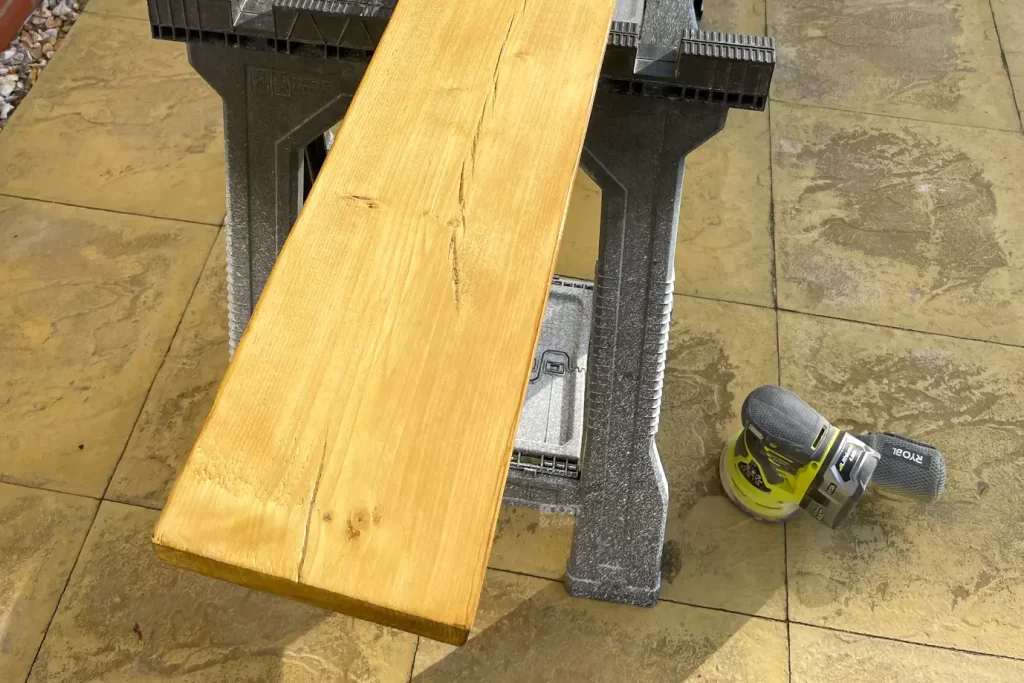
I then tried sanding it back slightly, before applying a layer of the ‘light oak’ on top. This helped knock out a lot of the yellow tone, but it still looked awful.
So, we ended up going back to B&Q and trying a different ‘medium oak’ stain – this time they had the ‘good home’ range in stock (same brand as our light oak stain). First I had to sand the plank of wood all the way back to pine, which took a few battery swaps on the Ryobi orbital sander, and a dead arm.
To stop the colour being too overpowering, we watered down the new medium oak paint so that it became a nice light wash of colour. This concoction was 2/3 paint and 1/3 water, which we stirred together in a little paper cup! We went for a total of two coats, then finished it off with the light oak as a top coat. It ended up being a pretty close match to the fire mantle! It just all took a lot more time and effort than we would have liked.
Top Tip: Remember to dust off your shelves before you paint them. Use a damp cloth to remove any dust, otherwise you won’t have a nice result at the end.
Step 16: Attach the shelves to the wall
James then had to line up the shelves and drill holes into the scaffold planks in exactly the right spot. We rested the shelf on-top of the brackets, and then marked a line either side of the bracket. James then marked where the middle was between both lines, and drilled a hole in the centre.
Before James pushed them on, we also squirted some CT1 into the holes and a few dots along the length of the plank for extra grip and security!
Top tip: Scaffold boards can be a little bowed, so you might need to give them a really good whack with a rubber mallet to get them on.
Conclusion:
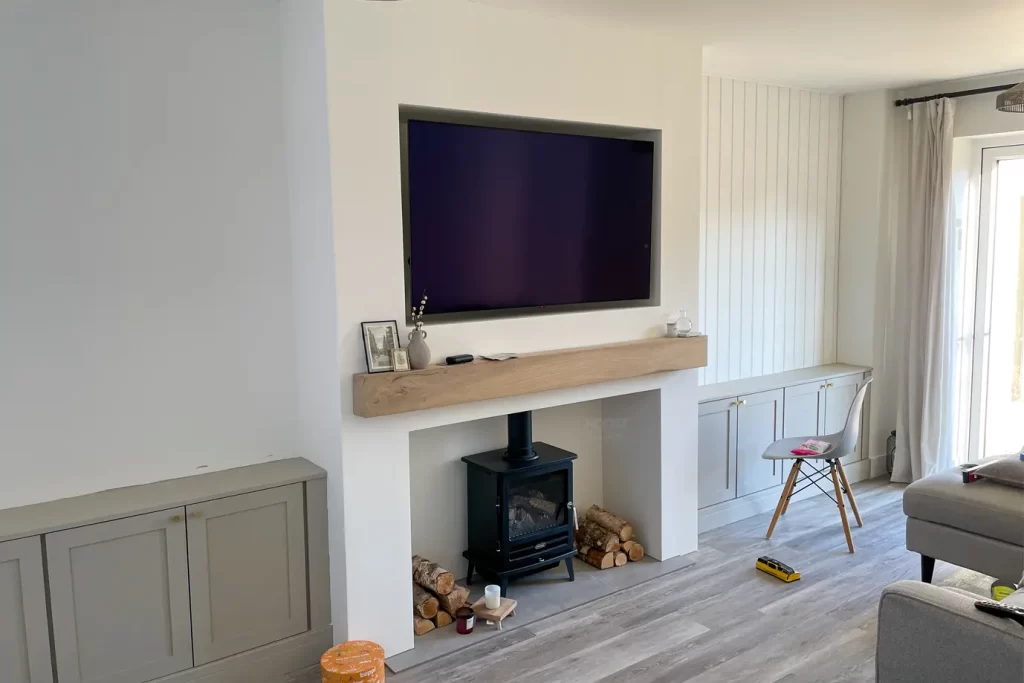
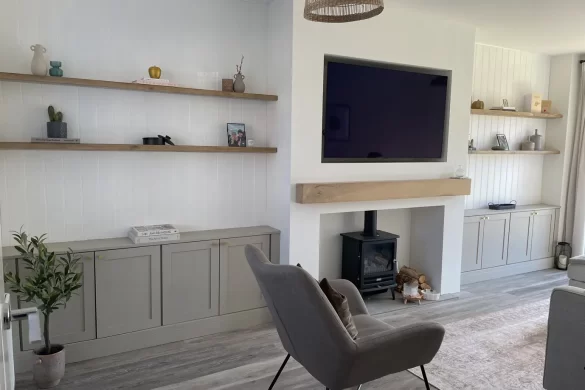
Hurray – YOU did it! You just built your very own alcove cupboards! Now it’s time to style up your shelves and admire all your hard work. So kick back on the sofa with a brew, and give yourself a well deserved pat on the back!
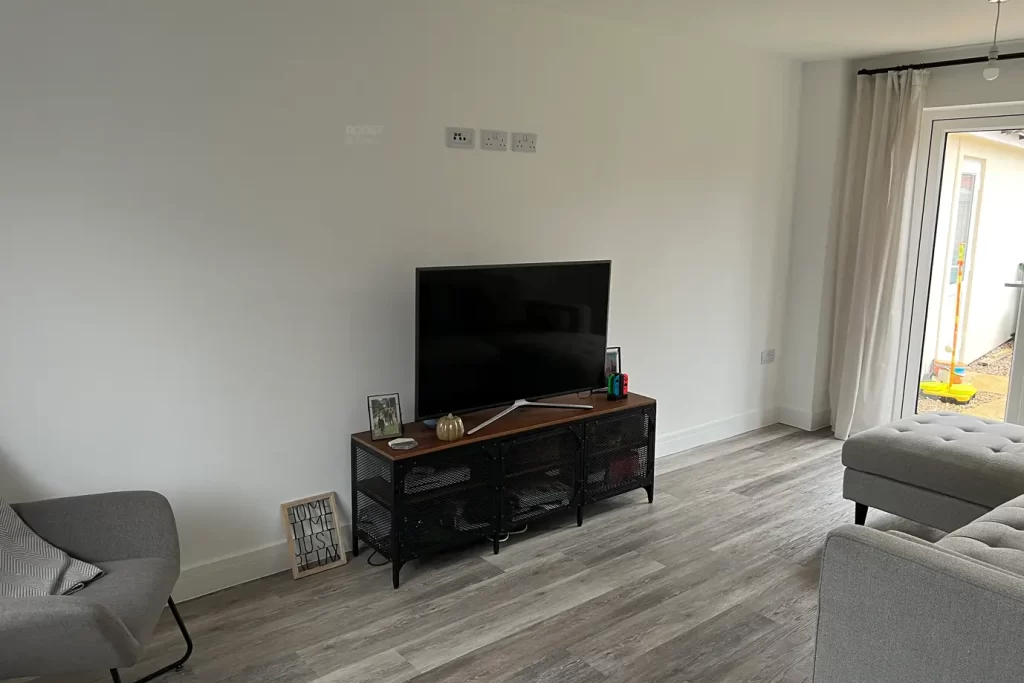
Can we just take a moment to compare our lounge when we bought the house last year, to what it looks like now. What a transformation!

Let me know if you give these alcove cupboards a try, I’d love to see your creations and how you got on.
Other posts you might be interested in:
- Adding a Stair Runner to Our New Build House
- DIY: How to build your own sliding barn door
- Adding a Kitchen Island To Our New Build House
- Building a False Chimney Breast for Your Cosy Wood Burner
- How We Grew Our Own Lawn & Saved £700
- DIY: How to Build A Narrow Floating Shelf Dressing Table in 7 Simple Steps
9 comments
Hello! I love your alcove cupboards! They look so professional. Just wondered what dimensions they are? We have super long alcoves (2.3m) but think this could also work in our space. Cheers!!!
Thank you so much Kathryn, I’m sure they will look lovely in your space, ours are a little shorter (just under 1.8m). We will be creating an e-book soon with all of our detailed dimensions for the frame work and finished cupboards.
Hello. This looks like a perfect plan for our living room. One question if you don’t mind…what did you do with the skirting on the side walls? Did you remove it or build the frame up to the skirting and then fill the gaps to the side wall with MDF?
Hello, thanks for your comment. We also removed the skirting from the side walls by using a multi-tool to cut it inline with where the unit would sit. Once it was all finished we caulked the joins so it looked seamless. Hope that helps!
Thanks for the prompt response. That’s what I thought you must have done but couldn’t tell from the pictures. Looks like you have done a great job.
Hey, looks great – how deep are these cupboards? around 250mm? Thanks!
Sorry for the late reply Kristian! They are indeed 250mm deep. Thanks!
Looks amazing, great effort. Wondering what paint you actually used for the cupboards?
Thanks Ruth! We used Valspar Trade wood & metal paint in eggshell, which was colour matched to F&B Hardwick White. Hope that helps!