
As if new build houses aren’t expensive enough, it appears that across most housing developments, it’s common for grass not to be included in your purchase price. Who knew?! We thought grass (and basic flooring) would be included. Instead, you get dusty concrete floors and mud pits for gardens.
In this article...
Price for getting our garden turfed
We were quoted the best part of £900 to get our garden turfed. So, on that note, we set out to seed it ourselves and take on the challenge as landscaping novices.
Ground prep work
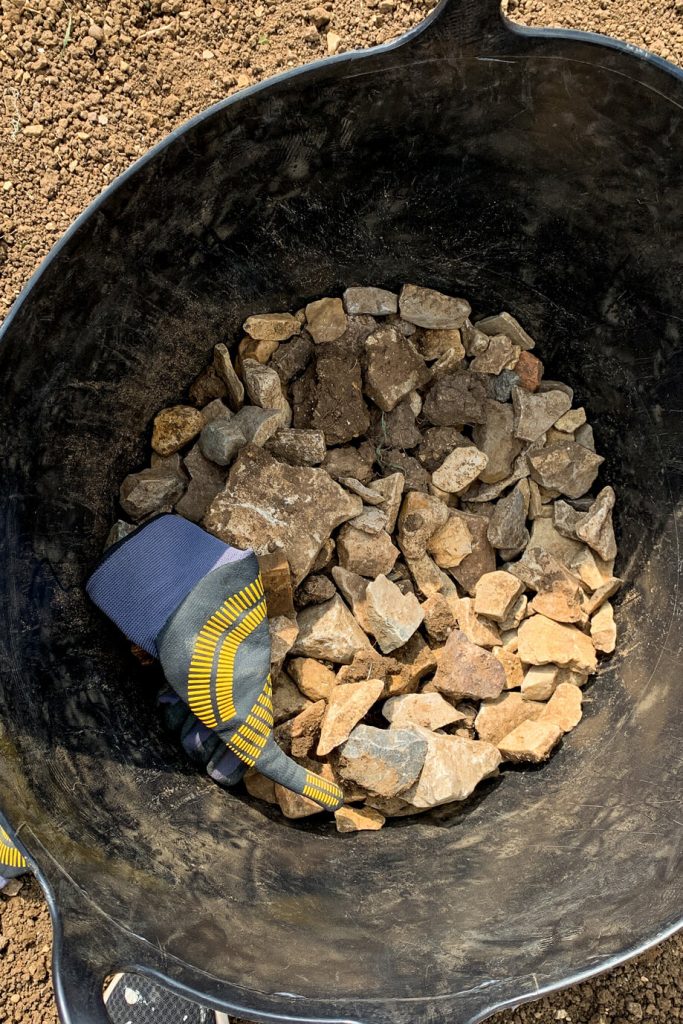
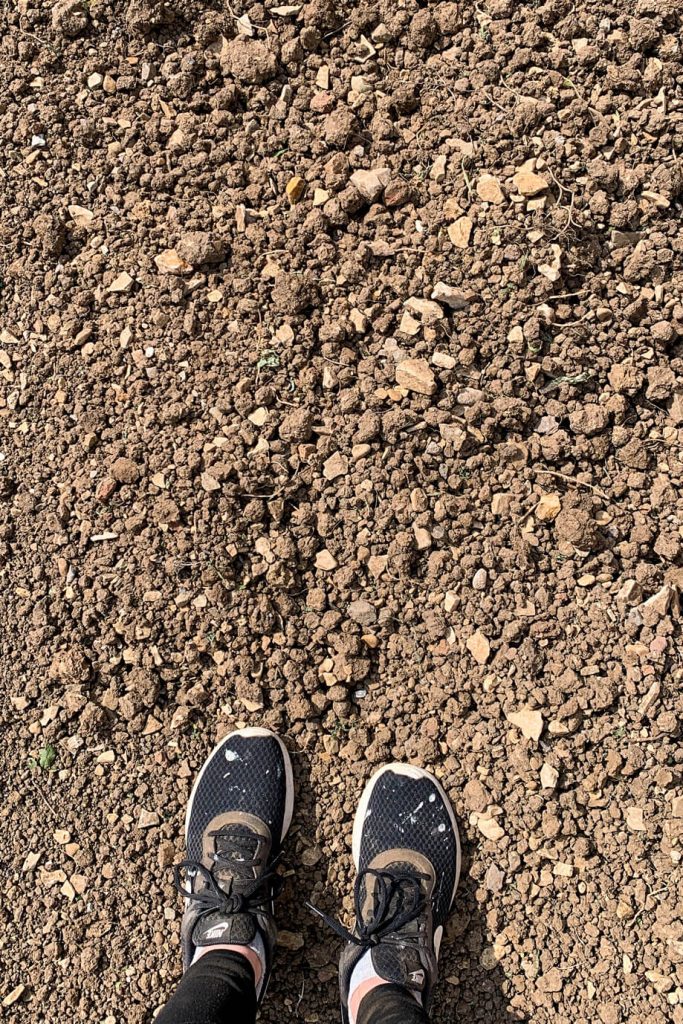
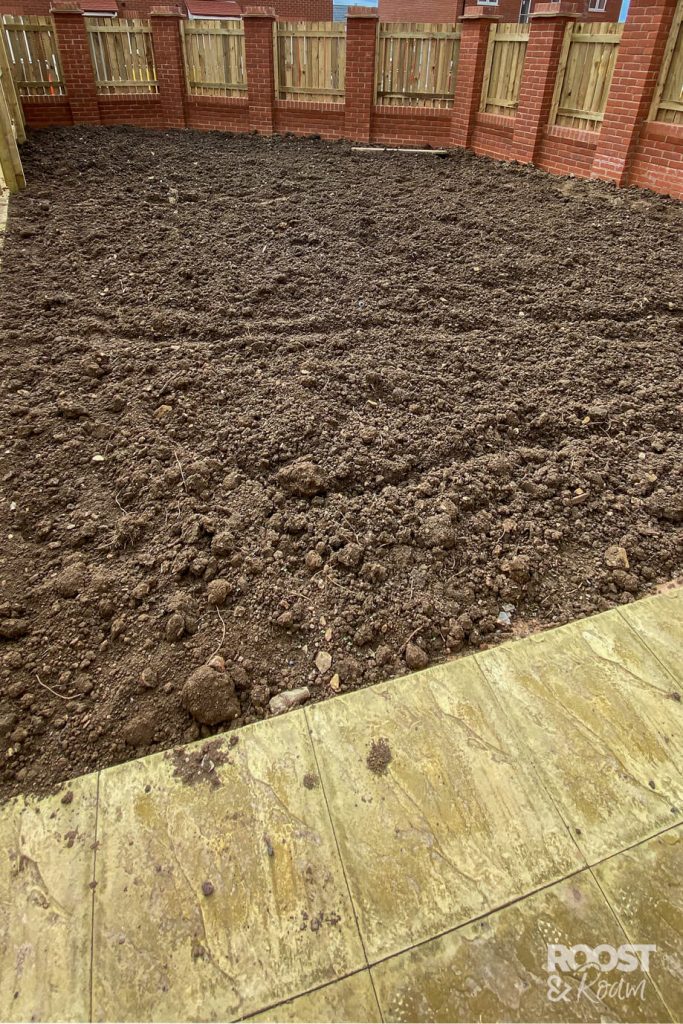
Unfortunately, the topsoil which the development had laid for us was utter rubbish. Consisting of about 50% rocks and 50% dirt. I don’t have green fingers, but I’m so glad we didn’t pay for the turf. It would have died off pretty quickly, and we would have poured all that money down the drain. (as our neighbours have now realised)
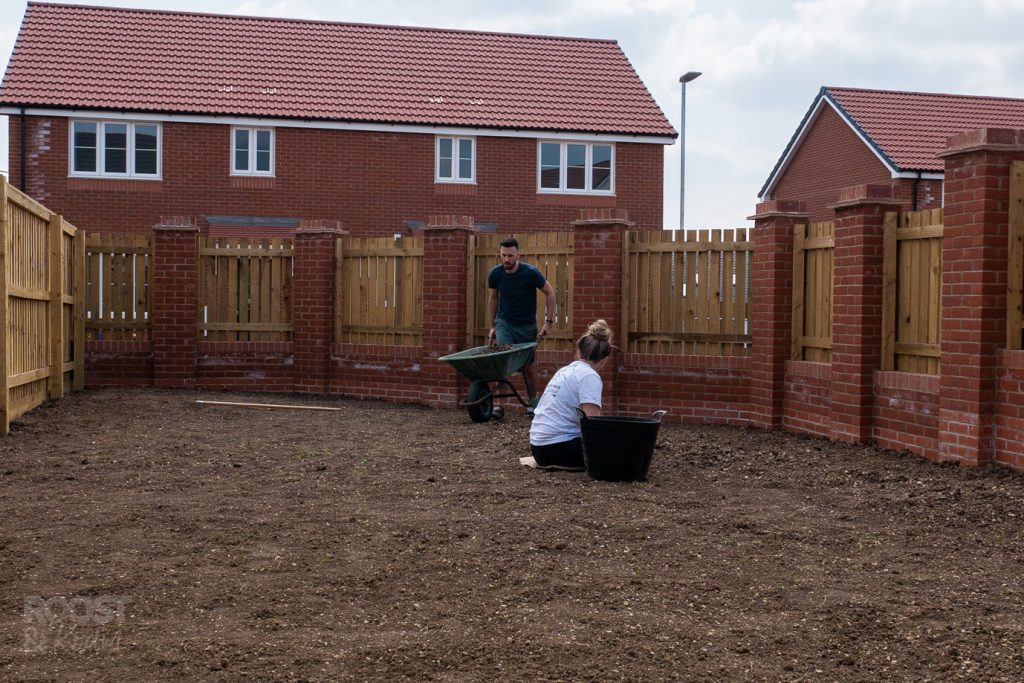
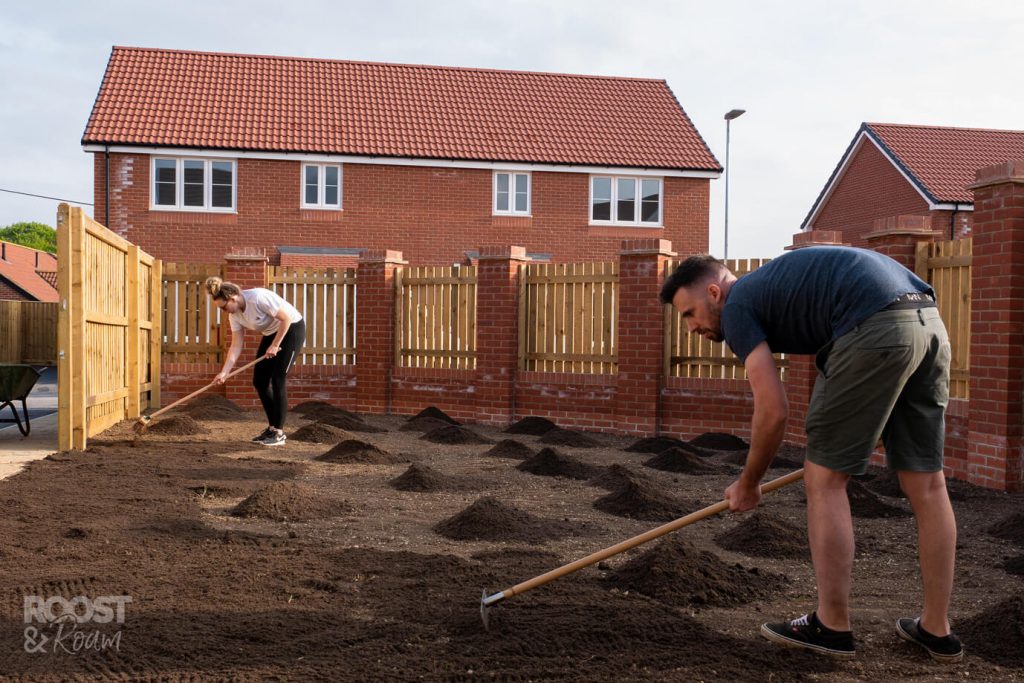
Because of all the unwanted rocks, that meant, the first thing we needed to do was remove as many of them as possible by hand. We picked out 6 buckets worth of these rocks!
Then we did the back-breaking part of digging out a small amount of soil all over, and we tried to level the garden the best we could with the tools we had. eg, a shovel, a plank of 2×1, and our feet!
Creating a new topsoil
Next up, we needed to add some good quality topsoil back in. We paid for a 1 tonne dumpy bag of topsoil which was delivered from buyturfonline.co.uk. Opting for their root zone; a blend of natural soil and silica sand – perfect for seeding a lawn apparently! Well, thats what our gardening research told us anyway.
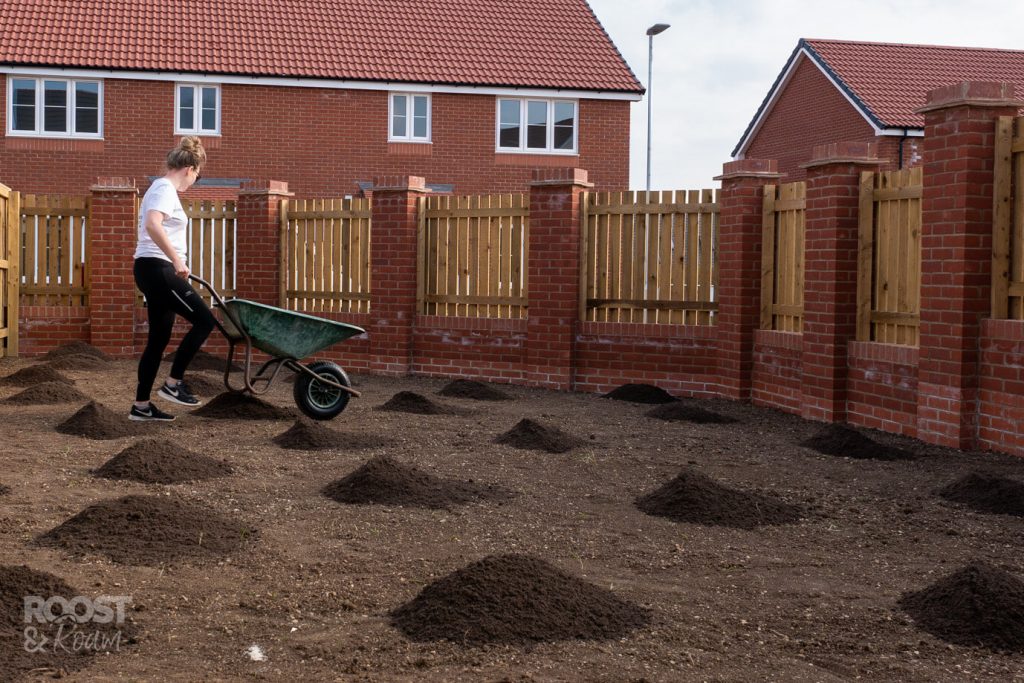
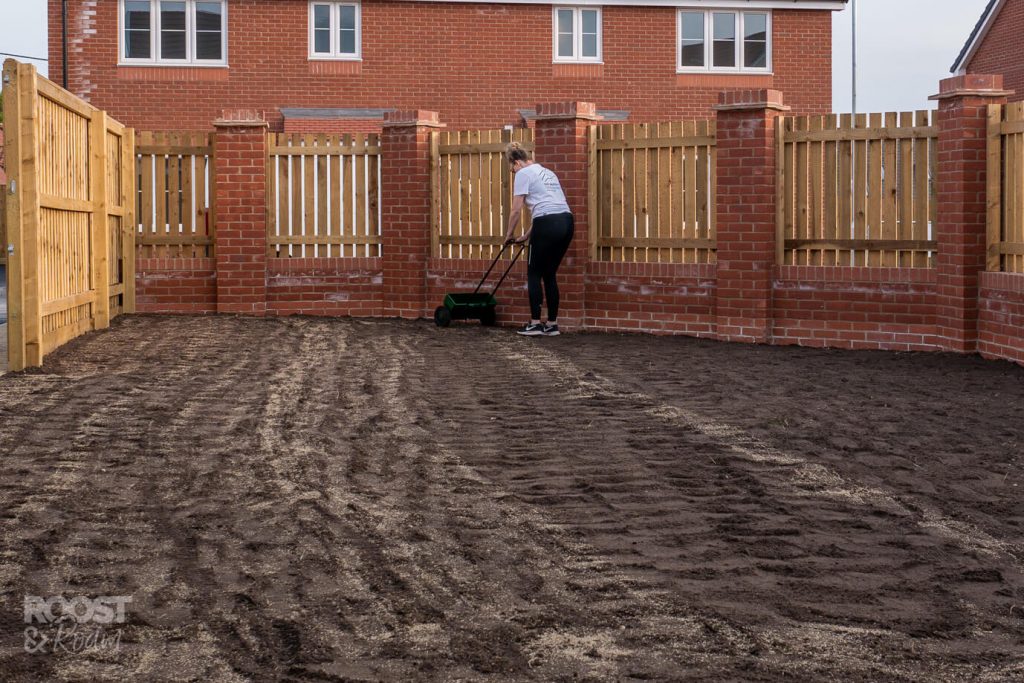
James was in charge of shovelling the new soil into the wheelbarrow, whilst i wheeled it through, and created lots of mounds all over the garden. Next we raked it out (i used a broom, as we didn’t have another rake!) and did the duck waddle walk all over it. Not only to compact it slightly ready for the seed. But to provide free afternoon entertainment for our new neighbours too.
Spreading the grass seed
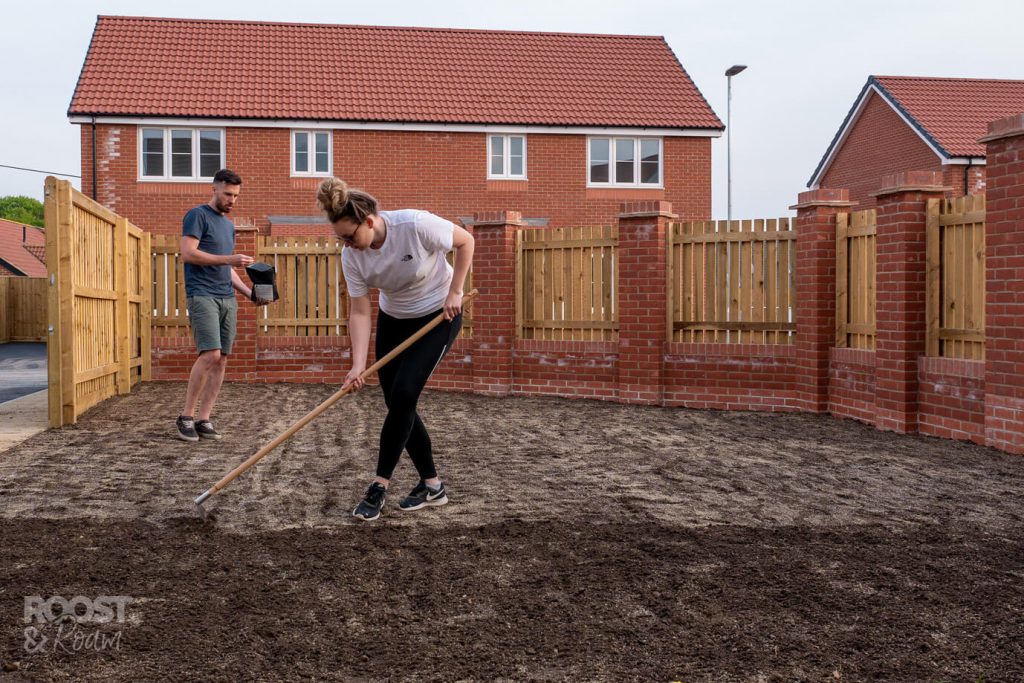
Next we filled up our seed spreader with grass seed and started laying an even coating. In hindsight, getting a spreader probably wasn’t required – but it was fun to use, plus we sold it on once we had finished with it. Just for info, we bought enough grass seed to allow 70 grams per m2. We also sprinkled over a little bit of grass seed fertiliser by hand. Just to help give it it’s best shot!
We carried out lots of research on which grass seed to go for. Wanting something hard wearing that could withstand the boys playing football on, along with something that would survive the heat of a south facing garden. In the end we opted for Barenbrug’s Sport Extreme which we ordered from Collier Turf Care . The seed is 100% perennial ryegrass, usually used in areas such as golf tees, fairways, cricket squares and tennis courts. A strong grass for high wear areas.
We then raked over it again lightly so the seeds were a little more covered.
Helping it grow
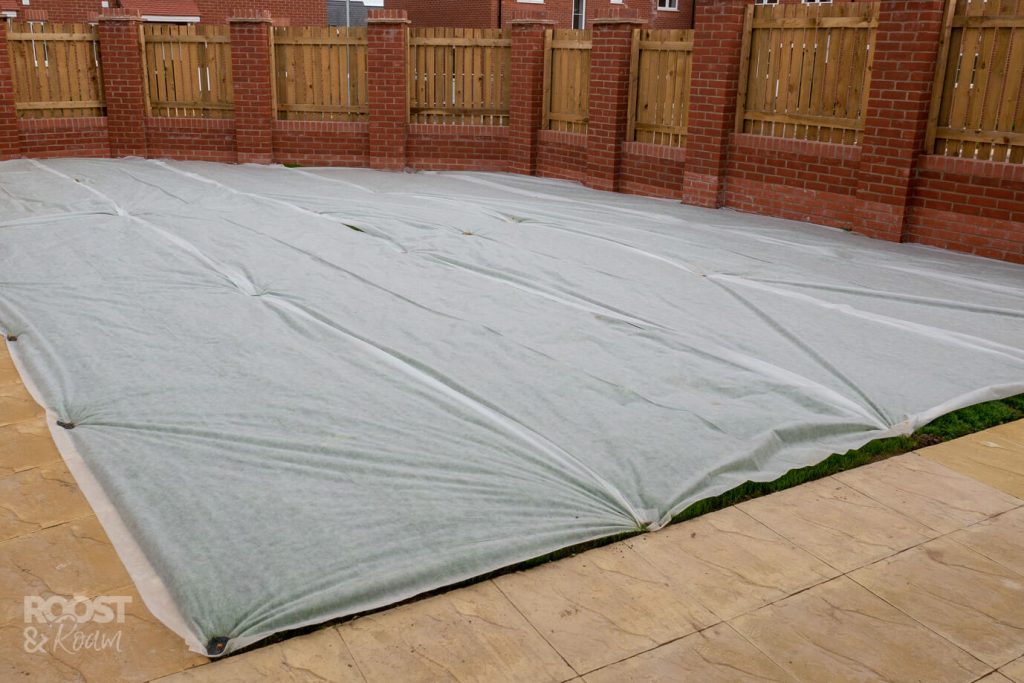
James ordered a garden fleece which we pegged into the soil to prevent it from blowing away in the wind. The garden fleece isn’t necessary, but it helps protect the seeds from getting washed away by rain, or becoming an easy meal for the birds. It also helps to create a greenhouse for the seeds, keeping them warm and providing an extra bit of moisture from the condensation.
We watered the grass twice a day, everyday, giving it a really good soaking every time. Luckily, we happened to time seeding our garden perfectly; lots of glorious sunshine for a couple weeks straight.
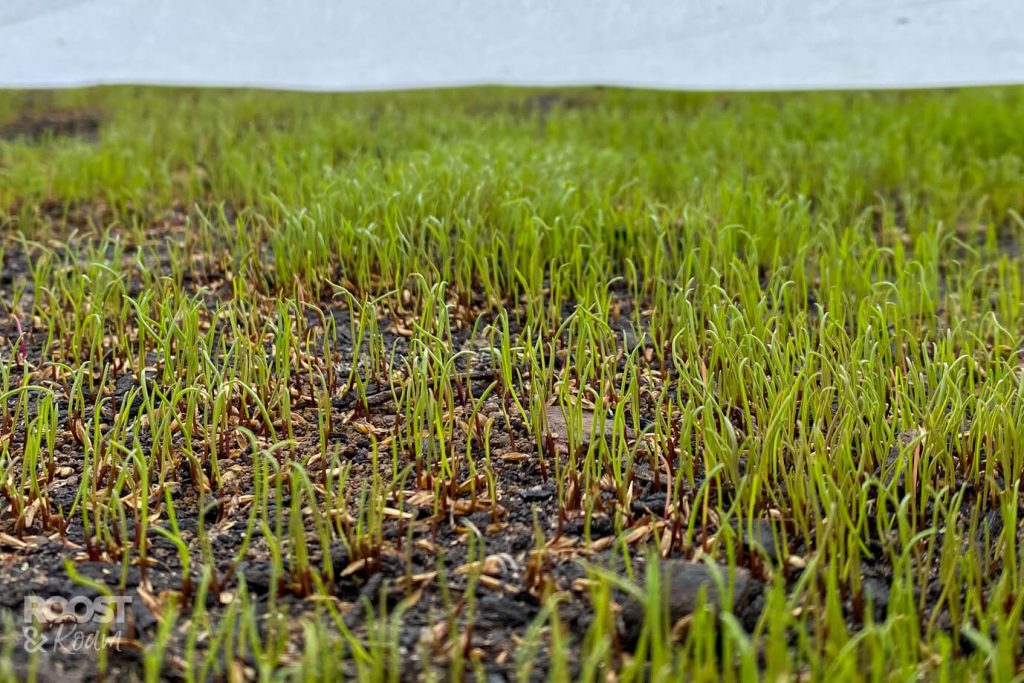
The first two weeks after seeding
We couldn’t quite believe it, after 6 days we already had loads of tiny green shoots sticking out the ground, which was very encouraging to see! We carried on watering the grass twice a day, and by day 13 the entire area had turned green. The garden fleece came off, and spread a little more seed over any bald patches, then recovered it again for a few more days.
18 days after seeding
After 18 days, we took the fleece off for good; the garden was now lovely and thick. After a couple more days it was ready for its first cut as it had already grown so long!
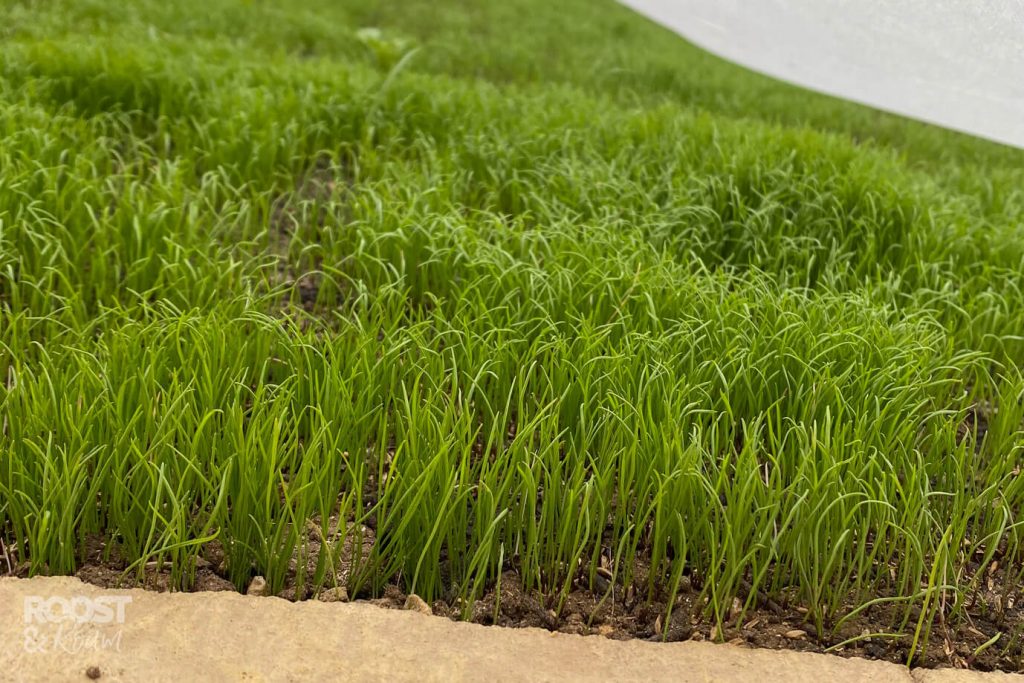
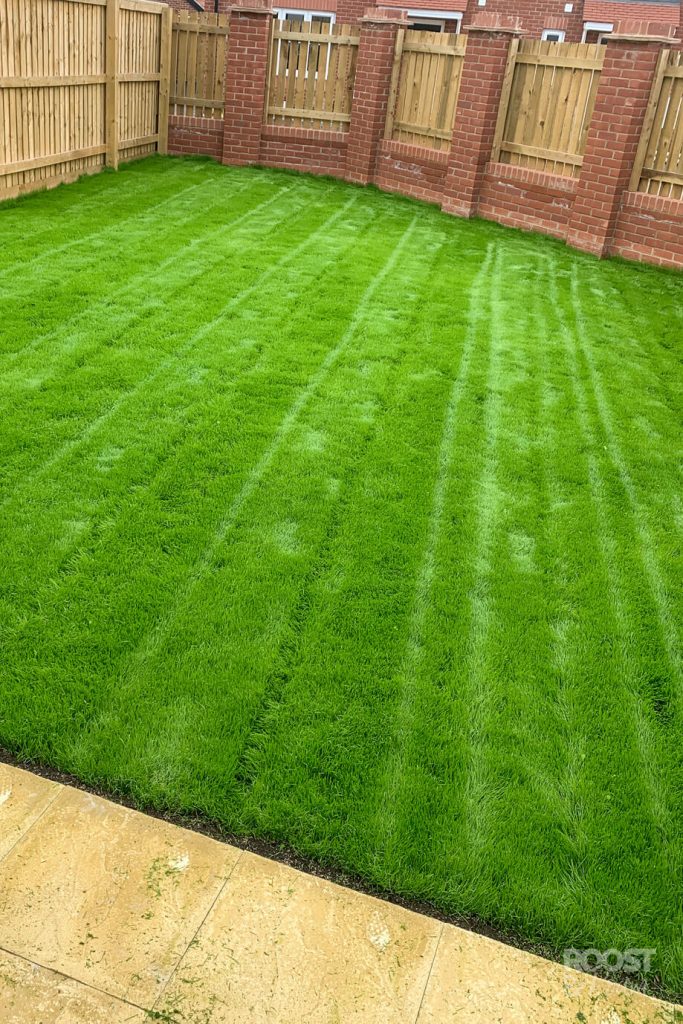
3 Weeks after seeding
Our garden now looked like this – we were so impressed that all our hard work payed off so quickly! The lawn was so thick and bright green, it actually looked more like artificial grass!
Grass maintenance
We carried on watering the grass twice a day, and tried to keep the boys off it for a total of 6 weeks. Just so the roots could really take hold before they started running all over it.
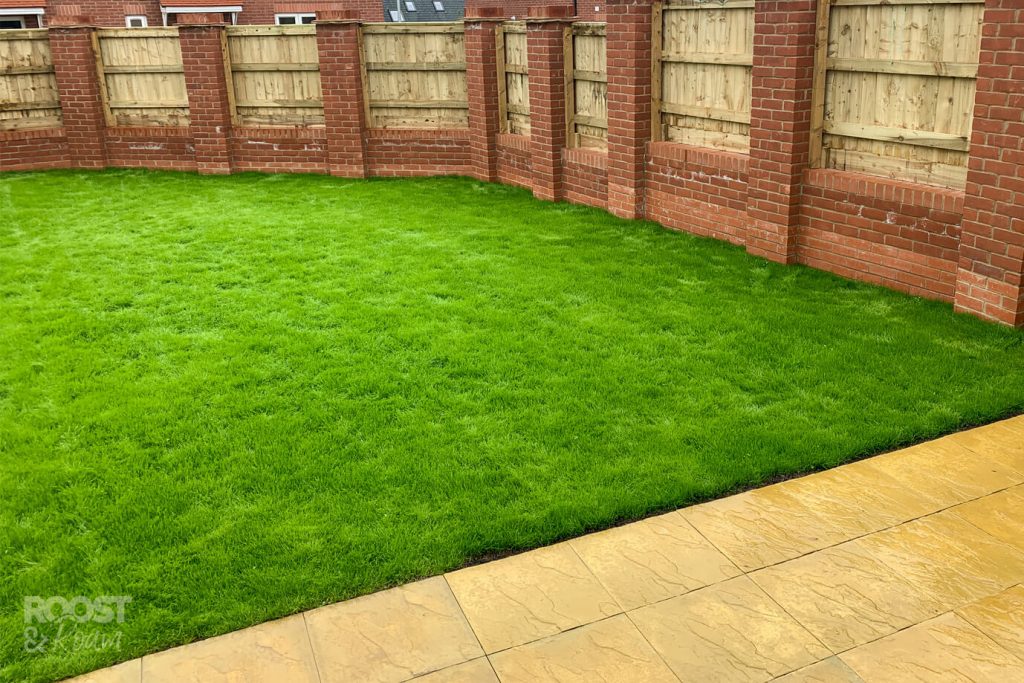
It’s now had a super hot summer, along with lots of football matches, and knee slides all over it. It’s holding up so well. Not quite as perfect and green, but just as strong & thick!
How much did it cost to seed the garden?
It total, it cost us about £200 to transform our mud patch to a luscious green lawn. Saving us a whopping £700!
If you enjoyed this post or found it helpful, and you’d like to show some love & support. You can now treat me to a cuppa on the link below, thanks so much if you do!