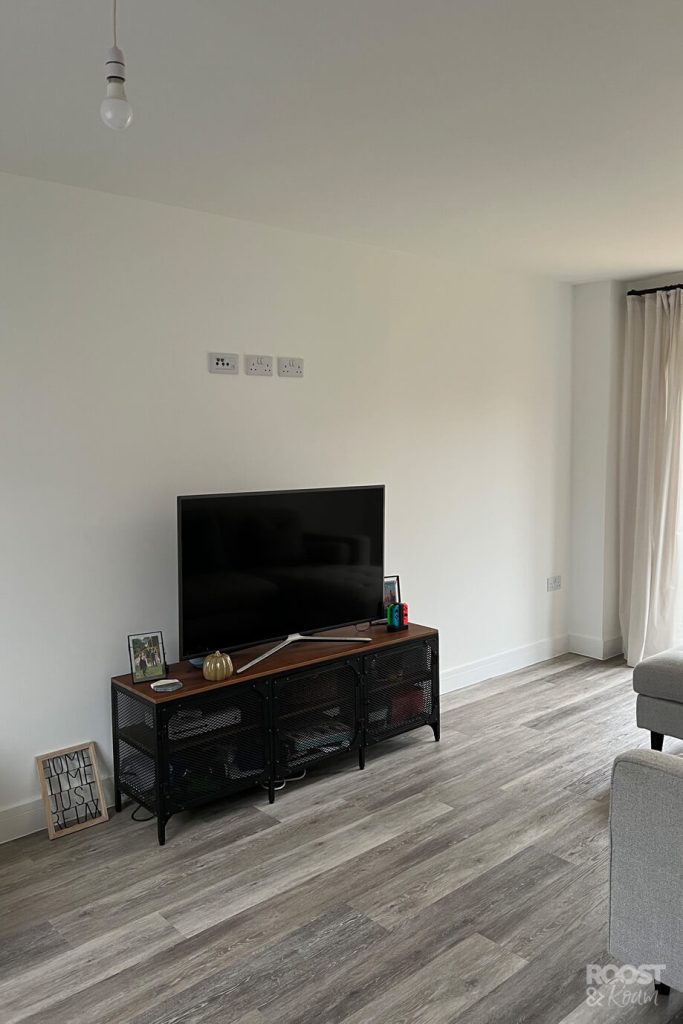
Our new build lounge is dual-aspect, with windows at the front and French doors opposite. Its a decent size room, but has a tricky rectangular floor plan which lacked any main focal point. From day dot we planned to build a false chimney breast and inject some much needed character and cosiness to the lacklustre room.
But what do you need to build a false chimney breast, and where do you even begin?
Well, keep reading and i’ll break it all down for you with our step-by-step guide. Plus our exciting new e-book launch reveals all our detailed measurements and dimensions to save you a lot of the legwork on your own DIY project!
In this article...
Adding an electric wood burner to our lounge
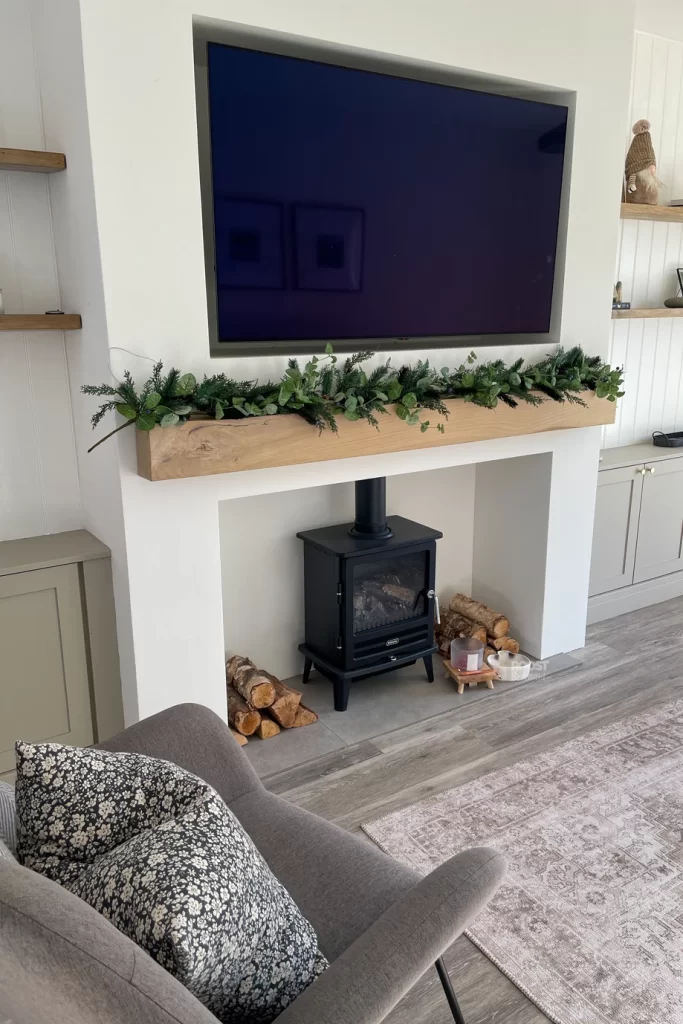
We failed to find anyone who had built a false chimney breast wall quite like ours. Everyone seemed to do the more modern media wall, consisting of long slimline electric fires. Whereas we wanted a false chimney breast with a traditional style wood burner.
I hope my DIY guide helps anyone who’s looking to build a wood burner chimney breast like ours.
Our rectangular lounge without a false chimney
Other home projects ranked higher in priority, so it wasn’t until December (9 months after moving in) that we could tackle our much needed lounge transformation.
Until then we put up with the lounge looking empty and drab, and made do with our industrial style TV stand from the old house. It was far from the aesthetic we were aiming for, and we couldn’t wait to transform this room into something far more cosy, with modern cottage vibes.
Saving money by building a DIY chimney breast wall
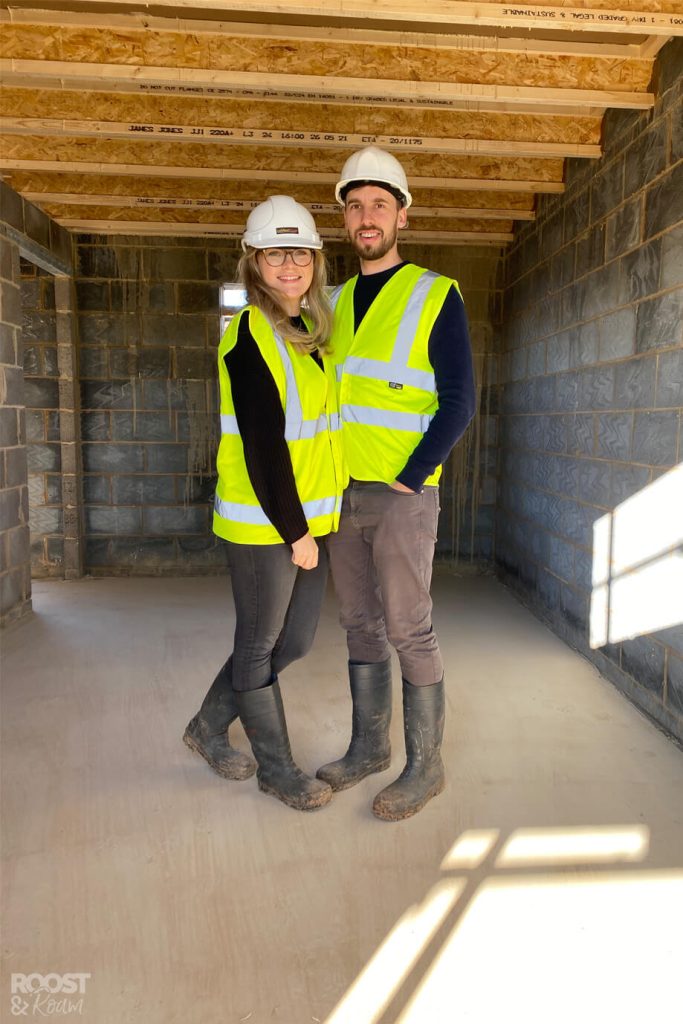
A carpenters day rate doesn’t come cheap, nor would it have married well with our measly just-before-Christmas budget. Therefor, James (along with a little bit of help from me!) took it upon himself.
He downed tools on the IT day job, and took on the challenge of carpentry, dry lining, mudding, tiling, and even dabbled a bit as an electrician too.
The end result looks uber professional and I’m incredibly proud of his workmanship! It’s become our favourite room in the house, and somehow it made it feel more spacious too. All we need now is some soft furnishing and interior touches like a big rug, artwork and décor pieces.
I’ll include all the bits that needed a bit of tweaking too, in the hopes that you’ll be able to avoid these stumbling blocks yourself.
Let jump in to it!
1. Draw and mark the false chimney breast on the wall
First-things-first, I grabbed a notepad and drew a quick sketch of what I pictured our chimney breast wall to look like.
To visualise the scale better, we then transferred my sketch directly onto the wall using good ole decorators tape. In preparation for this project we had already bought a new 55 inch OLED TV and Dimplex Opti-myst fire, so we had those dimensions at hand. First we pinpointed the middle of the wall, then marked out the size of the fire. From there we just played around with the rest of the spacing until we were happy with it.
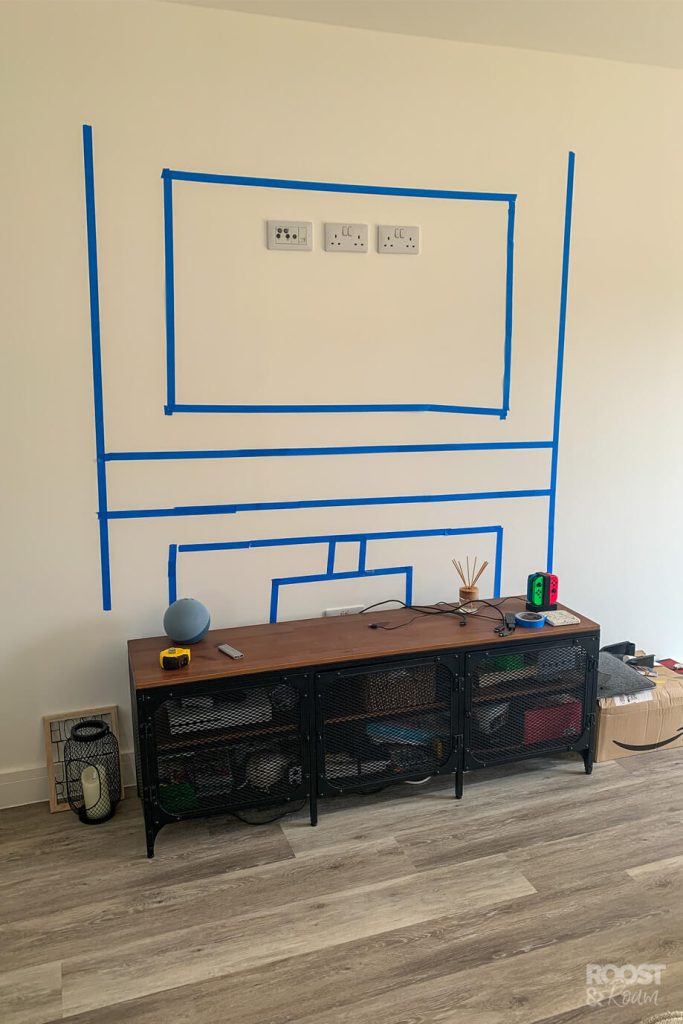
Once it was all marked out on the wall, we could then measure and calculate the quantity of wood required. Luckily we still had some 2x4s left over from our garage conversion, and my parents had some 2x2s from their house build that we could use.
We took a rough guess on plasterboard sheets, and ordered in everything else we needed for phase one; like plasterboard screws, wood screws, concrete screws and drywall screwdriver bits.
The skirting boards were ripped up, then we scanned the wall for studs using the Franklin Sensor stud finder. James drew on the wall to mark these, and the cheeky elves cut a couple holes in the ceiling to check it was right. Turns out the Franklin Sensor stud finder was spot on, and the holes were going to be covered over anyway. It made a great Elf on the Shelf day too!

2. Building the false chimney breast frame
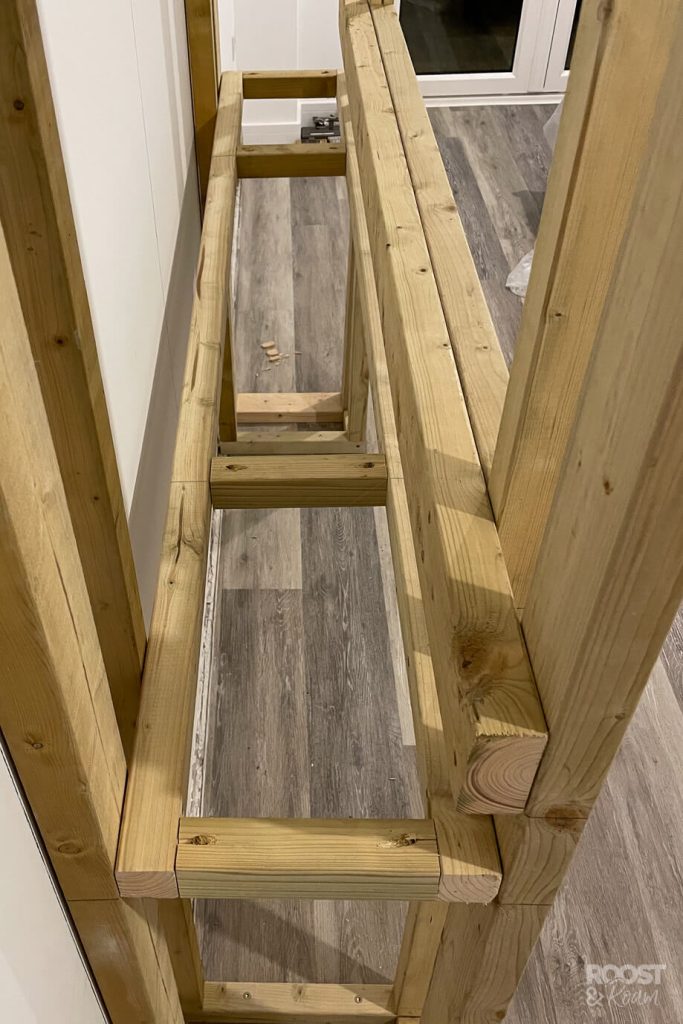
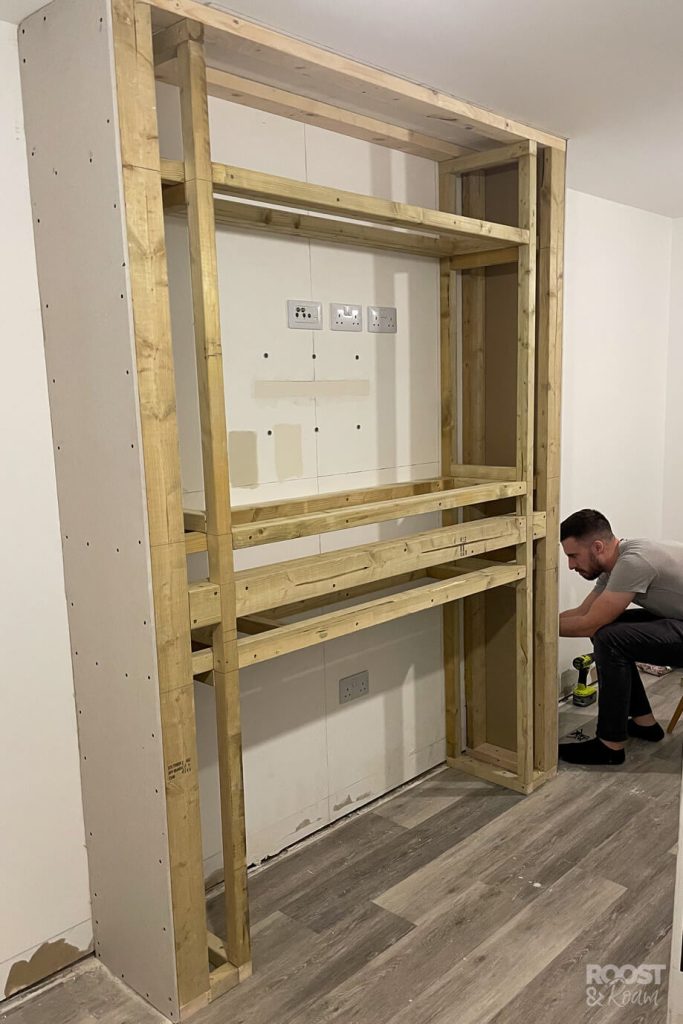
James built the top of the frame first and secured it into the ceiling joists. Then he moved onto the outer frames, securing them into the floor with large concrete screws and again into the frame above. He also screwed the vertical beam to the back wall (made of breeze blocks) making sure its sturdy and secure.

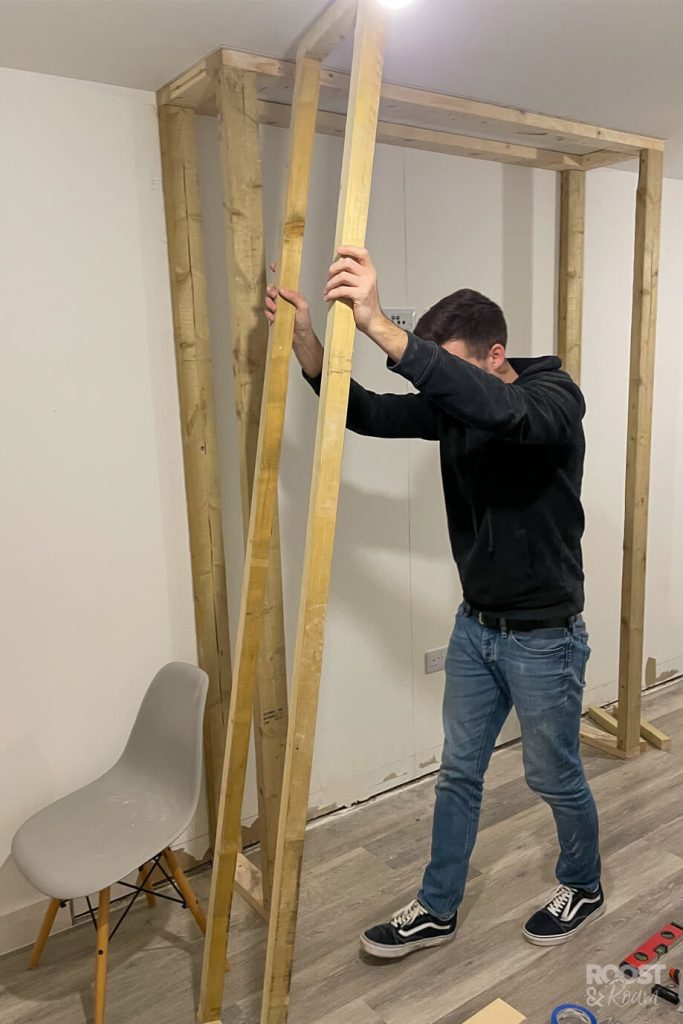
From here he built another two frames for the inner chimney wall and repeated the fixing process. We added some noggins for strength and to give us somewhere to fix the plasterboard later on.
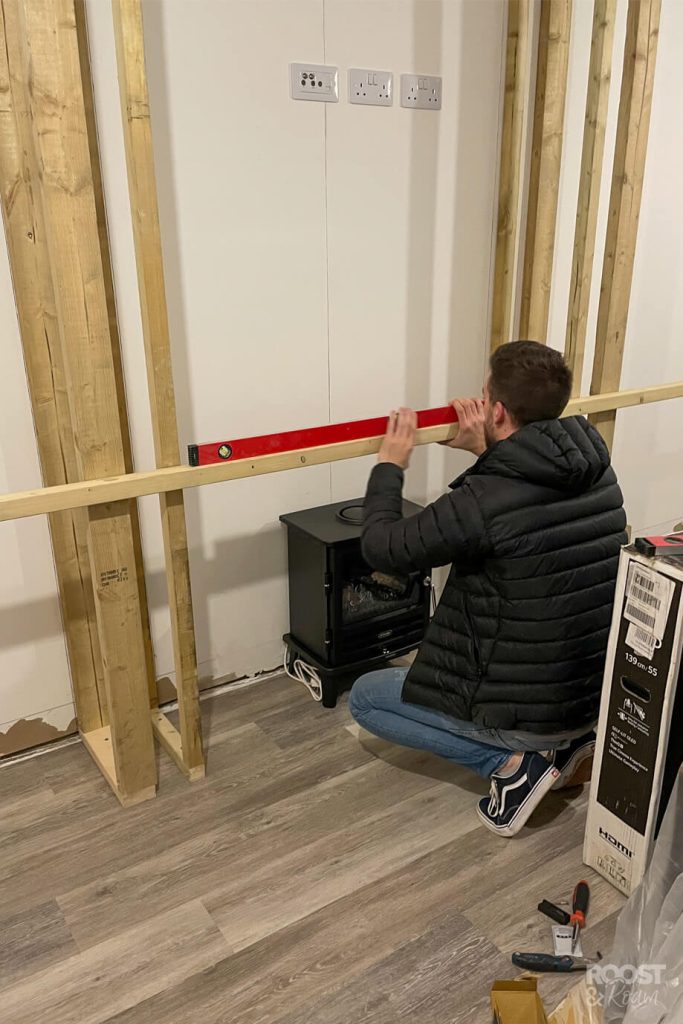
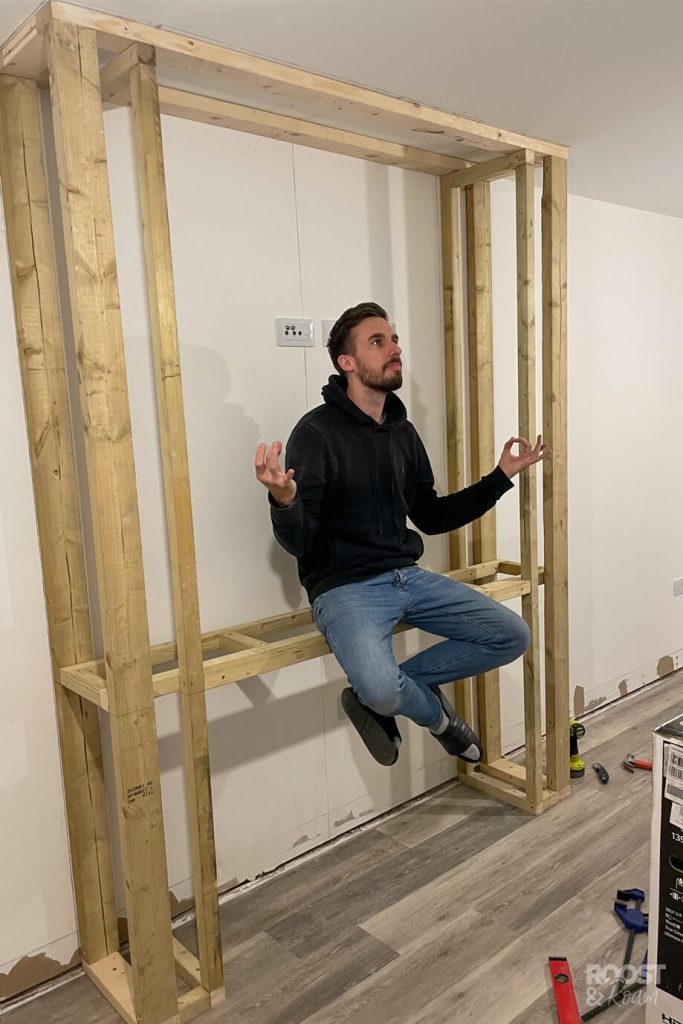
Then we started to connect it all up with horizontal pieces of wood, making it extra strong where the heavy oak mantle was later going to be secured.
After a little strength test (AKA sitting on it) he moved on to the wood that would frame the TV. Making sure to account for the thickness of the plasterboard so there would still be a 4cm gap surrounding the TV at the end.
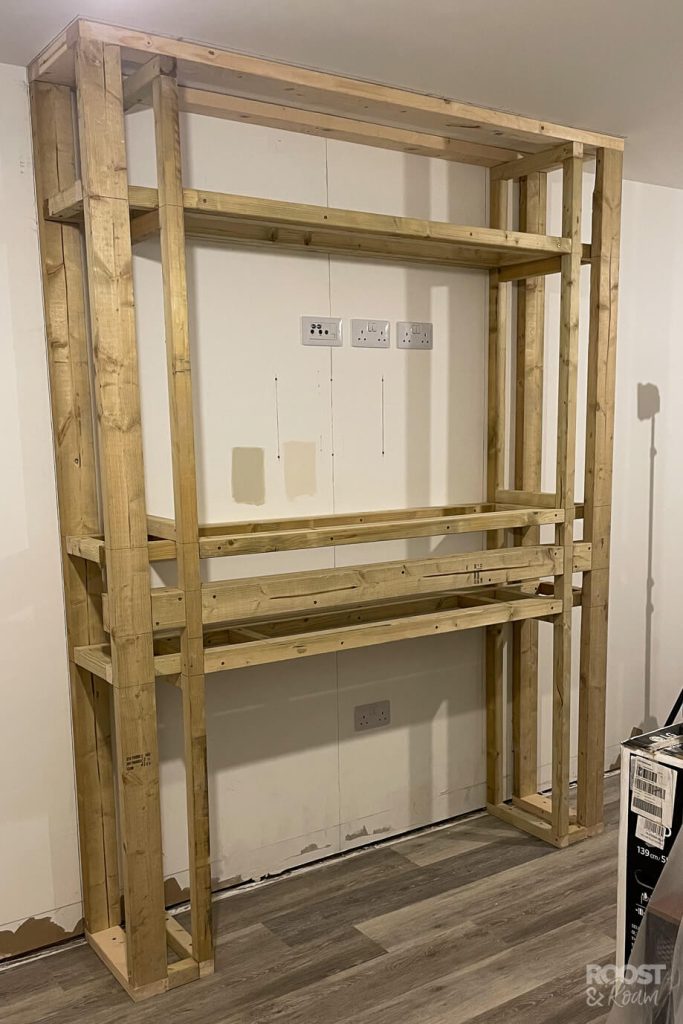
3. Fixing plasterboard to the wooden frame
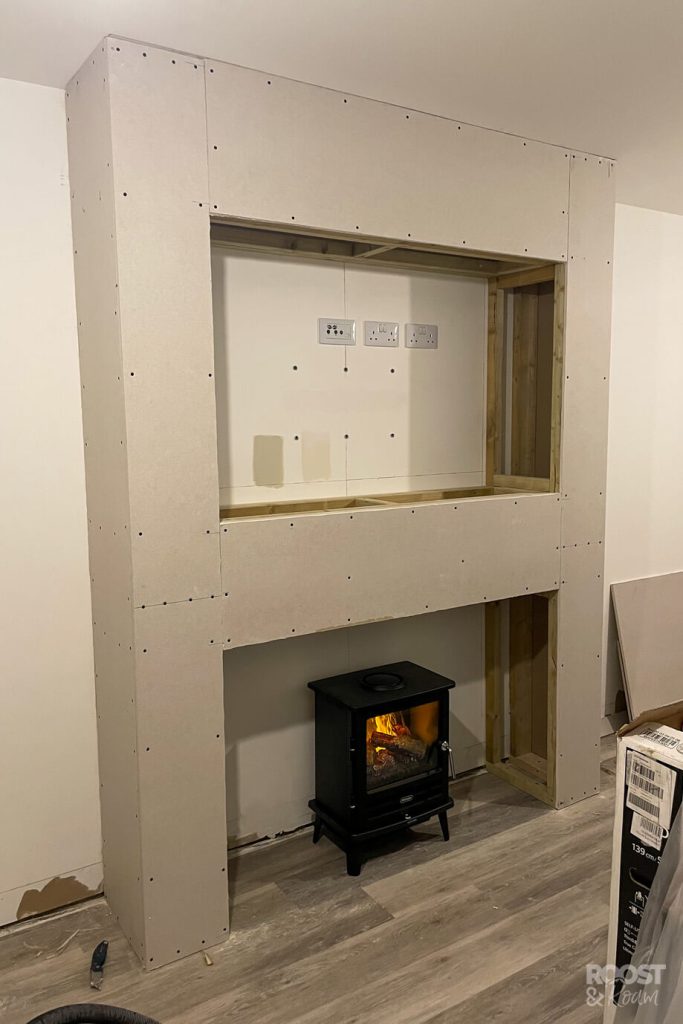
Once the wooden skeleton was complete, we moved on to fixing the plasterboard. For this project we used straight edge plasterboard as we didn’t really need feather edge like we used in the garage.
James measured and cut the plasterboard, working out the best way to have minimal joins.
less joins = less mudding work!
We fixed this to the frame using a plasterboard drill bit and plasterboard screws. I recommend using a plasterboard drill bit, as it helps the screws sit at the right depth ready for mudding.
James left a little gap inside the fireplace for a light strip to go along the back. Although this had to be changed – more on this later…
4. Cable management & accent lighting
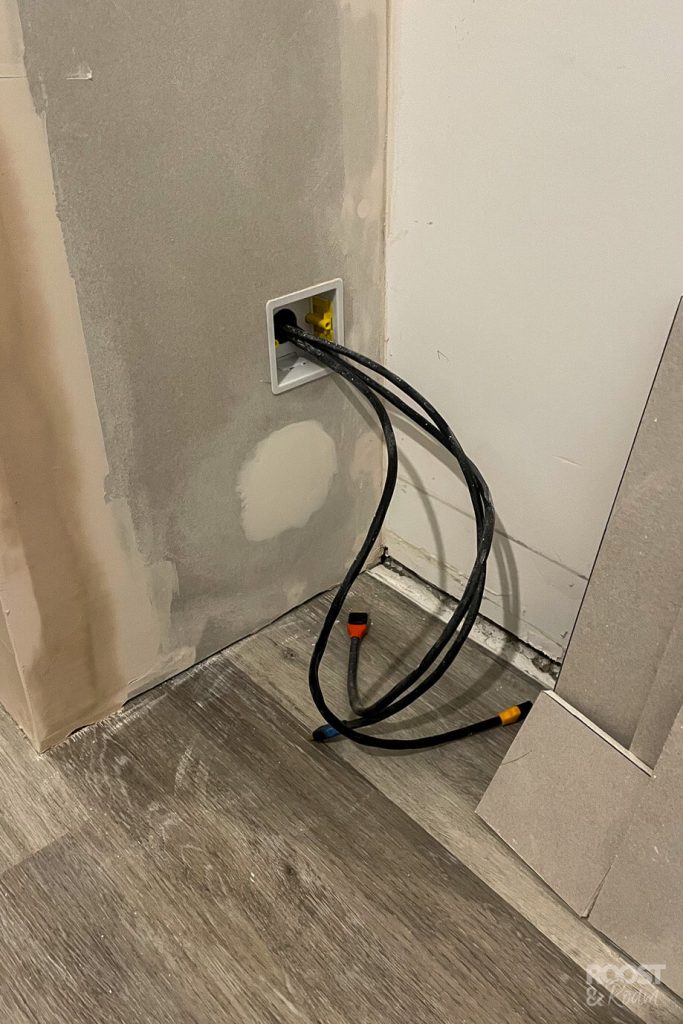
Before we enclosed the bottom internal wall with plasterboard. James cut a hole at the bottom of the external wall and fed the colour coded HDMI cables down through the internal cavity. That way all the ugly cables would be hidden away come the end.
However, this cable management actually took a couple attempts as we messed up.
First off we cut the external hole too low. Which meant when the time came to build the alcove storage (read about that here!) it would have been below skirting board height. Luckily we realised early on, so that hole was patched back up, and a slightly higher hole was created. Now the cables were able to run straight down into the alcove cupboard for the Xbox & Nintendo Switch.
We also fed an LED light strip down to add a touch of soft ambient lighting within the fireplace. Initially, we had trunking behind the TV to keep all the cables and LED light strip concealed. Unfortunately, It was too snug to fit everything in, and caused the delicate light strip to get pinched. So we removed the plastic trunking, and used a cable tidy instead to hide any sagging cables beneath the TV.
5. Adding corner bead & mudding the seams
This was James’ second go at dry-lining/mudding. Luckily it went much better than his previous experience in the garage, where he was constantly having issues with bubbles!
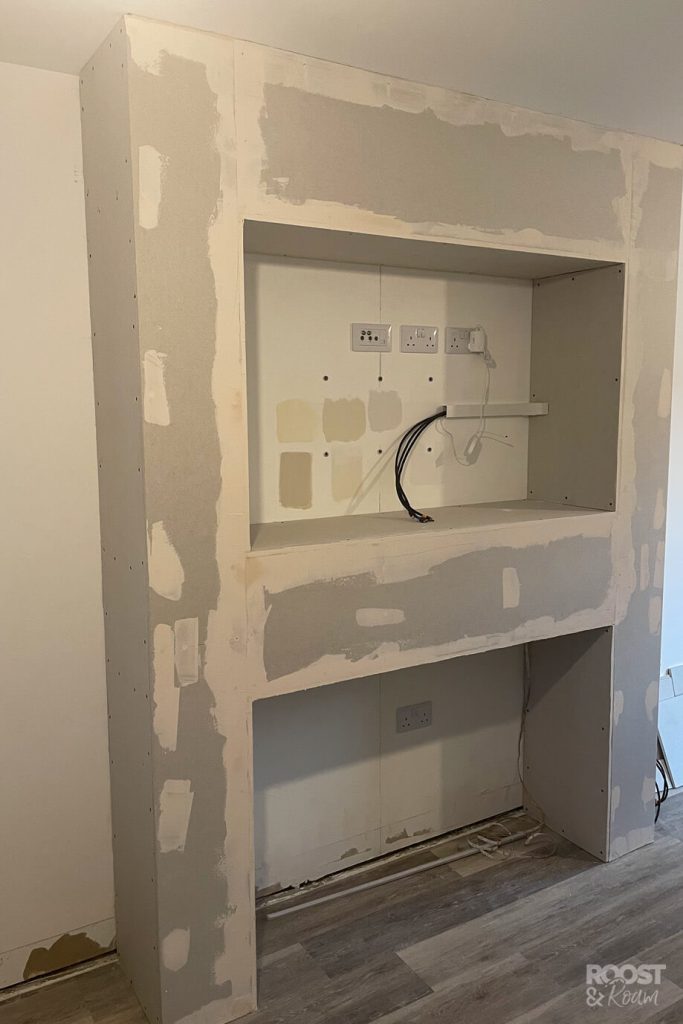
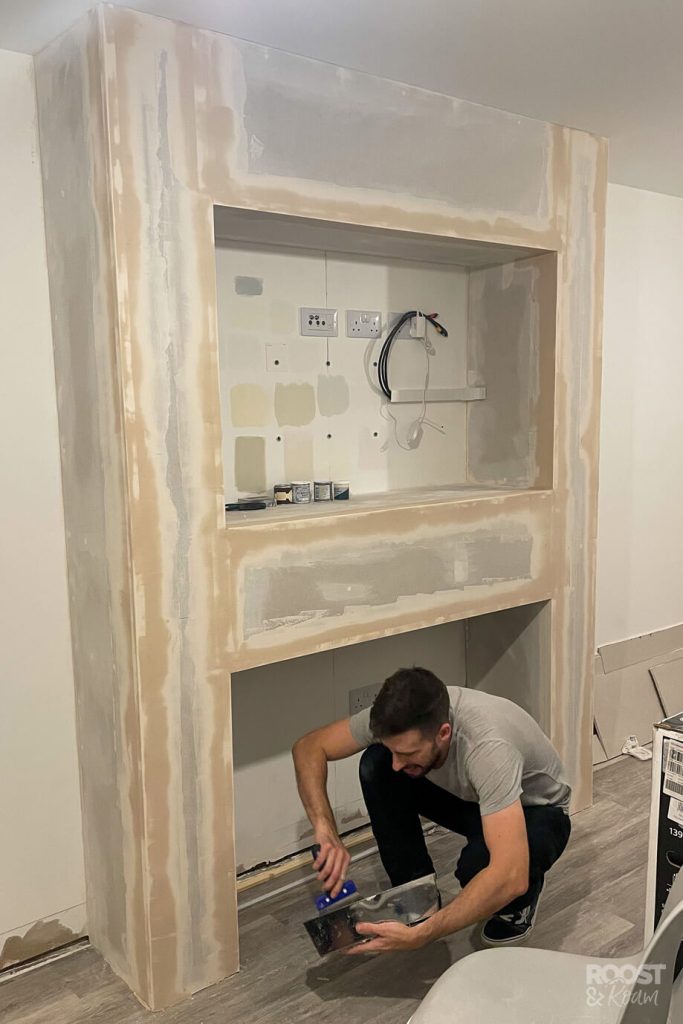
First, he filled all the screw holes and joins with some easifill jointing compound. Then he added the paper corner bead and taped all the join seams.
Then it was just a case of following the mudding and sanding back process. He did a total of 2 layers, followed by a 3rd skim coat to fill in any imperfections and groves.
6. Moving the LED strip lights
I mentioned earlier that we had to reconfigure the accent lighting. Here’s why!
Originally we left a small gap so the plasterboard didn’t kiss the back wall, leaving a small cavity to hide an LED light strip inside. Sadly, the light strip was too close to the wall that it caused a harsh dotty appearance, rather than the soft ambient glow we were looking for.
In an attempt to disperse the light better we ordered in a LED defuser strip, and although it improved the situation, it still wasn’t right. Meaning James had the rigmarole of channelling out a new gap slightly further away, and filling in the original gap with a small slither of plasterboard.
We kept the lights in the casing strip, and now situated in their new spot they give off the soft, cosy glow we were dreaming of.
7. Painting the walls
At last, it was my time to shine.
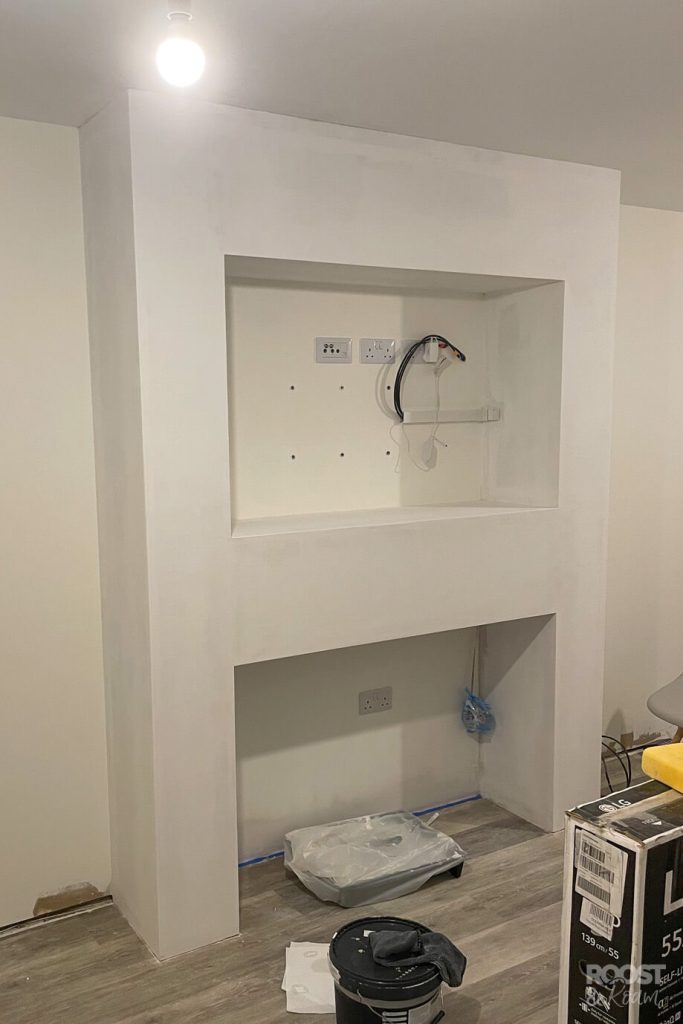
Mudding dries far quicker than traditional plaster, so the following day I had a paint brush and roller in my hand ready to go!
I applied a couple coats of primer for the thirsty plasterboard to soak in first. Then it was time to move onto the paint colour. I wanted it to be a slightly warm off white, apposed to the cold stark white it was before.
After getting through a million different white paint testers, I settled on ‘Hot White’ by Valspar and did a total of 2 coats.
We used their premium matte base and it was a really smooth paint to work with.
8. Installing the extendable TV bracket
Because the TV sits inside the newly created alcove, we needed a double arm bracket that would keep the TV straight as we pulled it in and out.
Most reasonably priced TV mounts only had one arm, but these made a zig-zag shape when pulled forward – an option that wouldn’t work inside the box we had created.
We went with this duel arm tv wall bracket from Amazon in the end which has been perfect and feels really sturdy for our 55inch TV.
James built our whole chimney breast without having the tv on the wall, solely relying on his maths calculations that the gap would be correct. If you have the TV and bracket before hand, it would probably be worth having it on the wall whilst working out your measurements.
Luckily for us, James’s maths was A* and we had a 4cm gap surrounding the TV as planned.
9. Painting and installing the oak mantle
I’d looked all over the internet for a nice oak mantle, but it was difficult to find one with the dimensions I wanted, and without a hefty price tag!
Building the chimney breast had already ate into our rectangular room, so I didn’t want a mantle with too much depth. We decided 4 inches didn’t protrude too far, and it met my criteria of being deep enough to hold a Christmas garland and candle! For aesthetics, I wanted the front face to be slightly longer than the top – so we settled for 4” x 5”. This also left nice spacing towards the TV and below to the fire.
We ended up getting our solid oak beam from a local wood merchants for only £63! Absolute bargain. It’s green oak, which means it may gain some new cracks over time. But we didn’t worry about that as it all adds to its charm!
First we sanded the beam using fine grit sandpaper, and smoothed off the squared edges slightly. Then we added a couple coats of ‘light oak’ wood paint.
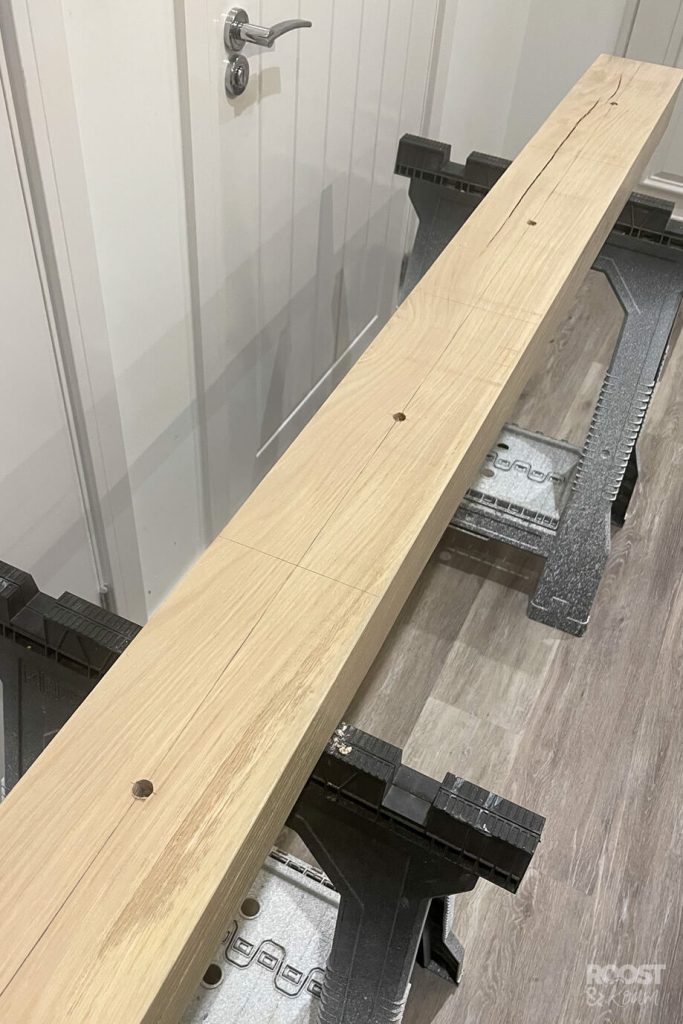
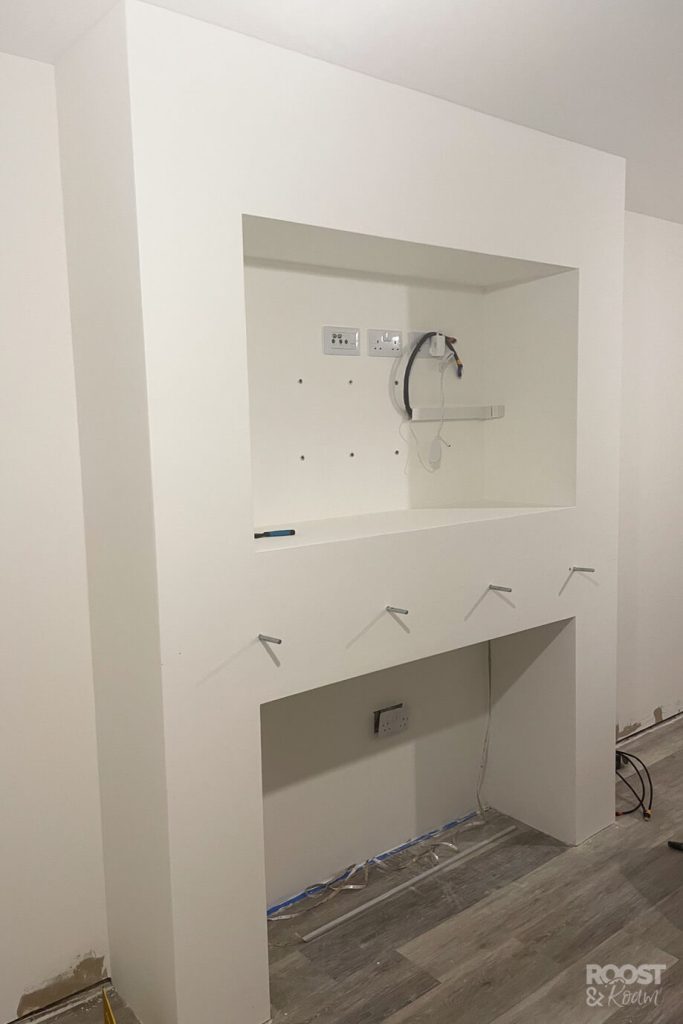
James then added 4 heavy duty floating shelf brackets to the wall. To work out where to install them he measured the beam, then divided that it into quarters, then drilled a hole in the centre of each quarter.
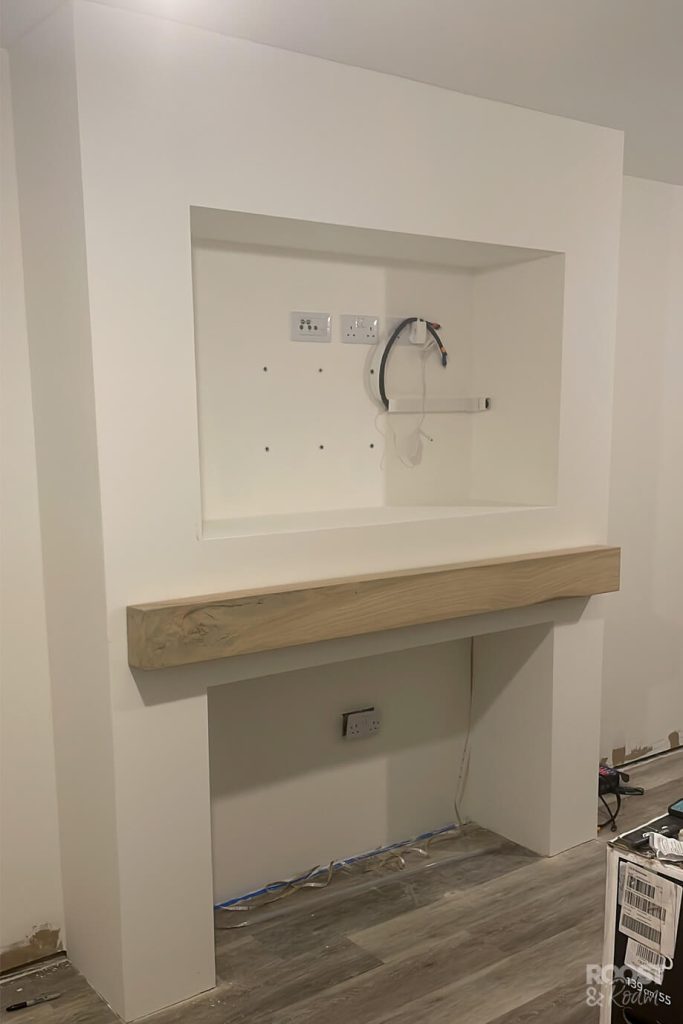
Each grabbing an end of the beam, we lined it up with the wall brackets, and slid it on like an absolute dream.
Not really! That’s so far from the truth.
It actually took about 10 minutes of whacking it with a rubber mallet at full force to get it on.
Good luck to the person who want’s to remove it one day, because that things on there for good!
10. Mounting the TV to the TV bracket
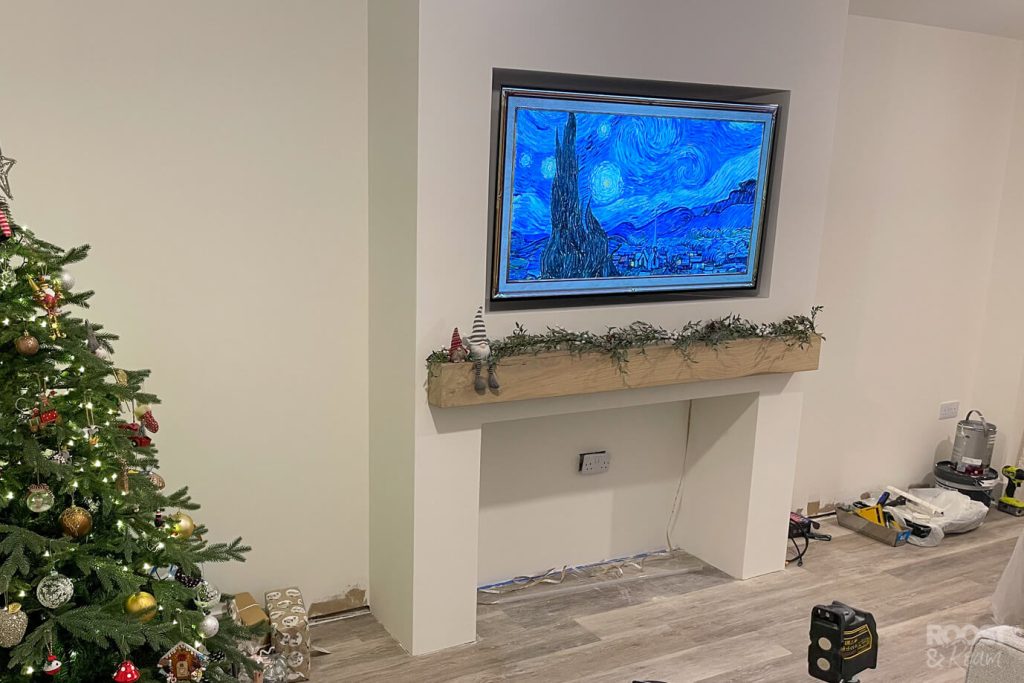
We then added our TV to the tv bracket which was straight forward.
Although we did encounter a problem which was a slight over sight on our behalf. The 3 metre cables which we fed through the wall weren’t long enough, as the ports on the new TV were on the opposite side to our old TV! So heads up, check which side your ports are on if you’re installing a new TV!
We then had to order in four-metre long cables, attach them to the incorrect cables and pull them through the wall.
11. Changing a double electric socket to a single socket
When we bought our house, we paid extra to have an additional socket installed in the middle of the lounge wall, ready for our fire.
Turns out that they didn’t actually put this in the centre of the wall, which meant it poked out from behind the fire and looked a bit naff!
To chase out a new hole and move the double socket to the left a bit would have been a big job. Instead, as we didn’t need a double socket, James rewired it into a single socket. Then we filled in where the double socket used to be, and once dry I primed and painted over the patch.
12. Making a DIY hearth
A custom fit hearth can cost a pretty penny, so we went for a cheaper option!
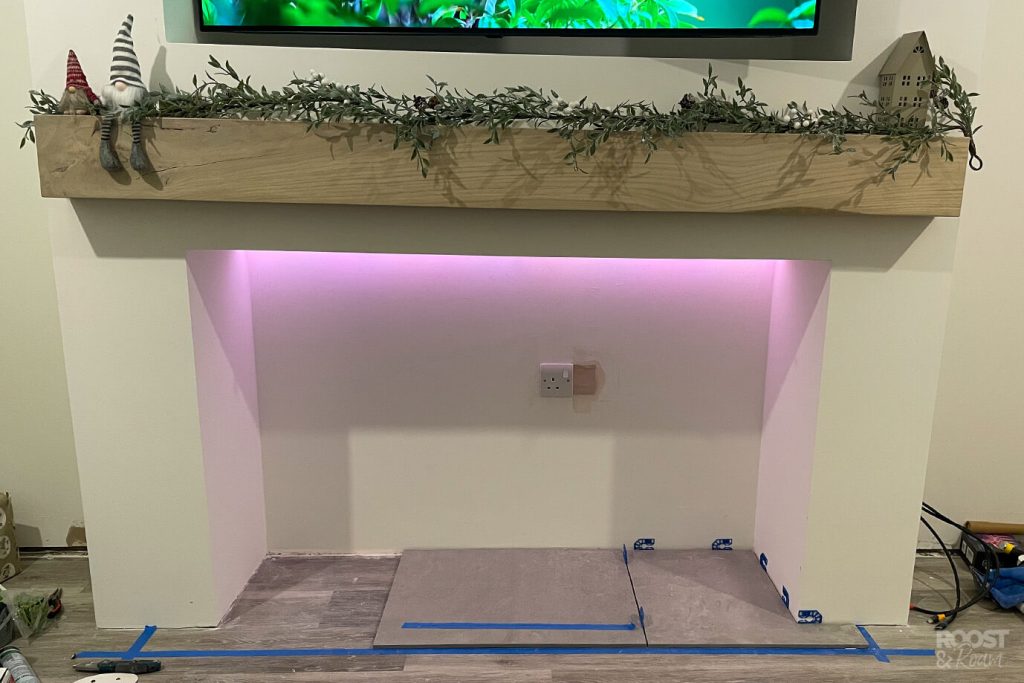
I wanted the hearth to look like stone, and found this pack of three 60×60 porcelain tiles in B&Q which were only £36 and were big enough to fill the space.
James used his angle grinder to take 100mm off the depth all of them. Then he cut an ‘L’ shape out of the outer two, so that they could splay around the front wall.
We fixed them down with some grab adhesive, and then grouted them in using this grey grout which matched perfectly.
13. Installing the Optimyst Dimplex fire
We went for the optimyst fire by Dimplex, which we absolutely love! The flame effect is so realistic for an electric fire, and we loved the one at Blue bee cottage when we stayed there.
They have a few different models and designs, but we liked the Willowbrook one the best as it was the most simple and modern in design.
All we had to do was plug it in, fill up the water tank and switch it on.
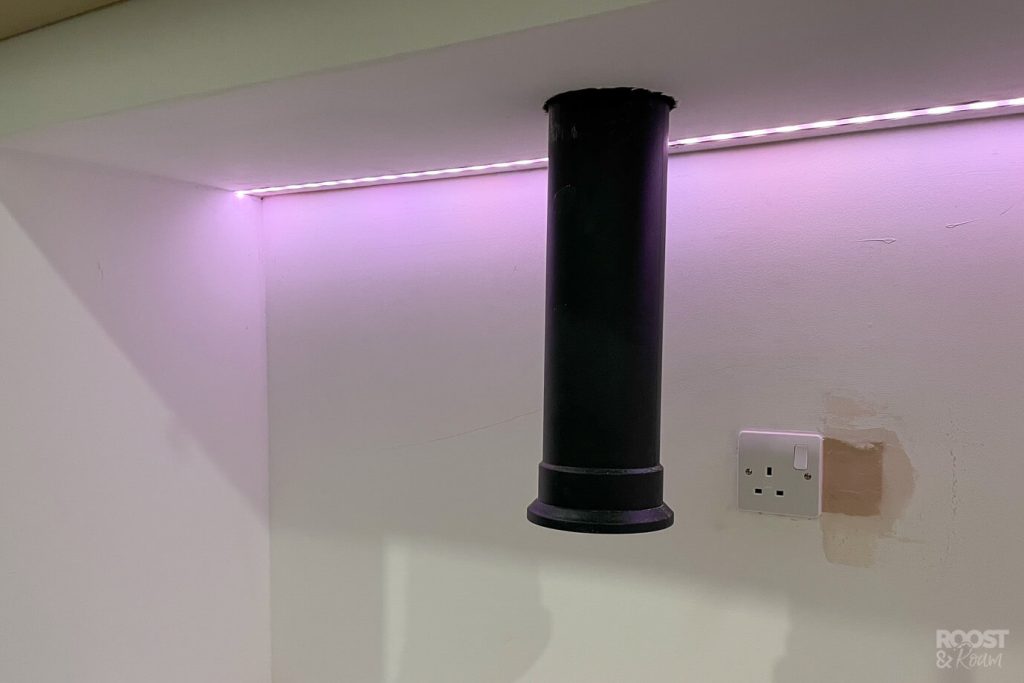
14. Adding a flue to an electric log burner
This step is optional. However, it finishes off your fire and makes it look far more realistic and convincing.
Dimplex sell a matching flue but it’s a curved one. I wanted a straight flue so it looked like it was actually going up the chimney breast.
I found this straight plastic flue with similar measurements on amazon for £28 instead.
Its too long for our space but we didn’t want to cut it, instead we cut a hole into the plasterboard and just pushed the flue up through. Doing it like this actually helps to hold it in the correct place, as it doesn’t click onto the top of the Dimplex fire.
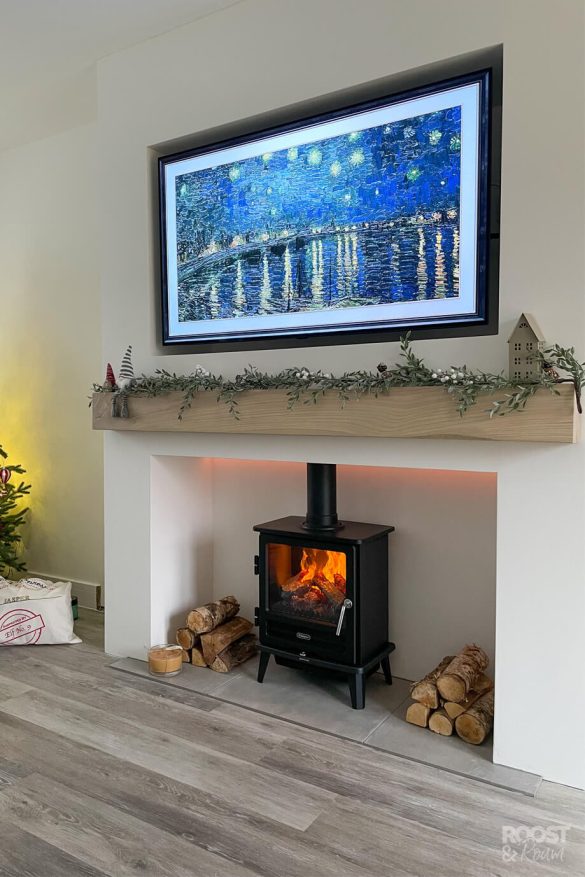
The grand reveal!
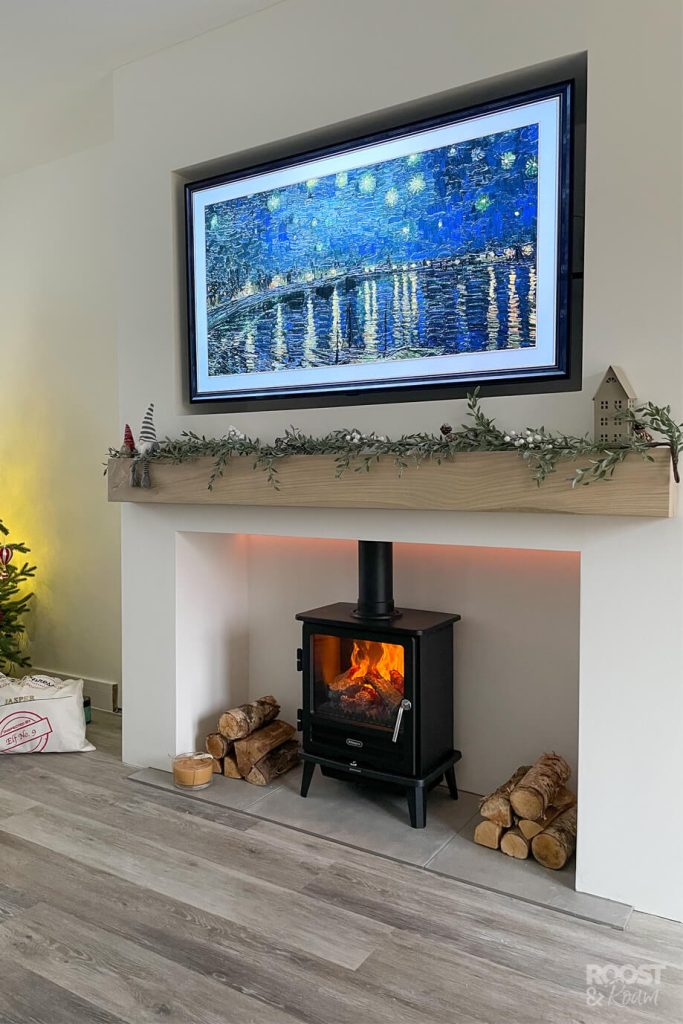
We certainly did a lot of learning throughout this project, but the final result made it all worth it. Our living room has been transformed into a cosy, inviting space that we’re proud to show off. Plus, having the satisfaction of knowing we built it ourselves is a wonderful feeling.
The construction of the false chimney breast was a significant challenge, requiring a lot of careful planning and problem-solving. We needed to be meticulous with our measurements to ensure everything fit just right – from the plasterboard to the oak mantle, and even the TV placement.
However, despite the difficulties and minor setbacks we faced, we enjoyed every moment of it. The process allowed us to be creative and hands-on, giving us the opportunity to bring our vision to life.
This DIY project is an excellent choice for anyone looking to add some character to their home. It does require some degree of handiness and a bit of patience, but the result is truly rewarding.
Thank you for following along on our DIY journey. If you found this post helpful or inspiring, we’d love to hear from you.
Dimensions for building a false chimney breast fireplace
Big news! We’ve just launched our very first e-book – and guess what? it’s cheaper than your morning cup of coffee!
Putting this together has been quite the adventure. We’ve delved into every aspect of our fireplace build for you, ensuring all measurements are precise and down to the millimetre! In this e-book, you’ll find all the dimensions you need, from the wooden frame construction to the plasterboard, to it’s finished size.
Think of this as your DIY helping hand. Marry this blog post with our detailed measurements and diagrams inside the e-book, and we hope to simplify your building experience and make it a little easier.
A huge shout-out and thanks to everyone who grabs a copy of our e-book. Your support is amazing, and we’re eager to see the awesome fireplaces you create!
Remember, a dash of creativity and a good dose of determination can work wonders in transforming your space into something truly special. Best of luck with all your DIY projects!
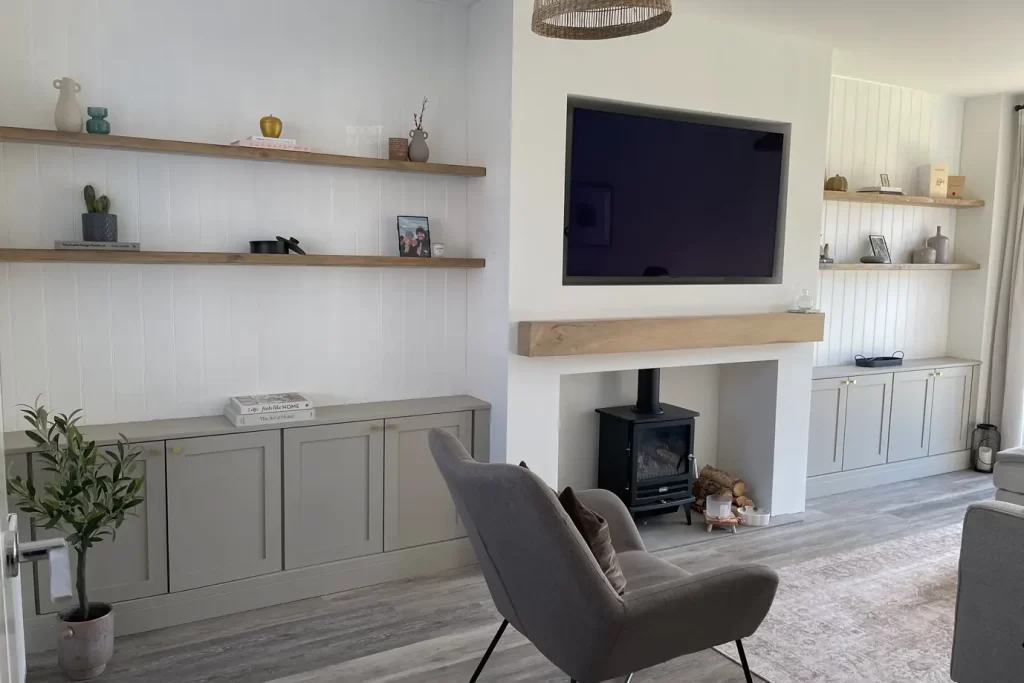
Read about how we have now built alcove cupboards either-side of the fireplace!
Check out my latest posts!
- Visit Brownsea Island, Dorset: Home to Red Squirrels & Scouts
- The Best Iceland Ring Road Trip: Full 7 Day Itinerary
- The Wrens Nest, Radstock: A Cosy Barn-Style Airbnb Near Bath
- Wimbleball Lake, Exmoor: 14km Circular Walk & Dam Guide
- The 8 Best Short Walks To Do In Somerset, 2024
12 comments
This is wonderful and so useful. I am going to do this in my new home.
Thank you so so much. It is stunning.
Are you considering any shelving either side? 😍
Hi Debbie, thanks so much for your lovely comment – it made my day 🙂 We have actually now built alcove storage either side, and we are currently in the process of making our shelves. I’ll be sure to put it on my blog once we’ve finished, so please come back and check!
Good luck building your own fireplace, I hope it all goes well.
This looks absolutely amazing, well done! Please can you share the dimensions?
Thank you! I will work them out and add the dimensions soon.
Hi there, it all looks fabulous, well done!!! We would like to copy what you have done as it looks so good. Please could you let me know what the dimensions are. Thank you.
Thanks so much Victoria! I will be adding our dimensions for all of it soon.
love love love your fire and false chimney breast, Thank you for being so insperational. Could you please post your dimensions as hubby is wanting to start on ours too, 🙂
Hi Margo! Thanks for your kind comment, and good luck with your own fireplace build. It’s taken us a little while to make, but we have just launched our e-book which costs £2.95 and shares all of our fireplace dimensions along with diagrams.
Amazing job! We would also love the get the dimensions please
Hi Roxie! Thanks so much, we have just launched an e-book which shares all of our dimensions, down to the millimetre! Hope it helps!
Hi Heidi,
I honestly love, love, love your chimney breast and will be buying your e-book,
Thank you so much for inspiration
Hi Bea! Thank you so much for your lovely comment and for the support. I hope our e-book helps you create your own beautiful chimney breast, please send us a photo when it’s complete, we would love to see it! Good luck 🙂